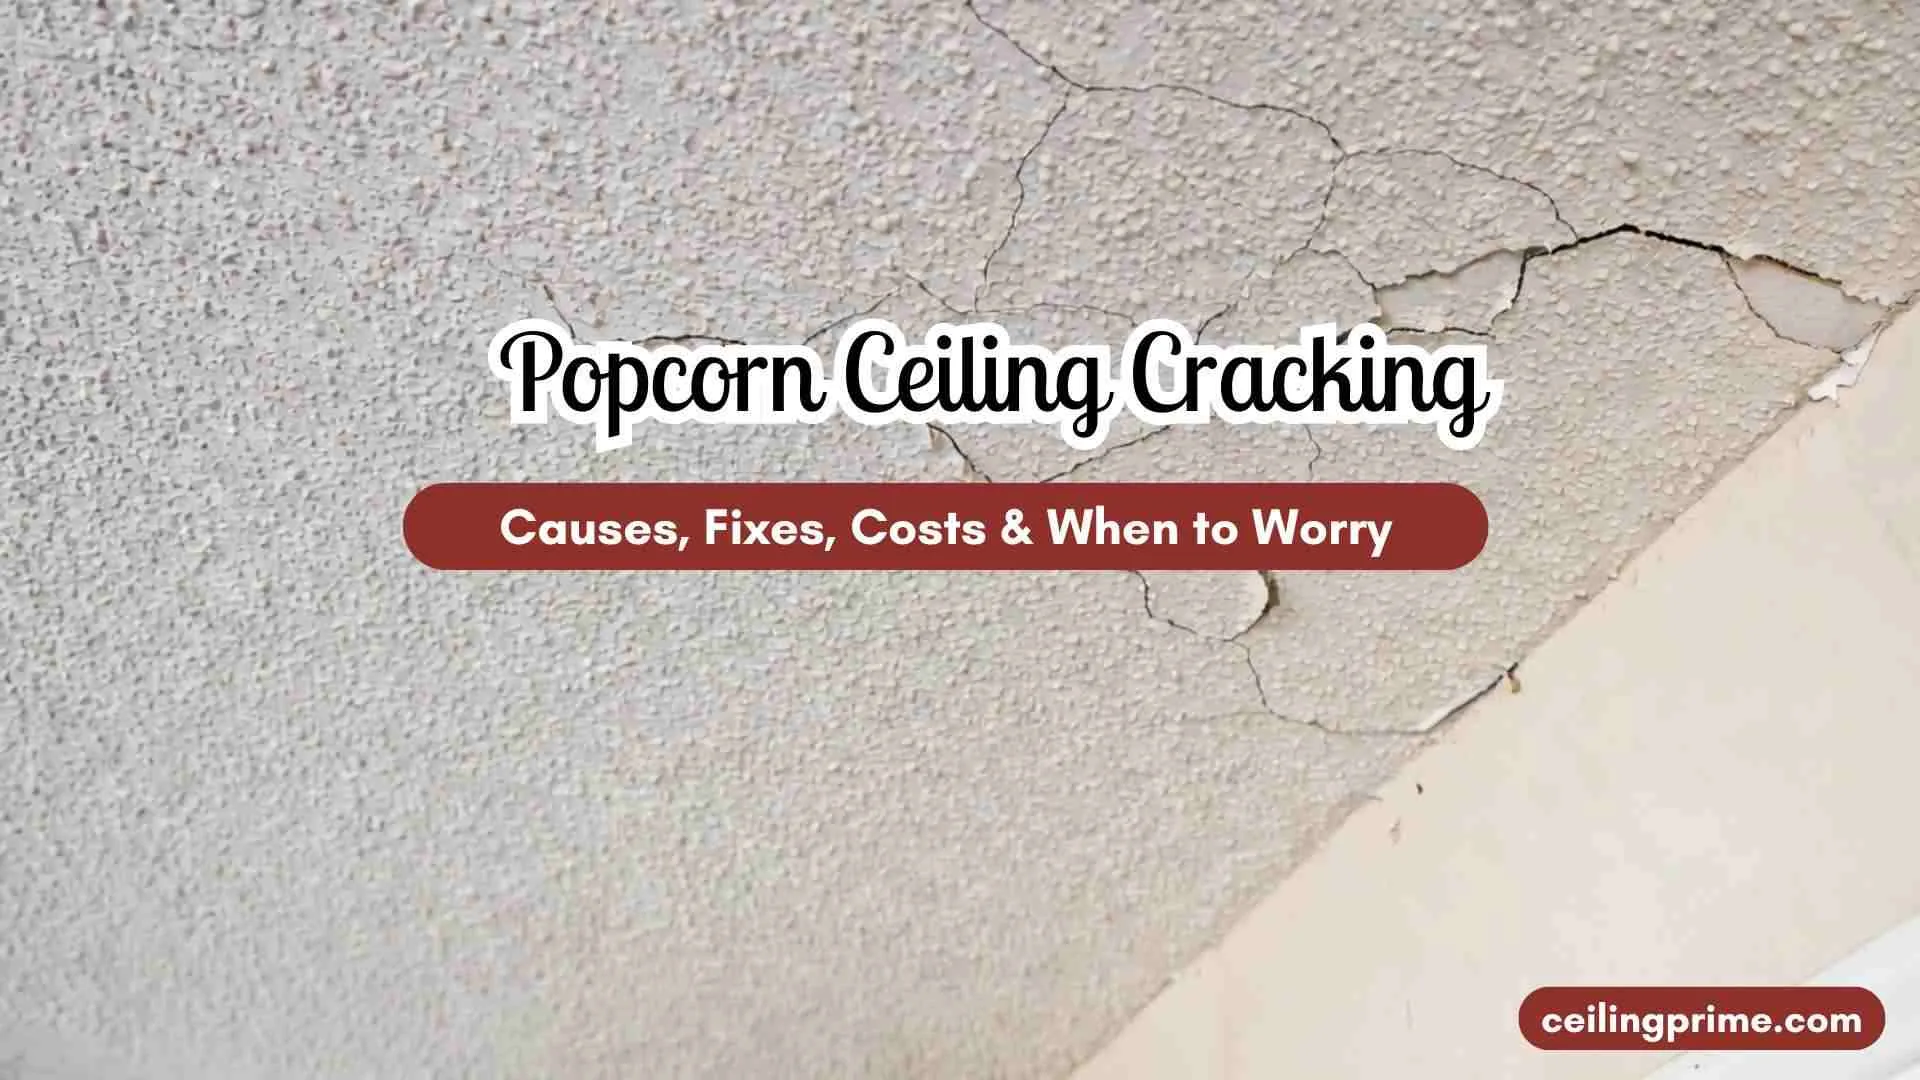
Popcorn Ceiling Cracking: Causes, Fixes, Costs & When to Worry (2026)
Quick Answer
Most popcorn ceiling cracking is cosmetic — caused by minor house settling, temperature cycles, or age. A hairline crack or spiderweb pattern that hasn’t changed in months is low urgency. A wide, jagged, or growing crack, or one accompanied by staining or sagging, signals water damage or structural movement and needs professional assessment before any repair.
popcorn ceiling Crack Type Quick Reference
| Crack Type | Most Likely Cause | Urgency |
| Hairline / spiderweb pattern | Minor house settling; temp cycles | Low — cosmetic; repair when ready |
| Straight crack along a seam | Drywall joint failure; tape popped | Moderate — fix the joint, then re-texture |
| Crack + brown/yellow staining | Water leak above (plumbing, roof) | High — fix leak before ceiling repair |
| Wide, jagged, or diagonal crack | Structural movement; foundation | High — call structural engineer first |
| Crack + sagging section | Water-damaged drywall; adhesion failure | Very high — section may fall; address now |
| Cracks forming after painting | Paint overload on texture; thermal expansion | Low — cosmetic; scrape and re-texture |
You look up and see new cracks running across the popcorn texture. The first question most homeowners ask is whether this is just normal aging or something that needs immediate attention. The answer depends on the type of crack, what’s happening above the ceiling, and how old the home is.
Most popcorn ceiling cracking (PCC) in Austin’s older housing stock is cosmetic. The homes in Hyde Park, Allandale, Travis Heights, and South Austin have been settling and adjusting to Texas heat cycles for 40–60 years. Hairline fractures in the texture are normal. But there are crack types that aren’t cosmetic, and knowing the difference prevents a $200 repair from becoming a $5,000 one.
What Is a Popcorn Ceiling and Why Does It Crack?
Popcorn ceilings (PC) — also called stipple ceilings, acoustic ceilings (AC), or cottage cheese ceilings — are spray-on or paint-on texture coatings applied to drywall (DW) surfaces. The texture is a mixture of joint compound and aggregate (polystyrene, styrofoam beads, or mineral material) that creates the bumpy, irregular surface.
Popcorn texture is inherently brittle. It doesn’t flex. When the drywall beneath it moves — from house settling, temperature changes, soil movement, or structural stress — the rigid texture cracks rather than bending with the movement. This is why popcorn ceiling cracking is so much more visible than cracks in smooth drywall, where hairline fractures are barely noticeable.
Austin’s black expansive clay soil — known as Black Vertisol — is the underlying cause of more ceiling cracks in Austin than almost any other city in the United States. The soil expands in wet winters and shrinks in dry summers, creating constant minor movement in foundations and frames throughout central Texas.
Common Causes of Popcorn Ceiling Cracking in Austin Homes
Eight causes account for nearly all popcorn ceiling cracking in Austin’s residential housing stock. Identifying the cause before repair is the step most DIYers skip — and then the cracks come back.
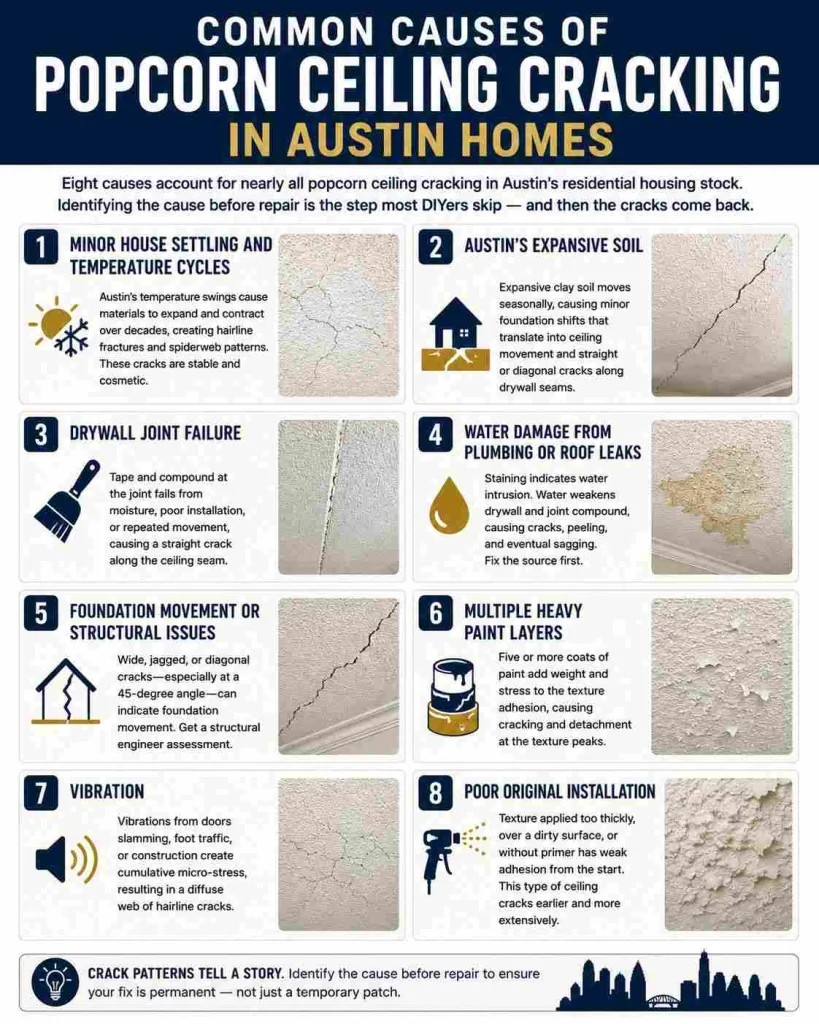
1. Minor House Settling and Temperature Cycles
The most common cause. Austin’s temperature swings — from mid-20s in winter to 105°F+ in summer — cause roof trusses, drywall sheets, and framing to expand and contract. Over decades, this creates hairline fractures (HF) and spiderweb patterns in the texture surface. These cracks are stable and cosmetic. They don’t grow significantly over time.
On pre-1985 homes in inner Austin neighborhoods, some level of popcorn ceiling cracking from this cause is nearly universal. It’s part of the character of the housing stock.
2. Austin’s Expansive Soil
Austin’s expansive clay soil moves seasonally — more than almost anywhere else in the United States. This soil movement creates minor foundation shifts that translate into wall and ceiling movement.
The result is straight cracks along drywall seams or diagonal cracks that follow the tape joint lines. This is one of the reasons a structural engineer is more commonly consulted on Austin ceiling cracks than in other U.S. markets.
3. Drywall Joint Failure
When the tape and compound at a drywall joint fails — from moisture, poor original installation, or repeated movement — the joint separates and shows as a straight crack along the ceiling.
This crack in popcorn ceiling runs along a visible seam, often from wall to wall. It requires reopening the joint, re-taping, re-mudding, and re-texturing. Painting over it without fixing the joint creates a crack that returns within months.
4. Water Damage from Plumbing or Roof Leaks
A crack accompanied by brown or yellow staining is a water damage (WD) indicator. Plumbing leaks from bathroom fixtures above, slow roof leaks, or HVAC condensate line drips all create ceiling staining over time. Water weakens the drywall’s structural capacity, softens the joint compound, and causes the texture to crack, peel, and eventually sag.
Fix the source of water first. Always. Repairing a popcorn ceiling over an active leak creates a repair that fails within weeks.
5. Foundation Movement or Structural Issues
Wide, jagged, or diagonal cracks — particularly those that follow a 45-degree angle from a corner — can indicate foundation movement (FM). Austin’s clay soil creates foundation stress cycles that produce this crack pattern. A structural engineer should assess diagonal or growing cracks before any ceiling repair is attempted. Patching a structurally-caused crack without addressing the foundation produces a crack that reappears.
6. Multiple Heavy Paint Layers
Many Austin rental properties and older homes have five or more coats of paint on the ceiling, accumulating over decades. The combined weight of multiple paint layers adds stress to the texture adhesion. When this stress exceeds the adhesion capacity of the original spray-on texture, cracking and detachment occurs — typically starting at the texture peaks.
7. Vibration
Repeated vibrations from doors slamming, upstairs foot traffic, or nearby construction create cumulative micro-stress in the texture binder. This shows as a diffuse web of hairline cracks rather than cracks along structural lines.
8. Poor Original Installation
Texture applied too thickly, applied over a dirty surface, or applied without adequate primer beneath it has weaker adhesion from the start. This type of ceiling develops cracks earlier and more extensively than well-installed popcorn texture.
Popcorn Ceiling Cracking vs. Sagging: Key Difference
These two problems look similar but have different causes and different urgency levels.
Cracking
Cracks in the texture surface without deformation of the ceiling plane. The ceiling is flat but shows visible fractures. Cosmetic cracks are stable and don’t change significantly over weeks. Structural cracks can grow slowly.
Sagging
The ceiling plane physically bows downward. Sagging almost always indicates water damage to the drywall or adhesion failure between the drywall and the framing. It can also mean the drywall fasteners have failed. A sagging section can fall. Do not ignore it.
A ceiling that is both cracking and sagging is the highest-urgency combination. The drywall or texture is likely water-damaged, and the section could fail under its own weight. Clear the area and call a contractor before attempting any DIY repair.
Asbestos Warning: Test Before Any Crack Repair on Pre-1978 Homes
If your Austin home was built before 1978, test for asbestos before scraping, sanding, or applying any material to a cracked popcorn ceiling. Popcorn texture from this era commonly contained asbestos (AS) as a binder. Disturbing the texture releases fibers. A crack repair is a small job; asbestos exposure is a permanent health risk.
Asbestos testing (AT) runs $250–$850 in Austin for professional certified-lab testing. DIY test kits cost $30–$50 and can be used for basic screening. Homes in Hyde Park, Rosedale, Allandale, North Loop, and Travis Heights were largely built between the 1940s and 1970s — these are high-probability asbestos homes.
If the test returns positive, painting over a crack in popcorn ceiling is still possible without disturbance, but scraping, sanding, or applying joint compound directly to the texture requires licensed asbestos abatement (AA) first.
How to Fix Cracks in Popcorn Ceiling: Step-by-Step
The repair process for a crack in popcorn ceiling has five stages. The most common DIY mistake is skipping Stage 1 (finding the cause) and going straight to patching.
Stage 1: Identify and Fix the Root Cause
Before touching the ceiling, confirm what caused the crack. Check above the ceiling if possible. Look for water stains, plumbing leaks, HVAC drips, or roof damage. Check the crack pattern against the diagnostic table above. If the crack is growing, call a structural engineer (SE) before repairing.
Repair the source first. A ceiling patch over an active leak or ongoing foundation movement will fail.
Stage 2: Asbestos Test (Pre-1978 Homes)
Already covered above. Do not skip this on any pre-1978 Austin home. No exceptions.
Stage 3: Clean and Prepare the Crack
- Remove loose texture. Use a two-inch putty knife (TPK) to scrape away all loose or detached texture within 2–3 inches of the crack. Work carefully — over-scraping creates a larger repair area and more texture-matching work.
- Widen hairline cracks slightly. Very thin hairline cracks won’t hold joint compound (JC) applied directly. Use the putty knife edge to open the crack to approximately 1/8 inch so the compound has something to grip.
- Sand the edges lightly. Feather the transition between the undamaged texture and the scraped area with 120-grit sandpaper. This reduces the visible edge of the repair.
- Remove all dust. Wipe with a dry brush or light vacuum before applying any compound.
Stage 4: Repair the Crack
For Hairline Cracks (No Drywall Joint Failure)
- Apply flexible acrylic caulk. For very fine hairline cracks in the texture surface — where the drywall beneath is intact and the crack is purely in the texture layer — paintable acrylic caulk (PAC) is faster and more durable than joint compound. Apply a thin bead, tool smooth, and let cure 24 hours.
- Apply joint compound over the caulk. Once the caulk is cured, apply a thin skim of pre-mixed JC to build out to the level of the surrounding texture.
For Drywall Joint Cracks
- Open the failed joint. Score along the crack with a utility knife to release any remaining tape. Remove all failed tape and compound.
- Apply mesh tape. Self-adhesive fiberglass mesh tape (FMT) bridges the joint and prevents the new compound from cracking along the same line.
- Apply joint compound in thin coats. Two to three thin coats of pre-mixed JC, dried and sanded between each coat. Feather outward 4–6 inches from the joint on both sides.
Stage 5: Match the Popcorn Texture
Texture matching is the hardest part of any popcorn ceiling crack repair. The existing ceiling has accumulated decades of paint and aging — fresh spray-on texture looks different until it’s primed and painted over.
- Aerosol spray cans (Homax, Zinsser). The fastest DIY option. Practice on cardboard from 18–24 inches to match the density and pattern. Apply two thin passes rather than one heavy coat.
- Brush stipple. Dip a stiff-bristled brush into diluted joint compound and dab against the ceiling to create a bumpy pattern. Difficult to match precisely but works on medium-heavy texture.
- Professional hopper gun. What contractors use for larger repairs. Provides the closest match to original spray-on texture but requires equipment most homeowners don’t own.
Prime the repaired area with Kilz 2 Primer after the texture dries. Then paint with flat ceiling paint in two coats. The repair will be less visible than an unprimed patch.
Repair or Remove? When Popcorn Ceiling Cracking Means It’s Time to Replace
Crack repair makes sense on isolated damage in a ceiling that’s otherwise stable. But popcorn ceiling cracking across a large area — or repeated cracking after previous repairs — is often a sign that the texture has reached the end of its useful life.
| Scenario | Repair | Remove |
| Single isolated crack | Best option; fast and affordable | Overkill for one small area |
| Multiple cracks in one room | Possible if cracks are stable | Consider — full removal is cleaner |
| Cracks returning after previous repairs | Investigate cause; repair often fails again | Recommended — texture has failed |
| Pre-sale renovation | Patches rarely match; visible in photos | Recommended — ROI 75–100% in Austin |
| Crack + staining + sagging | Address water damage first; then assess | Usually required — DW likely damaged |
| Asbestos positive ceiling | Only if no scraping involved | After certified abatement |
Popcorn Ceiling Crack Repair Cost in 2026 (Austin TX)
Cost depends on whether the repair is isolated or requires addressing underlying damage, plus the size of the affected area.
| Repair Scope | DIY Cost | Pro Cost in Austin |
| Single hairline crack (small patch) | $20–$50 materials | $200–$400 |
| Multiple cracks (1 room) | $50–$150 materials | $400–$800 |
| Drywall joint failure repair | $40–$100 materials | $300–$600 per joint |
| Water damage repair (DW replacement) | $100–$300 materials | $500–$1,500+ |
| Full ceiling removal (room, clean) | $150–$500 materials | $690–$1,500 per room |
| Asbestos testing (add-on) | $30–$50 (DIY kit) | $300–$700 professional |
| Asbestos abatement (if positive) | Cannot DIY | $8–$15/sq ft in Austin |
When to Call a Professional for Popcorn Ceiling Cracking
Most isolated hairline cracks are DIY-manageable on post-1978 Austin homes. These situations require a professional assessment before you touch the ceiling:
- The crack is growing. Measure the crack and mark its endpoints with pencil. Check again in two weeks. A growing crack indicates active movement.
- The crack is wide or jagged. Anything wider than 1/4 inch, or with a jagged or diagonal path, requires a structural engineer (SE) to rule out foundation movement before repair.
- The ceiling is stained above the crack. Brown or yellow staining means water. A plumber or roofer needs to identify the source before any ceiling work begins.
- The ceiling is sagging anywhere near the crack. A section that has physically dropped is a safety hazard. Clear the area and call a contractor.
- The home is pre-1978 and hasn’t been tested. Call CeilingPrime or a certified asbestos inspector before any scraping or sanding.
- Previous repairs have failed in the same location. Recurring cracks in the same spot mean the underlying cause hasn’t been fixed. A professional assessment identifies what’s actually driving the movement.
How to Prevent Popcorn Ceiling Cracking?
Austin’s soil movement and temperature cycles make some cracking inevitable. These practices reduce frequency and severity:
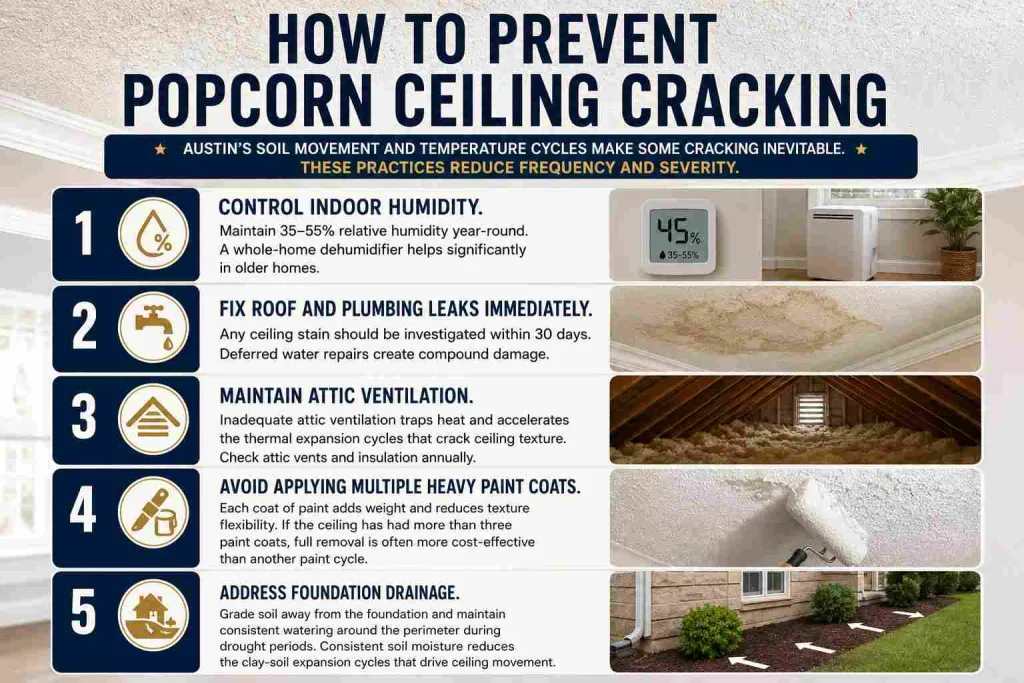
- Control indoor humidity. Maintain 35–55% relative humidity year-round. Austin’s humid summers push indoor moisture above 60%, which softens drywall joint compound over time. A whole-home dehumidifier helps significantly in older homes.
- Fix roof and plumbing leaks immediately. Any ceiling stain should be investigated within 30 days. Deferred water repairs create compound damage — what starts as a stain becomes a structural failure.
- Maintain attic ventilation. Inadequate attic ventilation traps heat and accelerates the thermal expansion cycles that crack ceiling texture. Check attic vents and insulation annually.
- Avoid applying multiple heavy paint coats. Each coat of paint adds weight and reduces texture flexibility. If the ceiling has had more than three paint coats, full removal is often more cost-effective than another paint cycle.
- Address foundation drainage. In Austin, grade soil away from the foundation and maintain consistent watering around the perimeter during drought periods. Consistent soil moisture reduces the clay-soil expansion cycles that drive ceiling movement.
Popcorn Ceiling Cracking in Austin’s Housing Stock: What to Expect by Neighborhood
Austin’s neighborhoods have distinct construction eras. What you’re likely dealing with varies by where the home is located:
| Neighborhood | Build Era | Common Crack Issues |
| Hyde Park, Rosedale, Allandale | 1940s–1970s | Asbestos probable; expansive soil cracks; drywall joint failure common |
| North Loop, Crestview, Brentwood | 1950s–1970s | Same; test mandatory; spiderweb cracks very common |
| Travis Heights, East Austin | 1940s–1980s | Older plumbing; water-related cracks common; test pre-1978 homes |
| South Austin (78704, 78745) | 1960s–1990s | Mixed era; test if pre-1978; soil movement moderate |
| Cedar Park, Round Rock | 1980s–2000s | Post-asbestos; thermal cracks more than soil cracks |
| Pflugerville, Georgetown | 1990s–2010s | Newer stock; cracks from thermal cycles; soil expansion still a factor |
Frequently Asked Questions
Q. Is popcorn ceiling cracking dangerous?
Not usually. Most popcorn ceiling cracking is cosmetic from settling or temperature changes. A sagging or water-stained cracking section is the dangerous scenario — the drywall may be compromised and could fall. Any crack accompanied by sagging should be treated as urgent.
Q. Why is my popcorn ceiling cracking after painting?
Painting a popcorn ceiling applies moisture and weight to the texture. On older ceilings with multiple existing paint layers, the added coat can break the adhesion of already-stressed texture. Thermal expansion from the wet paint drying also causes micro-movement in the surface. This is common on ceilings that have had three or more coats of paint.
Q. Does popcorn ceiling cracking mean foundation problems?
Not always. Most popcorn ceiling cracking comes from minor settling, temperature cycles, or drywall joint failure. Foundation problems (FP) typically produce diagonal or stair-step cracks, often appearing simultaneously in walls and ceilings. If you see diagonal ceiling cracks alongside wall cracks, call a structural engineer before doing any repair.
Q. Can I just paint over a crack in popcorn ceiling?
You can, but it’s a short-term fix. Paint fills very fine hairline cracks temporarily but does not seal them. Without repairing the crack in the texture layer, the crack reappears within one to two paint cycles. For a lasting repair, open the crack, apply joint compound, retexture, prime, then paint.
Q. How much does popcorn ceiling crack repair cost in Austin?
A single hairline crack repair by a professional runs $200–$400 in Austin. Multiple cracks in one room: $400–$800. Water damage repair that requires drywall replacement: $500–$1,500+. Asbestos abatement (if the pre-1978 home tests positive) adds $8–$15 per sq ft on top of standard repair pricing.
Q. What if my home was built before 1978 and has cracks?
Test for asbestos before scraping, sanding, or applying joint compound to the ceiling. If the test is negative, proceed with standard repair. If positive and the crack is small and stable, painting over the intact surface without disturbing it is the safest option. Full repair or removal requires licensed asbestos abatement first.
Q. Should I repair or remove a cracking popcorn ceiling?
Repair for isolated cracks in a stable ceiling. Remove when: cracks cover a large portion of the ceiling, previous repairs have failed repeatedly, you’re preparing to sell the home, or the texture has deteriorated across the room. Full popcorn ceiling removal in Austin costs $2.30–$4.05 per sq ft and delivers a higher-quality result than extensive patching.



One Comment