How to Patch Popcorn Ceiling: Easiest DIY Repair Without Scraping Everything
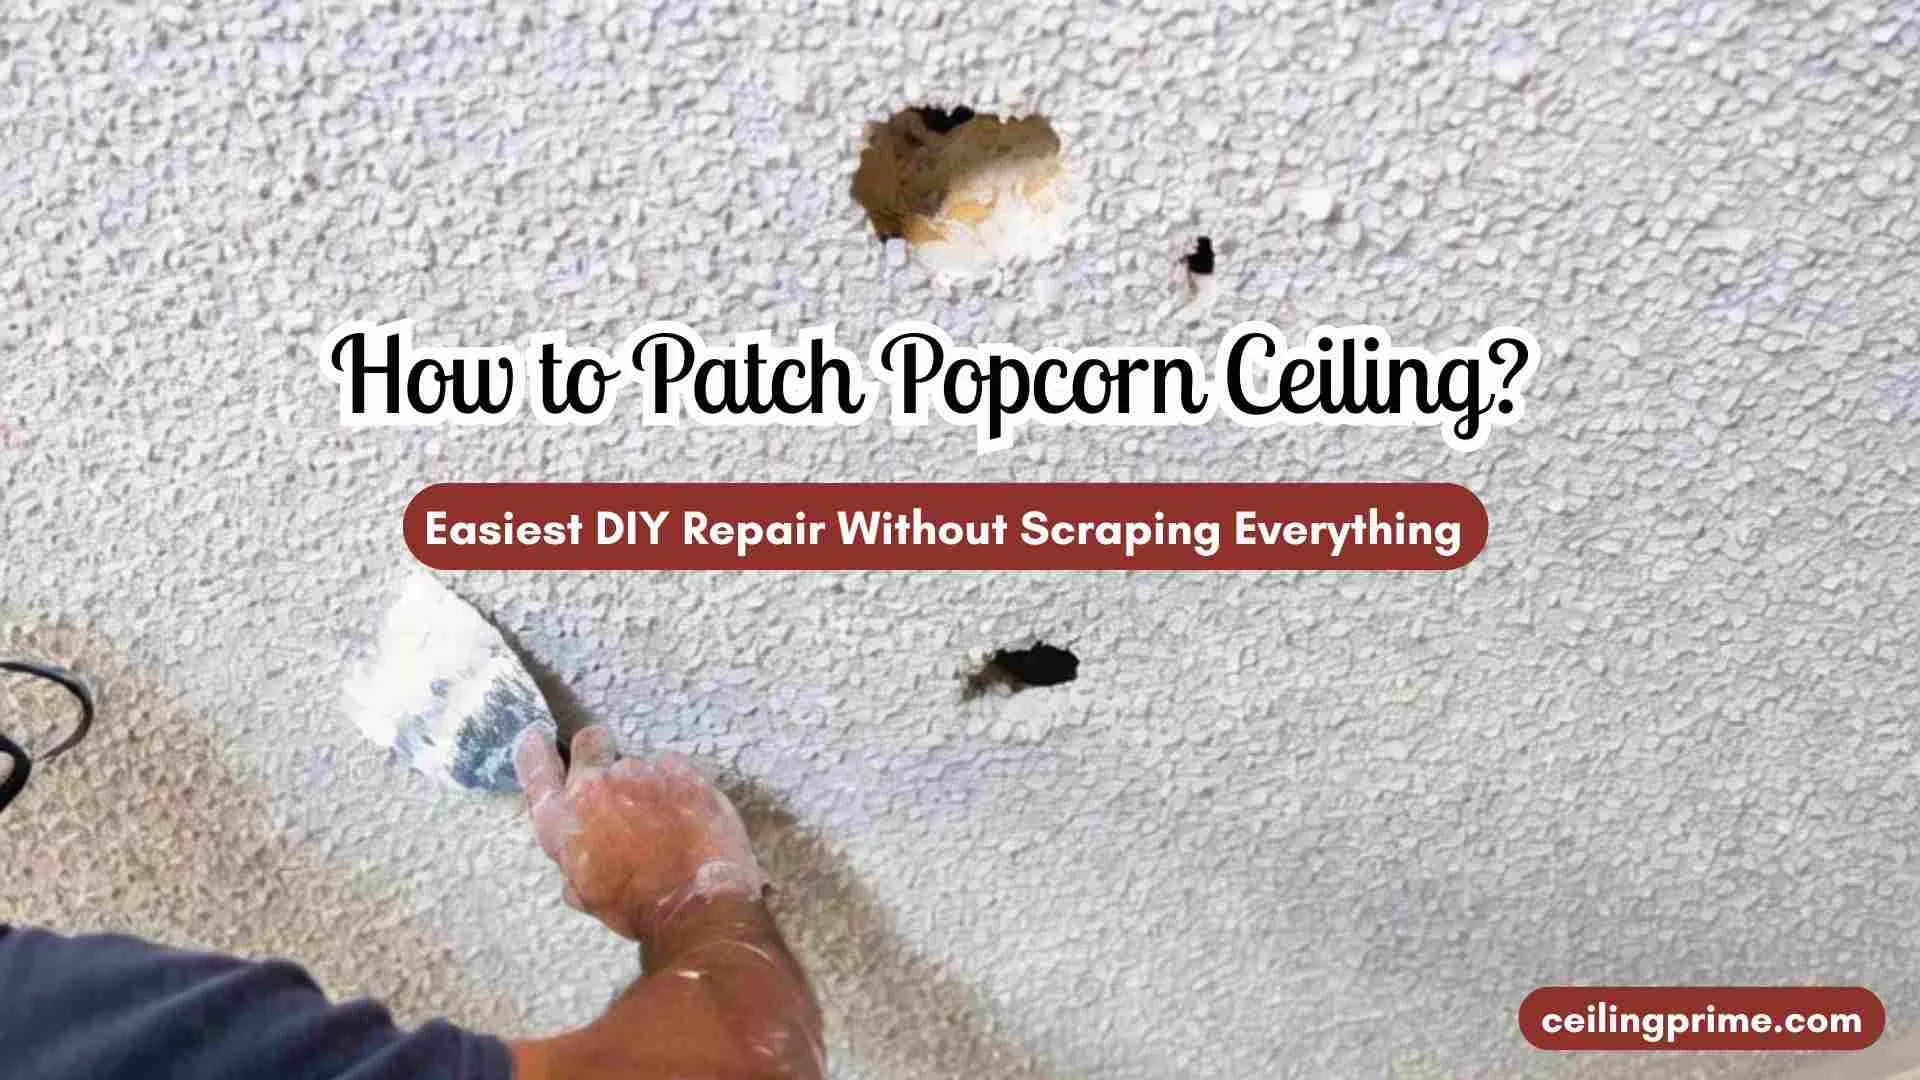
You replaced a ceiling fan and now there is a 6-inch hole staring down at you from the popcorn ceiling. Or a water leak left a brown stain and crumbling texture in the bathroom. Either way, the damage is small and scraping the entire ceiling sounds like overkill. A patch popcorn ceiling fixes that problem in one afternoon for under $30.
Patching beats full removal on cost, time, and mess. A full scrape-and-smooth job runs $2 to $6 per square foot and takes days. A single patch takes two to four hours, uses basic tools from Home Depot or Lowe’s, and leaves the rest of your ceiling untouched. The key is matching the existing texture so the repair disappears.
This guide covers everything the other tutorials skip — asbestos safety for pre-1980 homes, the exact products that work (Homax and Zinsser), drying times, texture-matching tricks from real DIYers, and a clear cost breakdown. Whether you are fixing a hole from a light fixture, repairing water damage, or covering a scrape from moving furniture, this is the only popcorn ceiling repair tutorial you need.
Is Popcorn Ceiling Patching Right for You?
A patch popcorn ceiling works best for small to medium damage — holes from light fixtures, scrapes, stains, or crumbling sections smaller than 2 square feet. It saves $500 or more compared to hiring a contractor for full ceiling texture removal.
| DIY Patch (Pros) | Full Removal (Pros) |
| Costs $15–$35 in materials | Gives the whole room a modern smooth finish |
| Done in 2–4 hours (plus dry time) | Increases home resale value by up to $2,500 |
| No dust cloud, minimal mess | Eliminates future patching needs |
| Keeps ceiling intact (less asbestos risk) | Removes potential asbestos permanently |
When to skip patching and call a pro: Damage larger than 2 square feet, active water leaks not yet fixed, visible mold growth, or homes built before 1980 with untested ceilings. In these cases, a professional ceiling repair contractor or asbestos abatement crew is the safer choice.
Asbestos Warning and Safety Prep (The Step Most Guides Skip)
Popcorn ceilings installed between the 1950s and mid-1980s often contain asbestos. The textured spray mix used chrysotile asbestos fibers for fireproofing and sound dampening. Scraping, sanding, or disturbing that material releases microscopic fibers into the air. Long-term inhalation causes mesothelioma, asbestosis, and lung cancer.
How to test: Buy an asbestos test kit from Home Depot or Amazon ($10–$35). Wet a small section of the ceiling, cut a quarter-sized sample, seal it in the provided bag, and mail it to the certified lab. Results take 3–7 business days. If positive, do not touch the ceiling yourself — hire a licensed abatement contractor.
PPE for asbestos-free ceilings: Wear an N95 dust mask, safety goggles without ventilation holes, and rubber gloves. Cover the floor and any furniture with plastic drop cloths. Open a window or run a fan for ventilation during sanding and spraying.
Tools and Materials You Need (Updated 2026 List)
Tools
| Tool | Approx. Cost | Where to Buy |
| Drywall patch kit or Fibatape self-stick mesh | $5–$10 | Home Depot, Lowe’s |
| Putty knife / taping knife (4” and 6”) | $5–$12 | Home Depot, Amazon |
| Sanding block + 120/220 grit sandpaper | $4–$8 | Any hardware store |
| Utility knife, drop cloths, painter’s tape | $8–$15 | Home Depot, Lowe’s |
| Spray bottle (for misting) | $2–$4 | Dollar store, Amazon |
Materials
| Material | Approx. Cost | Notes |
| Lightweight joint compound (spackle) | $7–$12 | Pre-mixed, ready to use |
| Homax Popcorn Ceiling Patch (7.5 oz squeeze tube) | $8–$12 | EZ Dab tip, covers 1 sq ft |
| Zinsser Ready-Mixed Popcorn Ceiling Patch (1 qt) | $10–$15 | Brush-on, covers larger areas |
| Homax Spray Texture (aerosol can) | $12–$20 | Best for 1–6 sq ft patches |
| Stain-blocking primer (Zinsser BIN or Kilz) | $10–$18 | Blocks water stains before texture |
| Flat white ceiling paint | $15–$25 | Match existing sheen |
The Homax squeeze tube with the EZ Dab foam applicator is the most popular popcorn ceiling patch product in 2026 reviews. It contains polystyrene chips that match standard acoustic ceiling texture. The Zinsser popcorn ceiling patch comes in a quart bucket and works better for bigger repairs where you need to brush on a thicker layer.
Step-by-Step: How to Patch a Popcorn Ceiling Hole?
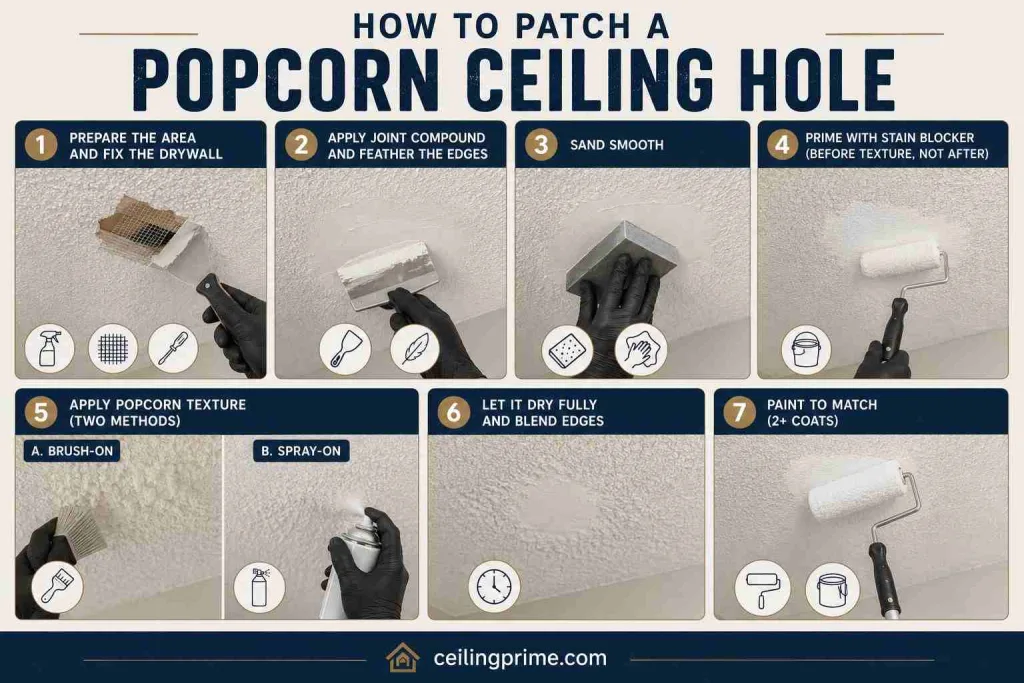
Step 1 — Prepare the Area and Fix the Drywall
Lay plastic sheeting on the floor below the damaged spot. Tape off walls and any fixtures with painter’s tape. Mist the damaged ceiling texture with water from a spray bottle to soften it. Use a putty knife to gently scrape away any loose or crumbling popcorn material.
If there is a hole in the drywall itself, place a self-adhesive Fibatape mesh patch over it. For holes larger than 4 inches, cut a drywall piece to fit, secure it with drywall screws, then tape the seams with fiberglass mesh tape.
Step 2 — Apply Joint Compound and Feather the Edges
Spread a thin layer of lightweight joint compound over the mesh tape or patch using a 6-inch taping knife. Let it dry completely — most spackle dries in 1 to 2 hours for thin coats. Apply a second skim coat layer and feather the edges 6 to 12 inches outward so the repair blends flat against the surrounding ceiling. Each skim coat layer should be thinner than the last.
Step 3 — Sand Smooth
Use a sanding block with 120-grit sandpaper between skim coat layers. Switch to 220-grit for the final pass. Sand lightly — you only need the joint compound flush with the ceiling surface. Wipe dust away with a damp cloth. The textured surface around the patch does not need to be perfectly smooth because the spray texture will cover minor imperfections.
Step 4 — Prime with Stain Blocker (Before Texture, Not After)
This is the step most DIY tutorials miss. Apply a stain-blocking primer like Zinsser BIN or Kilz to the patched area before adding texture. Primer seals the raw joint compound, prevents yellow bleed-through, and gives the popcorn ceiling patch texture something to grip. Drape plastic around the area and spray or brush the primer on. Let it dry for 30 to 60 minutes.
Step 5 — Apply Popcorn Texture (Two Methods)
Method A — Brush-on (small patches under 1 sq ft): Open the Homax squeeze tube or Zinsser popcorn ceiling patch bucket. Dab the texture onto the primed area using the EZ Dab applicator, a disposable paint brush, or a crumpled paper towel.
Build up the texture in thin layers using a stippling motion until it matches the surrounding popcorn finish. This method gives you the most control for matching existing texture.
Method B — Spray-on (patches 1–6 sq ft): Shake the Homax aerosol can for a full minute. Hold it 9 to 14 inches from the ceiling. Trigger in short, half-second bursts while sweeping across the surface. Apply light coats — heavy application causes sagging.
Feather the spray texture into the existing popcorn by overlapping the edges. A pro trick: run hot water over the can for 60 seconds before spraying. Warm product flows better and produces more consistent chip distribution.
Step 6 — Let It Dry Fully and Blend Edges
Homax popcorn ceiling patch dry time varies by product and humidity. The squeeze tube and brush-on formula dries in 12 to 24 hours. The aerosol spray version needs 24 hours before painting. Do not rush this step — painting over damp texture traps moisture and causes peeling later. Check that the patch is dry to the touch and the same color as the surrounding ceiling (wet texture looks darker).
Step 7 — Paint to Match (2+ Coats)
Use a flat white ceiling paint that matches the existing color. If the ceiling has yellowed with age, cut a small texture sample and bring it to the paint counter for a color match.
Apply paint with a thick-nap roller (3/4-inch) or a soft brush. Roll gently so you don’t pull the new popcorn off. Two coats gives the best coverage and blends the repair into the surrounding area.
Pro Tips for Invisible Texture Patch Results
- Practice first: Spray or dab texture onto a piece of cardboard before touching your ceiling. Adjust distance and pressure until the pattern matches your existing texture.
- Match the chunk size: Older popcorn ceilings from the 1950s and 1960s have larger, chunkier aggregate. Modern products like Homax use finer polystyrene chips. If your ceiling has larger chunks, mix small pieces of crushed Styrofoam into the premixed compound for a closer match.
- Feather wide: Extend your patch texture 6 to 12 inches beyond the damaged area. A gradual blend is invisible — a hard edge is obvious.
- Painted vs unpainted popcorn: If the original ceiling was painted, prime your patch first and apply texture over the primer. If it was never painted, the raw texture will match the existing surface better without primer between the texture and paint coats.
- Use a sealing pad for small dab repairs: Instead of spray, some DIYers use an oatmeal-textured sealing pad to press texture onto the ceiling. This reduces overspray and mess in small bathrooms or kitchens.
Common Mistakes to Avoid
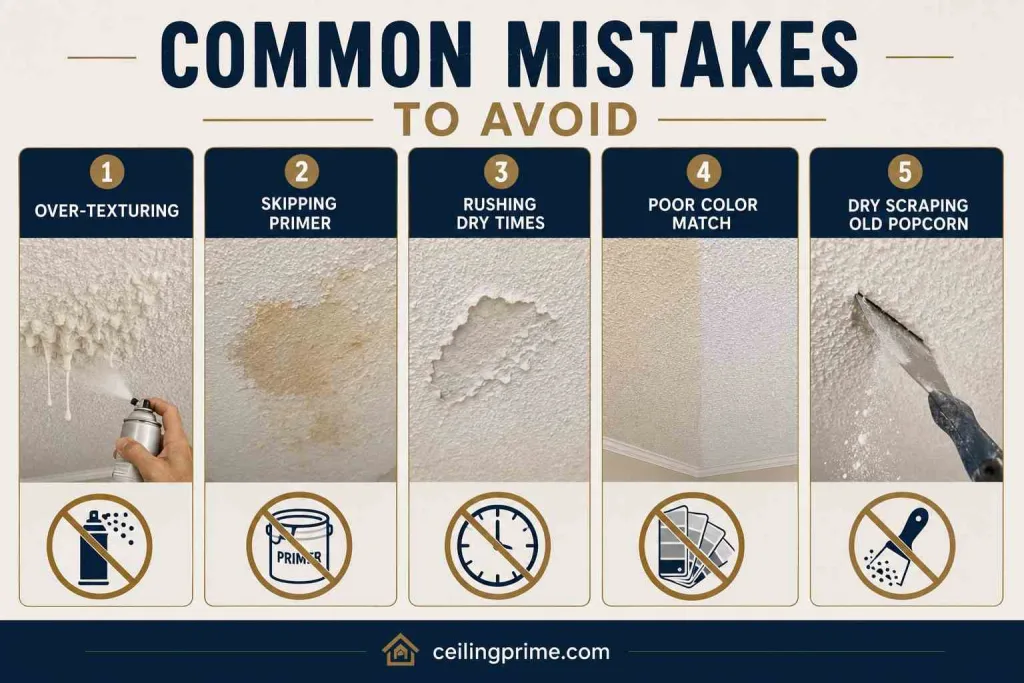
- Over-texturing: Spraying too much product at once causes sagging or dripping. Use thin coats and build up gradually.
- Skipping primer: Raw joint compound absorbs paint unevenly and creates yellow stains that show through the texture. Prime first, texture second, paint last.
- Rushing dry times: Painting over wet texture peels within weeks. Wait a full 24 hours after texture application.
- Poor color match: Old ceilings yellow over time. Bring a physical sample to the paint store instead of guessing “flat white.”
- Dry scraping old popcorn: Scraping without misting releases dust and possible asbestos fibers. Always wet the area first with a spray bottle.
Cost Breakdown: DIY Popcorn Ceiling Patch vs Hiring a Pro
| Factor | DIY Patch | Professional Repair |
| Materials | $15–$35 | Included in quote |
| Labor | Your time (2–4 hours) | $484–$604 per patch (2026 avg.) |
| Time to Complete | 1 day (including dry time) | Half day on-site |
| Best For | Small holes, scrapes, stains | Large damage, water issues, asbestos ceilings |
A popcorn ceiling patch kit from Home Depot or Lowe’s costs between $15 and $25 and covers most single-hole repairs. If you already own basic tools like a putty knife and sanding block, your total out-of-pocket stays under $30. Professional ceiling repair starts around $484 per patch in 2026, with hourly rates of $60 to $90 for a drywall contractor.
Frequently Asked Questions
Q. How do you patch a popcorn ceiling without scraping the whole thing?
Fix the drywall hole with a mesh patch and joint compound, sand it smooth, prime with stain blocker, then apply matching popcorn texture using a brush-on product (Homax or Zinsser) or aerosol spray. Paint to match after 24 hours of dry time.
Q. What is the best popcorn ceiling patch product in 2026?
The Homax Popcorn Ceiling Patch squeeze tube with the EZ Dab applicator is the top-rated option for patches under 1 square foot. For larger areas, the Homax premixed quart tub or the Zinsser popcorn ceiling patch bucket works better because you can brush on thicker layers and blend the edges.
Q. How long does homax popcorn ceiling patch dry time take?
The Homax squeeze tube and premixed brush-on formula dry in 12 to 24 hours depending on humidity and ventilation. The Homax aerosol spray texture needs a full 24 hours before you can paint over it. Thicker applications take longer. Do not speed up drying with a dehumidifier — uneven drying causes cracking.
Q. Can you paint over a popcorn ceiling patch?
Yes. After the texture dries completely, apply flat ceiling paint with a thick-nap roller or soft brush. Use gentle pressure so you do not pull the new texture off. Two coats blend the patch into the rest of the ceiling.
Q. Is it dangerous to patch a popcorn ceiling (asbestos)?
Ceilings installed before 1980 may contain asbestos in the texture material. Patching a small area is lower risk than full removal, but you should still test before scraping any existing texture. Home asbestos test kits cost $10 to $35 and take about a week for lab results.
Q. How do you match existing popcorn texture perfectly?
Test the product on a piece of cardboard first. Adjust spray distance (9 to 14 inches) and pressure until the chip size and density match your ceiling. For older, chunkier popcorn, mix crushed Styrofoam bits into the premixed compound. Feather 6 to 12 inches beyond the repair for a gradual blend.
Q. What if the popcorn ceiling has water damage?
Fix the leak first. Remove any soft, crumbling texture by misting and scraping. Let the drywall dry completely. Apply stain-blocking primer (Kilz or Zinsser BIN) to seal the stain. Then patch the drywall and apply popcorn texture as described above.
Q. Can I use regular spackle on a popcorn ceiling?
Regular spackle repairs the drywall underneath but does not replicate the popcorn texture. Use spackle to fill and smooth the hole, then apply a separate popcorn ceiling texture product on top to match the surrounding finish.
Q. How much does a professional popcorn ceiling patch cost?
Professional repair runs $484 to $604 per patch in 2026. Hourly rates for ceiling contractors range from $60 to $90. Full ceiling texture removal and smooth finishing costs $2 to $6 per square foot for the entire room.
Q. Is it better to patch or remove the whole popcorn ceiling?
Patch if the damage is small and localized. Remove the whole ceiling if you plan to sell the home, if the texture contains asbestos, or if damage covers more than a few square feet. Smooth ceilings increase home value and attract buyers who view popcorn as outdated.