Best Paint for Popcorn Ceiling: Flat Latex, Right Roller, and What to Avoid
The best paint for a popcorn ceiling is a flat or matte, water-based acrylic-latex formula with high hide and low spatter — applied with a 3/4-inch to 1-inch nap roller. The flat sheen hides the texture’s micro-shadows and imperfections; the thick nap reaches into the bumps without pressing against them hard enough to loosen them.
Get either of those two details wrong and you will end up with a blotchy finish, texture falling off in patches, or a ceiling that shows every shadow and flaw under room lighting. Here is the details about best paint for popcorn ceiling, what actually works and why.
Check for Asbestos Before Painting a Pre-1980 Popcorn Ceiling
Painting a popcorn ceiling disturbs the texture surface — rollers press against the bumps and the added moisture from water-based paint is absorbed into the porous texture. On a pre-1980 ceiling that contains asbestos-containing material (ACM), painting is technically a disturbance event. It is generally considered low-risk compared to scraping, but it is worth being informed.
If the ceiling has not been tested and was installed before 1980, a professional asbestos test costs $25–$75 per lab sample. If the result is positive at the Environmental Protection Agency (EPA) threshold of 1% or more, consult a licensed professional before proceeding with painting.
For most intact pre-1980 ceilings with no visible damage, painting by roller is considered a low-disturbance activity — but the decision should be an informed one.
The Best Paint Types for Popcorn Ceilings
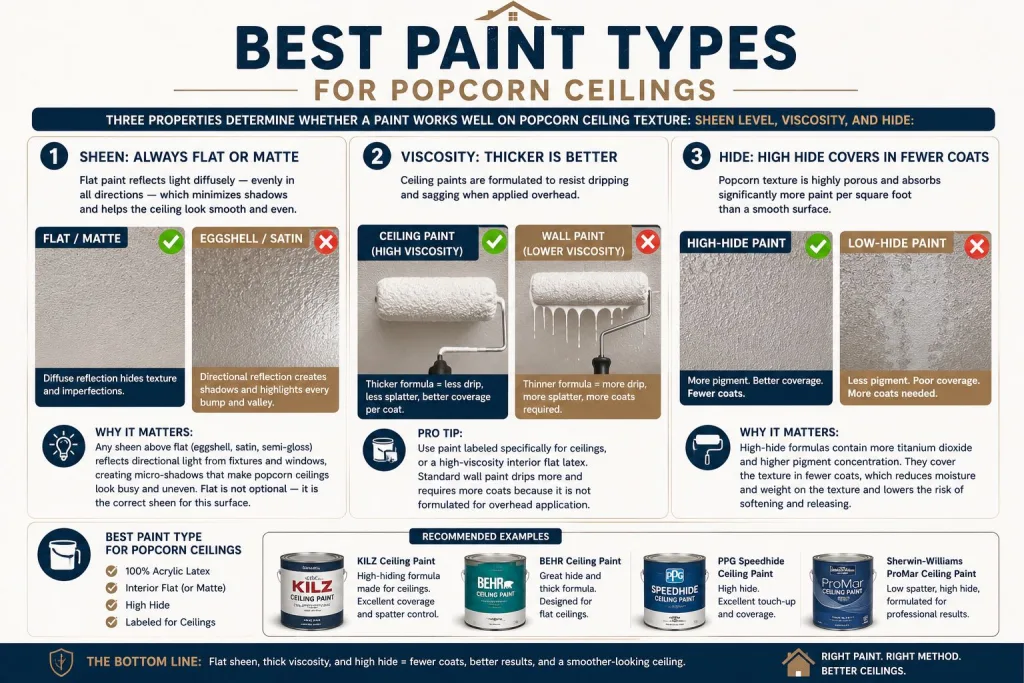
Three properties determine whether a paint works well on popcorn ceiling texture: sheen level, viscosity, and hide. Here is what each means in practice:
Sheen: always flat or matte
Flat paint reflects light diffusely — evenly in all directions — which means it does not create directional reflections that emphasize the three-dimensional texture peaks and valleys. Any sheen above flat (eggshell, satin, semi-gloss) reflects directional light from fixtures and windows, creating micro-shadows across the texture surface that make the ceiling look busy and uneven.
On a popcorn ceiling where the surface is already inherently irregular, sheen amplifies every imperfection. Flat is not optional — it is the correct sheen for this surface.
Viscosity: thicker is better
Ceiling paints are formulated to resist dripping and sagging when applied overhead. Thicker viscosity means less drip, less splatter, and better coverage per coat. Standard wall paint applied to a ceiling drips more and requires more coats because it is not formulated for overhead application. Use paint labeled specifically for ceilings, or a high-viscosity interior flat latex.
Hide: high hide covers in fewer coats
Popcorn texture is highly porous and absorbs significantly more paint per square foot than a smooth surface. High-hide formulas — which contain more titanium dioxide and higher pigment concentration — cover the texture in fewer coats, which matters because each additional coat adds moisture, weight, and risk of the texture softening and releasing.
Recommended Best Paint for Popcorn Ceiling
| Benjamin Moore Waterborne Ceiling Paint | Best overall result; standard rooms | Flat | High hide, excellent flow-out, very low splatter during application |
| BEHR PREMIUM PLUS Ceiling Paint | Budget-friendly, widely available | Flat | Formulated specifically for ceilings; available at Home Depot; good hide for the price |
| Sherwin-Williams Ceiling Bright White | High-volume rooms, good coverage | Flat | High viscosity reduces drip; available at Sherwin-Williams stores across Austin |
| KILZ PVA Drywall Primer | First coat on bare/unpainted texture | Flat | Seals porous texture before topcoat; dramatically reduces paint absorption and coat count |
| KILZ 2 or Zinsser BIN (shellac) | Water-stained areas before painting | Flat primer | Blocks water stains from bleeding through paint regardless of how many topcoats are applied |
| Moisture-resistant flat latex | Kitchens, bathrooms, humid rooms | Flat | Mildew-resistant formula; important in Austin’s high-humidity months (summer) |
Sheen Comparison: Why Flat Is the Only Right Answer
| Flat / Matte | Diffuses light evenly; conceals texture micro-shadows; makes ceiling appear smooth | Correct — use this |
| Eggshell | Slight sheen creates directional reflection; highlights texture peaks under room lighting | Avoid — shows texture more |
| Satin | Noticeable sheen; texture surface creates visible shadow patterns under any directional light | Avoid — looks worse than flat on textured ceilings |
| Semi-gloss | High reflectivity; every texture bump creates a visible highlight and shadow | Never use — ceiling looks rough and busy |
| Gloss | Maximum reflectivity; completely inappropriate for textured surfaces | Never use |
Roller vs. Spray: Which Is Better for Popcorn Ceiling Paint?
Spray application
An airless paint sprayer is the ideal method for applying paint to an unpainted or lightly painted popcorn ceiling. Spray application does not press against the texture surface — the paint is atomized and deposited without mechanical contact.
This means zero risk of the roller pushing against texture peaks and dislodging them. The result is more even coverage into all the crevices of the texture, and no roller texture imprinted on top of the ceiling texture.
The limitation: spraying requires masking every wall, window, light fixture, and floor completely before painting. Airborne overspray settles on every exposed surface. For DIY use, sprayer setup and cleanup add significant time. For professional jobs, spraying is the preferred method on unpainted ceilings.
Roller application
A 3/4-inch to 1-inch nap roller works well on previously painted popcorn ceilings where the texture is firmly bonded and sealed by the existing paint. The thick nap reaches into the texture bumps without the roller core pressing flat against the surface. Load the roller fully — do not overwork a dry roller back and forth across the same section, which is how rollers loosen texture. One pass, reload, next section.
On an unpainted ceiling where the texture has never been sealed, roller application carries more risk of dislodging texture because the water in the paint is absorbed directly into the unsealed porous surface, temporarily softening it. A preliminary coat of KILZ PVA primer by sprayer first, then rolling the topcoat, reduces this risk significantly.
The fingernail adhesion test
Before painting, press a fingernail lightly against the texture in several spots. If the texture releases easily, the adhesion is already compromised — roller application will pull chunks off throughout the job. In this case, either spray only (no pressure) or accept that the ceiling needs to come down before painting. Do not attempt to roll paint onto loosely bonded popcorn texture.
Handling Water Stains Before Painting
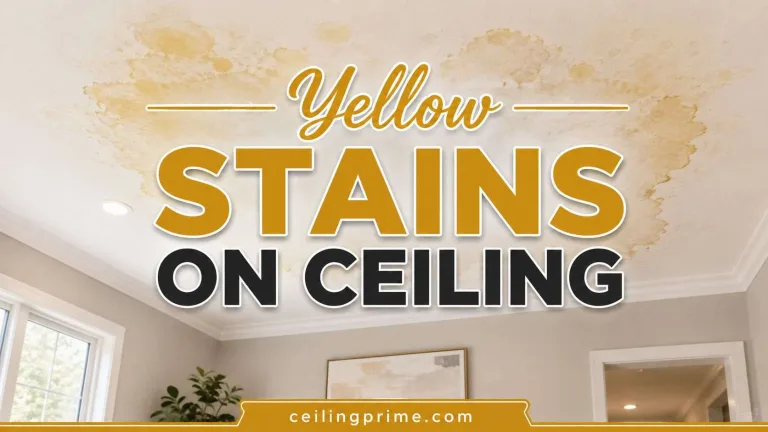
Painting over a water stain on a popcorn ceiling without primer is one of the most common and most expensive mistakes in ceiling painting. Water stains contain tannins and minerals that migrate through water-based paint regardless of how many coats are applied. The stain always reappears — sometimes within days, sometimes within weeks.
The correct approach: apply an oil-based or shellac-based stain-blocking primer specifically to the stained area before any topcoat. KILZ Original (oil-based) and Zinsser BIN (shellac-based) are the two products that reliably block water stains. Apply one coat to the stained section, let dry fully (1–2 hours for oil-based, 45 minutes for shellac), then paint the full ceiling with flat latex topcoat. The stain will not bleed through.
Do not use water-based stain blockers (like KILZ 2 or latex-based primers) on water stains on ceilings — they are more effective on smoke and tannin stains than on water damage, and on popcorn texture where the stain has penetrated deep into the porous surface, a water-based primer often fails. Use oil or shellac on water stains.
How Much Paint Does a Popcorn Ceiling Need?
Significantly more than a smooth ceiling. A standard smooth ceiling requires approximately 300–400 square feet of coverage per gallon of paint. A popcorn ceiling — with its porous, three-dimensional surface — uses roughly 200–250 square feet per gallon on the first coat, and 300–350 on subsequent coats as the surface becomes sealed.
For a 12×15 room (180 sq ft ceiling), plan on at least one full gallon for the first coat on an unpainted ceiling, plus a second gallon for the topcoat. If there is stain blocking primer required, add a quart to a half-gallon for that step. Buying one extra quart is always cheaper than a second trip.
Step-by-Step: How to Paint a Popcorn Ceiling
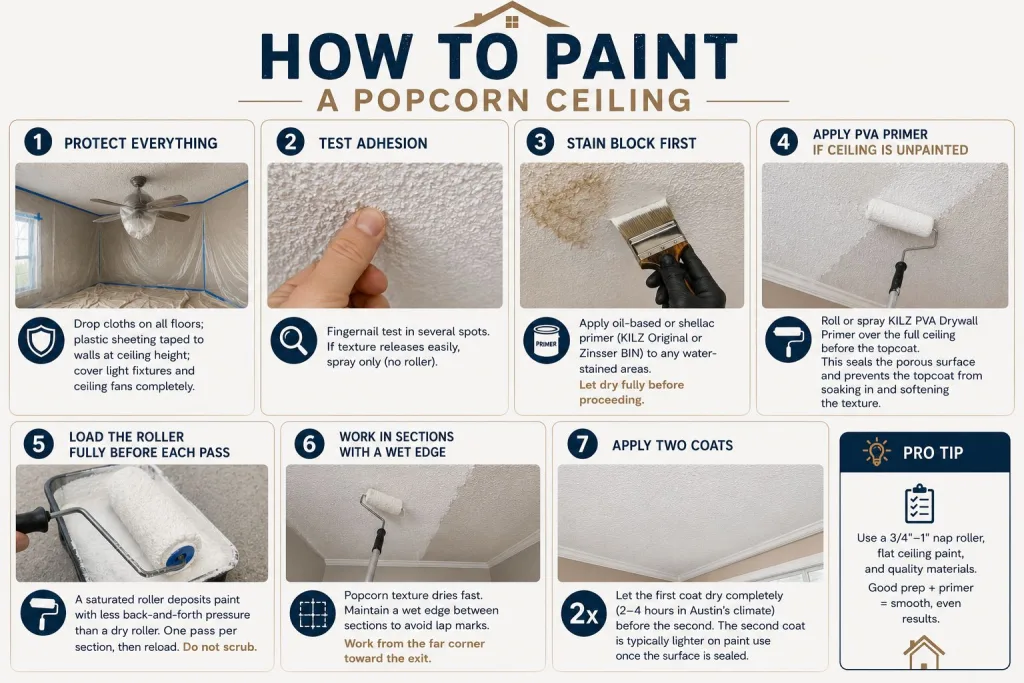
- Protect everything — Drop cloths on all floors; plastic sheeting taped to walls at ceiling height; cover light fixtures and ceiling fans completely.
- Test adhesion — Fingernail test in several spots. If texture releases easily, spray only (no roller).
- Stain block first — Apply oil-based or shellac primer (KILZ Original or Zinsser BIN) to any water-stained areas. Let dry fully before proceeding.
- Apply PVA primer if ceiling is unpainted — Roll or spray KILZ PVA Drywall Primer over the full ceiling before the topcoat. This seals the porous surface and prevents the topcoat from soaking in and softening the texture.
- Load the roller fully before each pass — A saturated roller deposits paint with less back-and-forth pressure than a dry roller. One pass per section, then reload. Do not scrub.
- Work in sections with a wet edge — Popcorn texture dries fast. Maintain a wet edge between sections to avoid lap marks. Work from the far corner toward the exit.
- Apply two coats — Let the first coat dry completely (2–4 hours in Austin’s climate) before the second. The second coat is typically lighter on paint use once the surface is sealed.
Frequently Asked Questions
Q. What kind of paint do you use on a popcorn ceiling?
Flat or matte, water-based acrylic-latex ceiling paint. Avoid any sheen above flat — eggshell, satin, semi-gloss, and gloss all make the three-dimensional texture shadows more visible under room lighting. Use a paint specifically formulated for ceilings (higher viscosity, low-spatter) rather than standard wall paint applied overhead.
Q. What is the best roller for painting a popcorn ceiling?
A 3/4-inch to 1-inch nap roller. The thicker nap reaches into the texture crevices without the roller core pressing flat against the surface. A 3/8-inch or 1/2-inch nap roller does not reach into the texture valleys and leaves uneven coverage. Do not use foam rollers — they apply too much pressure and will dislodge texture.
Q. Can you use regular white paint on a popcorn ceiling?
You can use any flat white acrylic-latex interior paint. However, ceiling-specific formulas (Benjamin Moore Waterborne Ceiling, BEHR Ceiling, Sherwin-Williams Ceiling) are thicker, splatter less during application, and cover in fewer coats because they are formulated for overhead work. Standard wall paint applied to a ceiling drips more and takes more coats on a porous popcorn surface.
Q. How do you paint a popcorn ceiling without making a mess?
Protect everything before you start — drop cloths on the floor, plastic taped to walls and light fixtures. Use a low-splatter ceiling-specific paint. Load the roller fully before each pass to avoid dry-roller pressure that loosens texture. Do not over-roll. If the ceiling is unpainted, consider spraying instead of rolling.
Q. Is it worth painting a popcorn ceiling or should you just remove it?
Painting freshens the appearance and costs much less than removal. But a painted popcorn ceiling is still a popcorn ceiling — buyers recognize it, the texture still accumulates dust and cobwebs, and on pre-1980 ceilings the asbestos question remains. If the goal is long-term value improvement or preparing for sale, removal and skim coat ($2.30–$4.05 per square foot with CeilingPrime in Austin) delivers a better result than painting alone.



One Comment