
Drywall Water Damage Ceiling: Assess, Fix, Replace & What It Costs
Drywall water damage ceiling problems follow a predictable pattern. Water enters from above. The drywall absorbs it. A stain appears. Paint bubbles. The surface softens. If the water keeps coming, the panel sags and eventually falls. The clock starts the moment water hits the drywall. Mold begins growing within 48 to 72 hours. The longer you wait, the more the repair costs.
This guide walks through a 4-level severity assessment so you know exactly what type of fix you need. It covers minor stains, soft spots, full panel replacement, plaster ceilings, mold checks, danger signs, costs, and who to call. Every repair level gets its own section with no repeated steps between them.
Is Water Damage on Ceiling Dangerous?
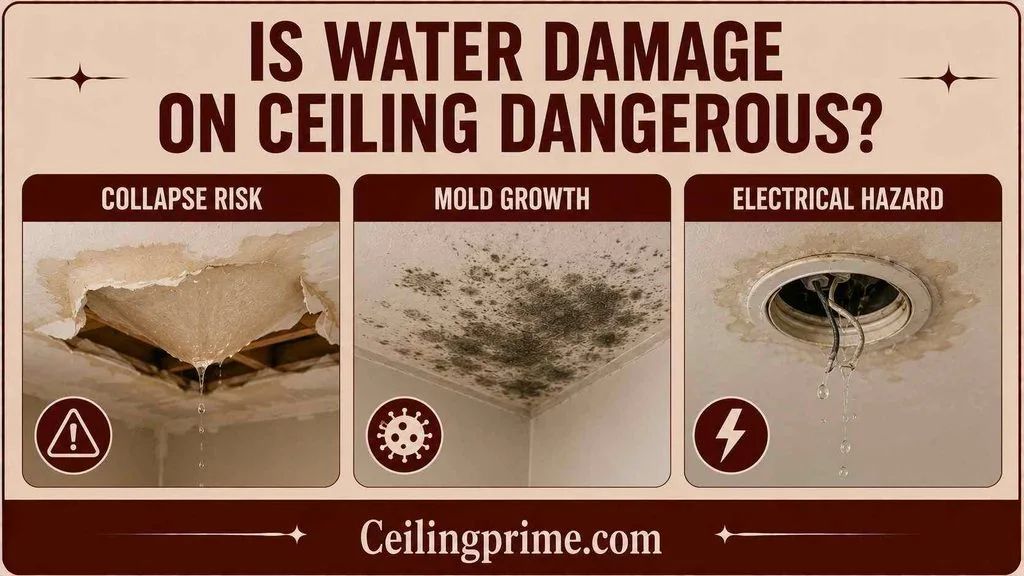
Yes. Drywall water damage ceiling problems are dangerous in three ways.
- Collapse risk: A standard 4×8 sheet of 1/2-inch drywall weighs 57 pounds dry. Saturated with water, it weighs significantly more. A wet, sagging ceiling panel can fall without warning. Never stand, sit, or sleep under a visibly sagging section.
- Mold growth: Mold begins colonizing wet drywall within 48 to 72 hours. Mold spores cause respiratory irritation, allergic reactions, and asthma attacks. Children, elderly individuals, and people with compromised immune systems are at the highest risk.
- Electrical hazard: Water near recessed lights, junction boxes, ceiling fans, or electrical wiring creates a shock and fire risk. If water is dripping near any electrical fixture, shut off the circuit breaker for that room before touching anything.
The danger increases with time. A fresh stain that is dry and firm is cosmetic. A wet, soft, sagging ceiling with a musty smell is an active safety hazard.
4 Levels of Drywall Water Damage Ceiling Severity
| Level | What You See | Press Test Result | Repair Type |
| 1 — Minor | Brown or yellow stain, dry surface | Firm and dry | Prime and paint |
| 2 — Moderate | Peeling paint, soft spots, small bubbles | Soft in spots, firm around edges | Cut and patch |
| 3 — Severe | Sagging, multiple cracks, large wet area | Spongy, crumbling, or heavy with water | Section replacement |
| 4 — Critical | Ceiling collapsed, mold visible, active drip | N/A — material is destroyed | Full panel replacement + mold remediation |
The press test tells you the severity. Push the stained area with your palm. Firm means cosmetic. Soft means compromised. Spongy or crumbling means destroyed. Match the result to the repair level below.
What to Do in the First 60 Minutes?
- Stop the water source. Turn off the main water supply for plumbing leaks. Tarp the roof for rain leaks. Clear the HVAC condensate line for drip pan overflow.
- Shut off electricity to the affected room if water is near light fixtures, fans, or outlets.
- Move furniture and belongings away from the damaged area.
- Place buckets under active drips.
- If the ceiling is bulging, poke a small drain hole in the lowest point of the bulge. Aim into a bucket. This prevents a full panel collapse.
- Start drying immediately. Aim fans at the wet surface. Run a dehumidifier. Open windows.
- Document everything with photos and video. Note the date, time, and suspected cause. This documentation is needed for insurance claims.

How to Repair Minor Water Damaged Drywall (Level 1: Stain Only)
Minor water damage means the leak has been fixed, the drywall is dry and firm, and the only problem is a cosmetic stain. This is the cheapest and fastest fix for a drywall water damage ceiling.
- Sand the stain lightly with 120-grit sandpaper.
- Apply one coat of oil-based or shellac-based stain-blocking primer. Regular latex primer does not block tannin stains. The brown mark bleeds through within days.
- Let the primer dry 1 to 2 hours.
- Apply two coats of flat ceiling paint. Wait 2 to 4 hours between coats.
Cost: $20 to $50 DIY. Time: 2 to 3 hours plus drying. A minor water damage ceiling repair is the simplest DIY ceiling project.
How to Patch Drywall Ceiling Water Damage (Level 2: Soft Spots)
Moderate damage means the paint is peeling, bubbling, or flaking, and one or more spots feel soft when pressed. The drywall paper face is damaged. The soft area must be cut out and replaced.
- Mark the boundary of the soft area. Press around the stain with your fingers. Mark where soft transitions to firm. Extend the cut 3 inches past the last soft point.
- If a ceiling joist falls within the marked area, extend the cut to the center of the nearest joists on each side.
- Cut with a keyhole saw. Remove the damaged section.
- Inspect the joist cavity for mold, wet insulation, and moisture on the wood. Let the cavity dry if damp.
- Install wood backing strips if the cut edges do not land on joists.
- Cut new drywall to fit. Same thickness as the existing ceiling. Screw into joists and backing every 8 inches.
- Tape all seams with paper tape. Apply 3 coats of joint compound. Feather each coat wider. Sand between coats.
- Prime with stain-blocking primer. Paint.
This is how to fix drywall water damage ceiling problems at the moderate level. The patch becomes invisible under paint when taped and finished correctly.
Replace Ceiling Drywall Water Damage (Level 3: Sagging or Large Area)
Severe damage means the drywall is sagging, cracking across multiple seams, or an area larger than 8 square feet is compromised. Patching is not practical. The damaged panels must be removed and replaced.
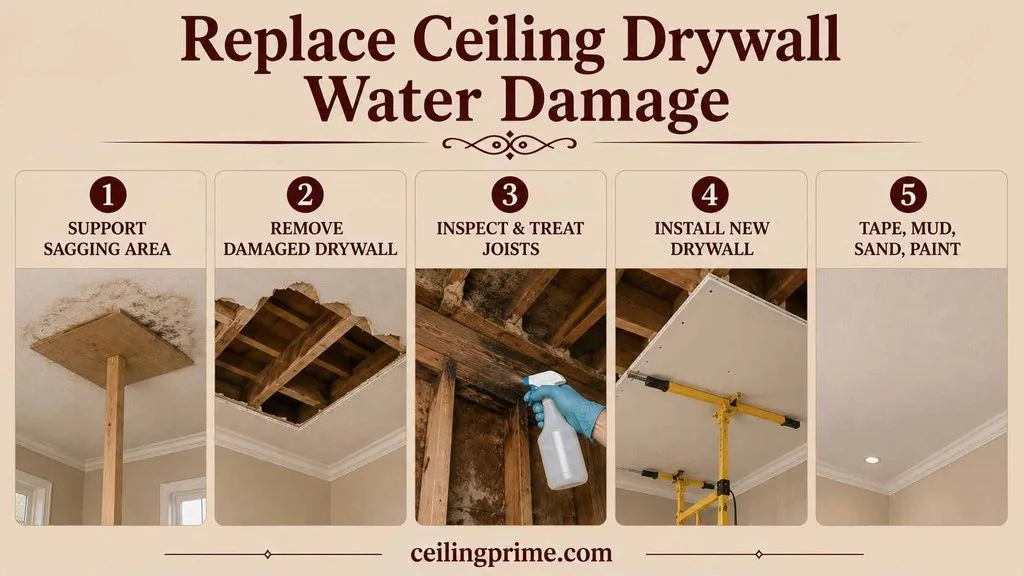
- Build a temporary support under the sagging area if it has not collapsed. Press plywood upward with a 2×4 to hold the panel while you work above.
- Remove the damaged panels entirely. Cut at the nearest joist centers on each side. Remove screws or pry nails.
- Check every joist in the exposed cavity. Look for mold, rot, cracks, and standing water. Treat mold on wood with a mold-killing solution. Let everything dry 24 to 48 hours.
- Install new drywall panels. Use a drywall lift for overhead work. Screw into joists every 8 inches.
- Tape, mud, sand, prime, and paint. Match the existing ceiling texture if the room has orange peel, knockdown, or popcorn.
Replace ceiling drywall water damage cost runs $500 to $2,500 for a single room depending on the area, height, and texture matching. DIY materials cost $50 to $200.
How to Repair Water Damaged Ceiling Plaster?
Plaster ceilings in older homes respond differently to water. Plaster does not absorb as fast as drywall. But when the plaster loses its bond to the lath behind it, sections crack, sag, and fall in chunks.
- Small stains (plaster firm): Sand. Prime with shellac-based primer. Paint. The process mirrors a drywall water damage ceiling stain repair but requires shellac primer because plaster reacts differently.
- Crumbling edges: Remove loose plaster back to solid material. Dampen the edges with a wet sponge. Fill with joint compound in thin layers (1/8 inch per coat). Let each coat dry fully. Sand. Prime. Paint.
- Large sections falling or lath exposed: Remove all loose plaster. Cut a drywall patch to fit. Screw into the lath or ceiling joists. Tape the seam between the new drywall and surrounding plaster with mesh tape. Apply 3 coats of compound. Sand. Prime with shellac-based primer. Paint.
- Whole ceiling replacement: Install new drywall directly over the plaster (screwed through the plaster into the joists). Or remove all plaster and lath, then install fresh drywall on the bare joists.
Mold Check After Drywall Water Damage Ceiling Repair
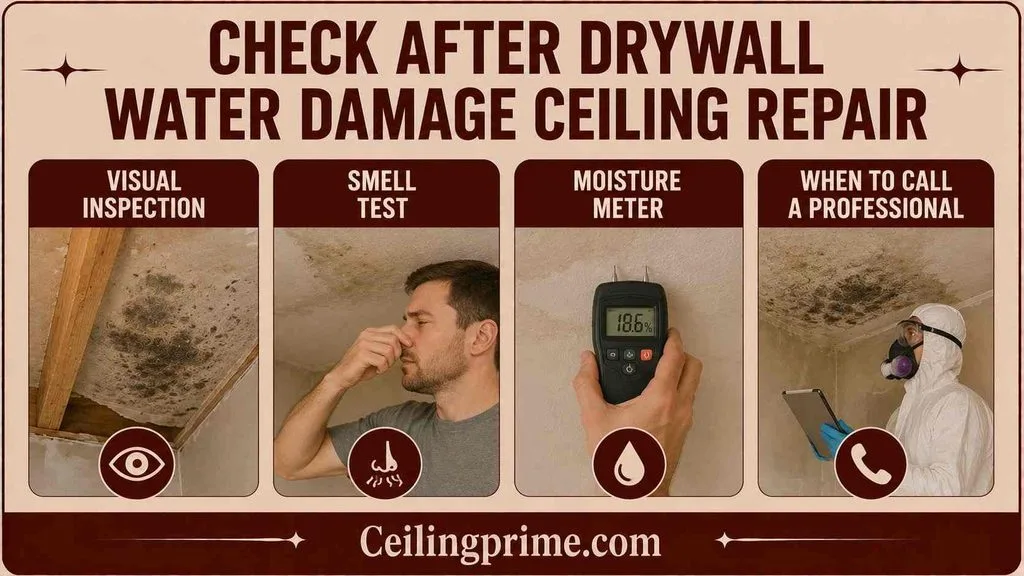
- Visual inspection: After cutting damaged drywall, look at the back side of the surrounding panels and the joist surfaces. Gray, green, or black spots indicate active mold growth.
- Smell test: A musty or earthy odor near the ceiling means mold spores are present even if you cannot see the colony. Mold grows inside the drywall core before it appears on the surface.
- Moisture meter: A reading above 20% on surrounding drywall means moisture is still present. Do not close the ceiling until readings drop below 15%.
- When to call a professional: If mold covers more than 10 square feet (about a 3×3 area), the EPA recommends professional remediation. If anyone in the home has respiratory symptoms near the affected area, call a specialist.
Never paint over mold. The colony grows underneath and pushes through the new surface within weeks.
Water Damage Ceiling Repair Cost
| Repair Level | Cost |
| Level 1 — Cosmetic (prime + paint) | $20–$50 DIY | $100–$250 pro |
| Level 2 — Cut and patch (small section) | $30–$80 DIY | $150–$400 pro |
| Level 3 — Section replacement | $50–$200 DIY | $500–$2,500 pro |
| Level 4 — Full ceiling + mold | $150–$400 DIY | $1,500–$5,000+ pro |
| Plaster ceiling repair (small to medium) | $30–$100 DIY | $200–$800 pro |
| Source fix — roof leak | $300–$1,500 |
| Source fix — plumbing leak | $150–$3,000 |
| Mold remediation | $500–$3,000 |
Source repair costs are separate from ceiling repair costs. Repair drywall ceiling water damage cost depends on severity, not room size. A 2-square-foot sagging section costs more to fix than a 10-square-foot dry stain because the sag requires cutting, backing, new drywall, taping, and finishing.
Insurance and Documentation Tips
- Homeowner insurance covers sudden, accidental water damage: burst pipes, storm damage, appliance failures, supply line breaks.
- Insurance does not cover gradual damage: slow leaks, deferred roof maintenance, long-term condensation, or neglected plumbing.
- Document before cleanup: Photograph and video the damage, the source, and any affected belongings.
- File within 24 hours: Most policies require prompt notification.
- Do not make permanent repairs before the adjuster visits. Make temporary fixes only (tarp, turn off water, bucket). The adjuster needs to see the raw damage.
- Keep every receipt: Emergency supplies, contractor invoices, and temporary housing expenses may be reimbursable.
Assess the Severity, Then Match the Fix
Every drywall water damage ceiling repair follows the same order: stop the water, dry the area, check for mold, assess the drywall, and choose the right repair level. Minor stains need primer and paint. Soft spots need a cut-and-patch. Sagging panels need full section replacement. And the source must be fixed before any ceiling work begins.
Frequently Asked Questions
Can water damaged ceiling drywall be saved?
If the drywall is firm and dry after the leak stops, yes. Prime and paint. If the drywall is soft, spongy, or crumbling, that section must be cut out and replaced. Wet drywall that dried but feels firm can be primed without replacement.
How long before water damaged drywall grows mold?
48 to 72 hours. Mold spores need moisture, organic material (drywall paper), and warmth. A wet ceiling in a heated home provides all three. Dry the ceiling within 48 hours to prevent mold colonization.
Should I replace or just patch the damaged section?
Patch if the damage covers less than 30% of the ceiling. Replace if the damage covers more than 30% or if multiple patches would overlap. Full replacement produces a cleaner finish and costs less per square foot at larger scales.
How do I know if the leak is from the roof or from plumbing?
Check the timing. If the stain appears after rain, it is a roof leak. If the stain appears after running water, showers, or flushing, it is a plumbing leak. If the stain appears in cold weather without rain or water use, it is condensation.
Do I need to remove the old drywall before installing new?
Yes for damaged sections. Screwing new drywall over soft, wet, or moldy old drywall traps moisture and mold inside the ceiling cavity. Remove the damaged material completely. Let the cavity dry. Then install fresh panels.
Who should I call for ceiling water damage?
Handyman for small stains and single patches. Drywall contractor for large sections and texture matching. Water damage restoration company for multi-room damage, mold, and insurance claims. Plumber or roofer for the source fix.





2 Comments