How to fix a sagging ceiling safely with simple repair tips
A sagging ceiling starts as a slight dip. It grows into a visible bow. Left alone, it becomes a collapse risk. Knowing how to fix a sagging ceiling starts with one question: is the drywall pulling away from the joists, or are the joists themselves bowing? The answer changes the entire repair.
Cosmetic sag is a DIY fix. Structural sag needs a professional. This guide covers the 6 causes, a diagnostic push test, step-by-step repair for both drywall sag and joist sag, safety checks for water and asbestos, costs, and the red flags that mean stop and call a contractor.
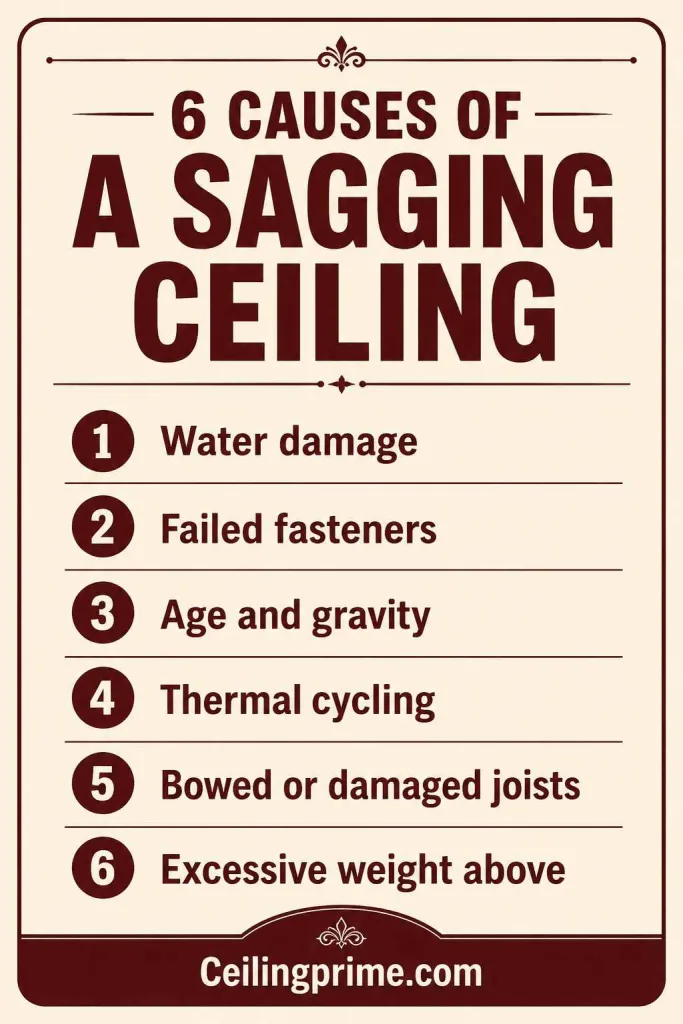
6 Causes of a Sagging Ceiling
1. Water damage: A roof leak or plumbing leak soaks drywall. Wet drywall weighs several times its dry weight. The extra load pulls screws through the paper face. The panel drops. This is the most common reason homeowners search for how to fix a sagging ceiling.
2. Failed fasteners: Original screws were too short. Or too few were used. Or the builder used adhesive only. Over years, the fasteners lose grip. The drywall separates from the joists. You see a gradual bow in one panel.
3. Age and gravity: Drywall is heavy. A standard 4×8 sheet of 1/2-inch drywall weighs about 57 pounds. Gravity pulls on that weight every day. After 30 to 50 years, adhesive dries out and nails work loose.
4. Thermal cycling: Attics reach extreme temperatures. Wood framing expands in heat. It contracts in cold. This repeated movement loosens fasteners over years of cycling.
5. Bowed or damaged joists: A cracked joist, a notched joist, or a rotted joist bows under the roof load. The ceiling follows the joist downward. This is structural sag.
6. Excessive weight above: Heavy insulation, stored items in the attic, or snow load on the roof can push joists beyond their capacity. The ceiling sags under the combined weight.
Safety First: 2 Checks Before You Touch the Ceiling
Check 1 — Active water: Press the sagging area gently with one finger. If it feels soft, wet, or spongy, stop. Water-soaked drywall can fall without warning. Find and stop the water source first. Turn off the water supply if plumbing is the cause. Place a tarp over the roof if rain is active. Do not stand directly under a wet, sagging ceiling.
Check 2 — Asbestos: Homes built before 1980 may have asbestos in the ceiling material. Popcorn texture is the most common source. Do not scrape, drill, or sand the ceiling without testing first. A DIY test kit costs $40 to $150. Professional testing runs $250 to $850. Understanding how to fix a sagging ceiling in an older home always starts with an asbestos check.
Step 1: Diagnose Drywall Sag vs Joist Sag
This step determines how to fix a sagging ceiling correctly. Getting the diagnosis wrong wastes money and time.
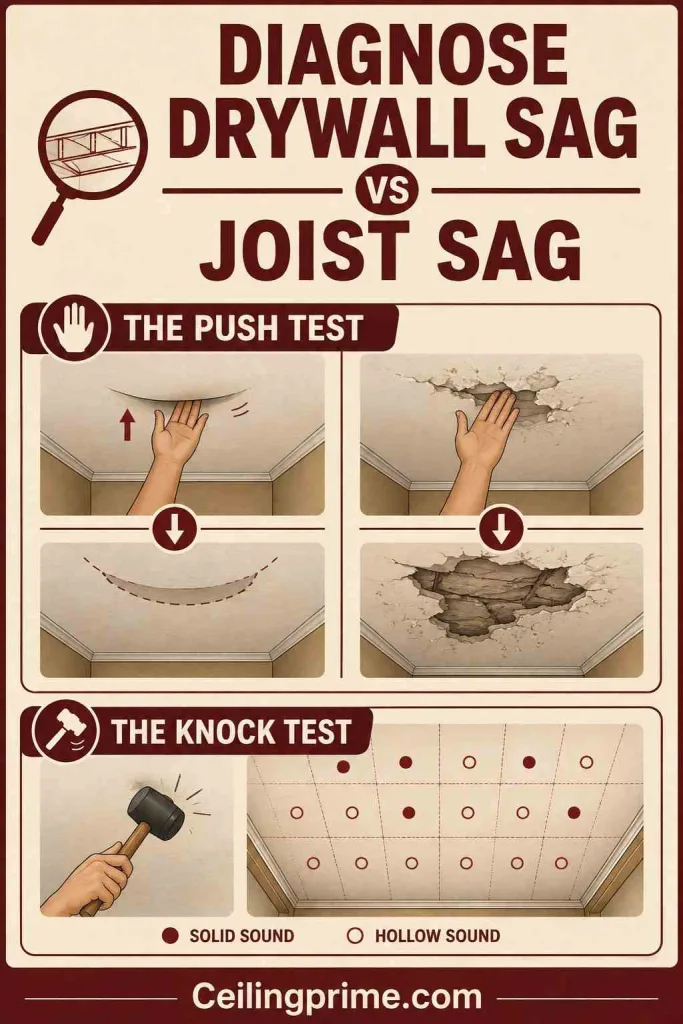
The Push Test
Stand on a stable ladder. Push upward on the sagging area with your palm. Two possible results tell you what failed.
- The panel moves up and springs back: The drywall separated from the joists. The panel itself is intact. This is cosmetic sag. You can fix it with screws and joint compound.
- The panel feels soft, crumbles, or does not move: The drywall is water-damaged or physically compromised. It needs full replacement before any refastening.
The Knock Test
Knock along the ceiling in a grid pattern. A solid knock means good contact with the joist. A hollow sound means the panel pulled away at that point. Map the hollow spots. Those are your refastening targets.
Read the Crack Pattern
| Crack Pattern | What It Means |
| Hairline cracks along drywall seams | Fastener or tape failure — cosmetic sag |
| Cracks crossing panel seams | Joist movement or structural shift |
| Diagonal cracks from door/window corners | Foundation settlement — call a structural engineer |
| Large gaps between panel edges | Significant drywall separation — refasten or replace |
Diagonal cracks across multiple panels are the most serious pattern. Stop the DIY approach. Get a structural inspection.
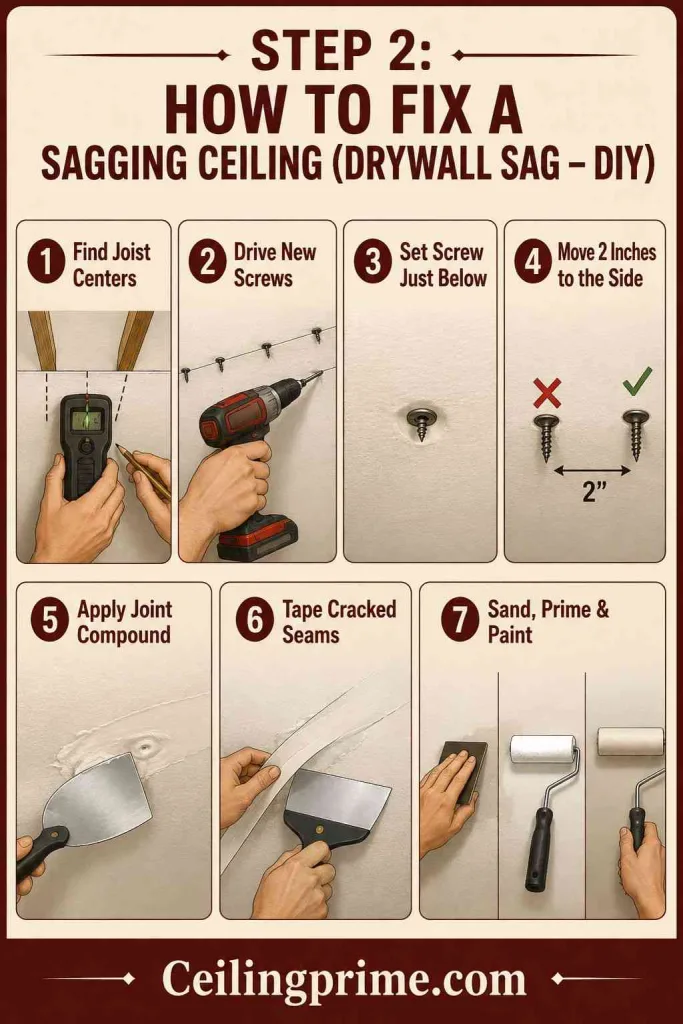
Step 2: How to Fix a Sagging Ceiling (Drywall Sag — DIY)
This fix works when the drywall separated from the joists but the panel and joists are both intact.
Tools needed: Stud finder, drill with drywall dimpler bit, 1-5/8 inch coarse-thread drywall screws (2-inch for thicker panels), joint compound, paper drywall tape, 6-inch and 10-inch drywall knives, 120-grit sandpaper, primer, flat ceiling paint.
- Step 1: Find joist centers. Use a stud finder. Mark every joist with a pencil line across the full sagging area.
- Step 2: Drive new drywall screws every 8 inches along each joist. Place screws at least 2 inches away from any old fastener that has torn through the paper.
- Step 3: Set each screw just below the drywall surface. A small dimple is correct. A hole means you went too far — that fastener will not hold.
- Step 4: Never re-drive a screw through a torn paper face. It spins freely and adds no strength. Move 2 inches to the side.
- Step 5: Apply joint compound over every screw dimple. Feather smooth with the 6-inch knife.
- Step 6: For cracked seams, press paper tape into a thin bed of compound. Smooth flat. Let dry. Apply a second coat.
- Step 7: Sand between coats with 120-grit. Prime the repaired area. Paint with flat ceiling paint.
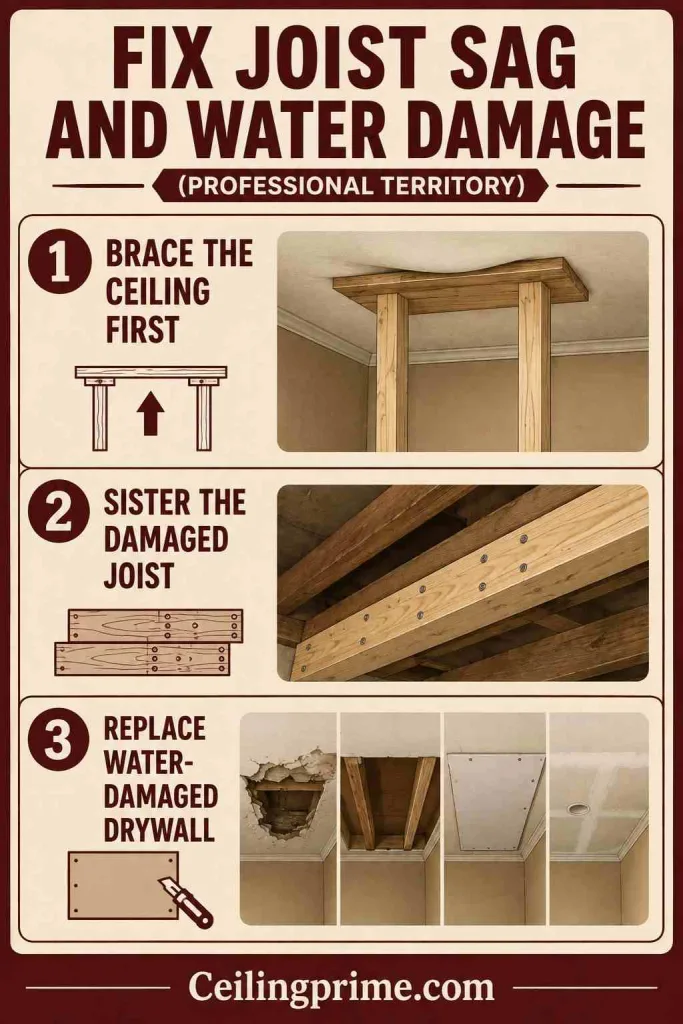
Step 3: Fix Joist Sag and Water Damage (Professional Territory)
When the push test reveals soft drywall or the joists themselves are bowing, screws and compound will not hold. Here is how to fix a sagging ceiling with structural issues.
Brace the Ceiling First
Build a temporary support wall. Cut two 2×4 vertical studs to just below ceiling height. Place a sheet of 3/4-inch plywood across the top. Press the assembly upward until it contacts the sagging area. This holds panels in place while you work on the framing above. Do not skip this step. A partially detached panel can fall while you are under it.
Sister the Damaged Joist
If a joist is cracked, bowed, or rotted, sistering fixes it. Cut a new joist to match the damaged one. Slide it flush against the existing member. Fasten the two together with structural screws or 16d nails every 12 inches along the full length. The new lumber takes over the load. The bowing stops.
Replace Water-Damaged Drywall
Wet drywall cannot be saved by refastening. Cut the panel back to the nearest joist on each side. Remove the damaged section. Check the cavity for mold and remaining moisture. Let the framing dry completely. Install replacement drywall. Prime with moisture-resistant primer. Tape, mud, sand, and paint.
How to Fix a Sagging Plaster Ceiling?
Plaster ceilings sag when the plaster loses its bond to the wood lath behind it. This is called key failure. The plaster “keys” that grip the lath break down from age, vibration, and moisture.
- Minor sag (plaster still attached at edges): Drill small holes through the plaster. Inject construction adhesive behind the plaster to rebond it to the lath. Use plaster washers and screws to hold the plaster tight while the adhesive cures. Remove the washers after 24 hours. Fill the screw holes with joint compound.
- Major sag (plaster crumbling or falling): Remove the damaged plaster section. Install new drywall over the lath. Tape, mud, and paint. In severe cases, remove the plaster and lath entirely and install full drywall sheets.
- Whole-ceiling sag: Install new drywall directly over the existing plaster. Screw into the joists through the plaster. This adds weight, so confirm the joists can handle it.

Sagging Ceiling Repair Costs in 2026
| Repair Type | 2026 Cost |
| DIY refasten with screws + compound | $30–$80 (materials) |
| Professional refasten and finish | $200–$600 per room |
| Drywall section replacement | $300–$800 |
| Full ceiling drywall replacement | $800–$2,500 per room |
| Joist sistering (per joist) | $200–$500 |
| Plaster ceiling repair (adhesive injection) | $300–$1,000 |
| Plaster removal + drywall replacement | $1,000–$3,000 per room |
| Water damage source repair (roof/plumbing) | $300–$3,000 |
| Structural engineer inspection | $300–$800 |
DIY refastening costs under $80 in materials. That covers screws, compound, tape, sandpaper, and primer. Professional work costs $200 to $2,500 per room depending on the severity. Knowing how to fix a sagging ceiling yourself saves $150 to $500 for cosmetic repairs.
When to Call a Professional?
- The sag spans multiple drywall panels. This indicates joist problems, not fastener failure.
- Diagonal cracks radiate from door or window corners. This signals foundation movement.
- The ceiling feels wet, soft, or spongy. Water-damaged drywall can collapse without warning.
- You see or smell mold in the ceiling cavity. Mold remediation requires professional equipment.
- The ceiling is plaster and large sections are detaching from the lath.
- The home was built before 1980 and you have not tested for asbestos.
- The sag is growing visibly over days or weeks. An active sag means the failure is progressing.
- You hear creaking or popping sounds from the ceiling. The framing is under stress.
Diagnose First, Then Fix the Right Problem
Now you know how to fix a sagging ceiling from start to finish. Use the push test to diagnose drywall sag vs joist sag. Refasten cosmetic sag with drywall screws every 8 inches along each joist. Replace water-damaged panels after fixing the source. Sister cracked joists. And call a professional for foundation cracks, active mold, asbestos, or any sag that spans multiple panels.
If you live in Austin and need ceiling repair, popcorn removal, or a smooth-finish upgrade, CeilingPrime handles it all. Call (512) 000-0000 or visit ceilingprime.com for a free estimate.
Frequently Asked Questions
Can I fix a sagging ceiling myself?
Yes for cosmetic sag. If the push test shows the panel moves up and springs back, you can refasten it with drywall screws and finish with joint compound. Structural sag, water damage, and plaster key failure usually need professional help.
How dangerous is a sagging ceiling?
A wet, sagging ceiling can collapse without warning. A standard drywall panel weighs about 57 pounds. Multiple panels falling at once cause injury and property damage. Never stand or sleep under a visibly sagging section.
Does insurance cover a sagging ceiling?
Insurance covers sudden damage from burst pipes, storms, and appliance failures. It does not cover gradual damage from age, deferred maintenance, or long-term leaks. Document the damage with photos and file within 24 hours for covered events.
How do I know if the joists are the problem?
Go into the attic above the sag. Look at the joists directly. If a joist is cracked, bowed more than 1/2 inch, has large notches, or shows rot, the joist is the problem. Sister it or call a structural engineer.
How long does a sagging ceiling repair take?
DIY refastening takes half a day. Drying and painting adds another day. Drywall replacement takes 1 to 2 days. Joist sistering takes 1 day. Plaster ceiling removal and drywall replacement takes 2 to 3 days per room.
What screws should I use for ceiling drywall?
1-5/8 inch coarse-thread drywall screws for 1/2-inch drywall. 2-inch screws for 5/8-inch drywall. Drive them every 8 inches along each joist. Set the head just below the surface without tearing the paper face.






One Comment