Board and Batten Ceiling: DIY Tutorial, Ideas & Step-by-Step Guide
A board and batten ceiling adds vertical (or horizontal) wood strips to a flat ceiling surface, creating a grid of raised battens over a flat board background. The technique originated in New Zealand villa ceilings during the nineteenth and early twentieth centuries and has surged in popularity across American homes as a farmhouse style and modern farmhouse design element.
This guide covers materials (MDF vs solid wood), the full tool list, a 9-step DIY installation tutorial, ideas for every room and ceiling type (flat, vaulted, sloped, tray), 2026 costs, and common mistakes. If you own a brad nailer and a weekend, you can complete a single room.
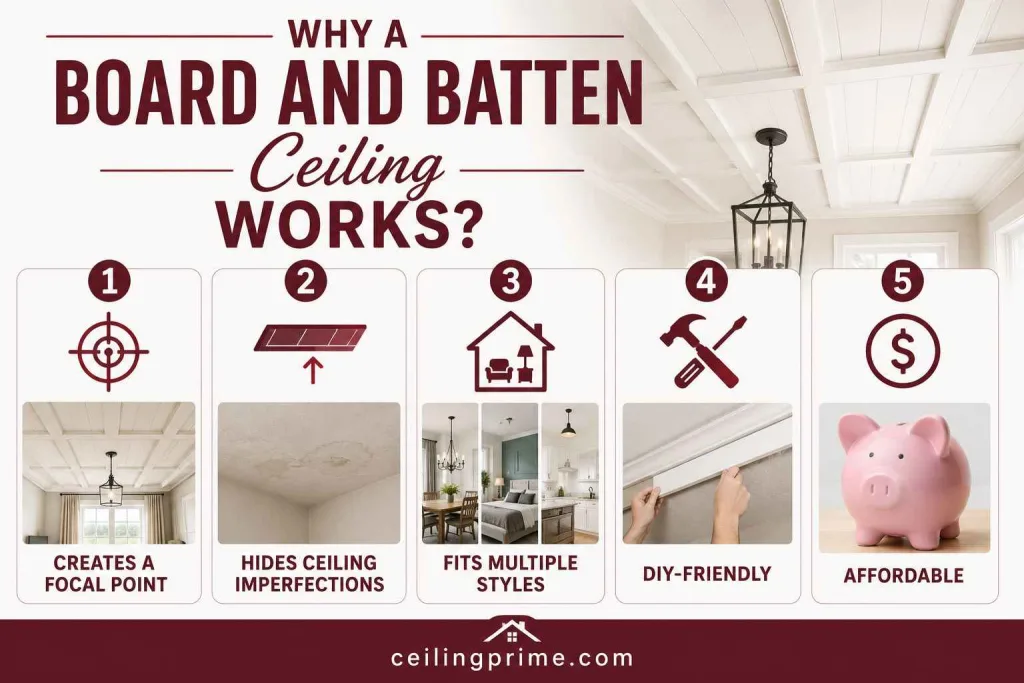
Why a Board and Batten Ceiling Works?
- Creates a focal point: The pattern draws the eye upward and adds architectural interest to a room that would otherwise have a flat, featureless drywall surface.
- Hides ceiling imperfections: The raised battens break up the surface and hide drywall seams, nail pops, and minor cracks without skim coating or retexturing.
- Fits multiple styles: Farmhouse, modern farmhouse, coastal, cottage, rustic, Scandinavian, and traditional interiors all use board and batten on ceilings and walls.
- DIY-friendly: MDF strips, a brad nailer, caulk, and paint. No advanced carpentry skills needed. One person can complete this project in a standard bedroom in a single weekend.
- Affordable: Total material cost for a 12×12 room runs $80–$200 depending on board material and spacing.
Materials: MDF vs Solid Wood for Board and Batten Ceiling
| Feature | MDF Strips | Solid Wood (Pine/Poplar) |
| Cost per 8-ft strip | $2–$5 | $3–$8 |
| Surface quality | Perfectly smooth — no knots or grain | Natural grain, may have knots |
| Cutting ease | Cuts clean with any saw | May splinter on edges |
| Paint finish | Absorbs paint heavily on cut edges — needs extra coats | Takes paint evenly |
| Moisture resistance | Poor — swells when wet | Fair — depends on species |
| Best for | Painted bedrooms, living rooms, dry interiors | Stained finish, higher-end projects |
MDF is the most popular choice for a painted board and batten ceiling because it is smooth, cheap, and cuts perfectly straight. This used a single 4×8 sheet of 1/2-inch MDF cut into 2-inch and 4-inch strips to cover a full 20-foot wall floor-to-ceiling for about $80 in materials. The same approach works on ceilings.
Tools and Supplies for a Board and Batten Ceiling Project
Tools:
- Brad nailer (Ryobi Brad Nailer or similar) with 1 1/4-inch brad nails.
- Stud finder — for locating ceiling joists.
- Miter saw or circular saw — for cutting strips to length.
- Jigsaw — for cutting around outlets, fixtures, and vents.
- Level — for keeping vertical boards plumb and horizontal boards straight.
- Tape measure and pencil — for layout.
Supplies:
- MDF strips (2-inch or 3-inch wide battens, 4-inch trim boards) or solid wood boards.
- Liquid Nails or construction adhesive — for extra hold between joists.
- Nail filler putty — for filling nail holes (never use caulk for this).
- Caulk — for filling gaps between battens and the ceiling surface, and between trim and walls.
- Primer and white paint (Behr Satin or similar).
- Painter’s tape.
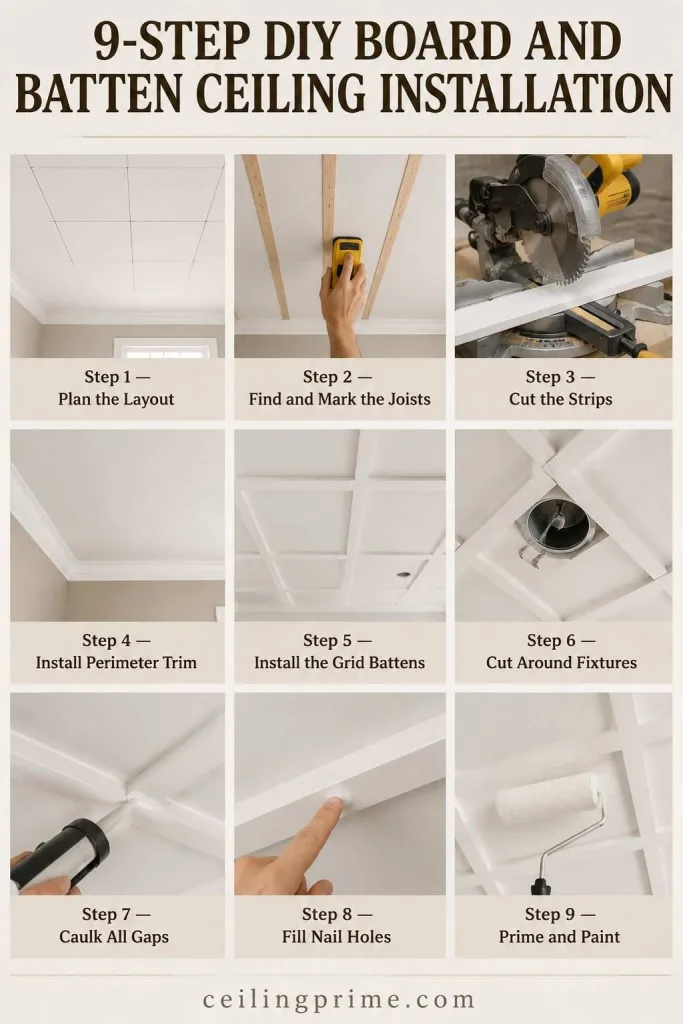
9-Step DIY Board and Batten Ceiling Installation
Let’s have a look at the some of the steps DIY board and batten ceiling installation.
Step 1 — Plan the Layout
Measure the ceiling length and width. Decide on batten spacing — 12 to 16 inches on center is standard for a farmhouse style look. Wider spacing (24 inches) creates a more modern, minimal grid. Narrower spacing (8–10 inches) adds more texture and detail. Sketch the pattern on paper or mark the ceiling with chalk lines.
Step 2 — Find and Mark the Joists
Use a stud finder to locate every ceiling joist. Mark each one with a pencil. Studs are normally 16 inches apart. Nailing battens into joists ensures they hold long-term.
Step 3 — Cut the Strips
Cut battens to length using a miter saw or circular saw. If using MDF, have Home Depot rip the 4×8 sheet into strips at the store for free. Request 2-inch and 4-inch widths. Sand cut edges lightly to remove splinters.
Step 4 — Install Perimeter Trim
Attach the wider trim boards (4-inch) around the ceiling perimeter where the ceiling meets the walls. These border strips frame the entire batten grid pattern. Apply Liquid Nails to the back and nail into joists or the top plate with the brad nailer.
Step 5 — Install the Grid Battens
Run the narrower strips (2–3 inch) across the ceiling in your chosen pattern — parallel lines, a grid, or a combination. Use a level to keep each strip straight. Apply adhesive and nail into joists at each crossing. Press firmly and hold for a few seconds. Keep spacing consistent by measuring from the edge of one batten to the edge of the next.
Step 6 — Cut Around Fixtures
Trace light fixture boxes, ceiling fans, vents, and smoke detectors with a pencil. Cut the openings with a jigsaw. Test fit before nailing.
Step 7 — Caulk All Gaps
Run a thin bead of caulk along every seam where a batten meets the ceiling surface and where the perimeter trim meets the wall. Smooth the caulk with a wet finger. Tape the ceiling and wall edges first for a crisp line — then caulk — then remove the tape while the caulk is still wet.
Step 8 — Fill Nail Holes
Press nail filler putty into every nail hole with your finger. Let it dry. Sand smooth with fine-grit sandpaper. Never fill nail holes with caulk — caulk does not sand flat and leaves visible mounds.
Step 9 — Prime and Paint
Apply one coat of primer to the entire ceiling (especially important on MDF — the cut edges absorb paint heavily). Let dry. Apply two coats of ceiling paint in your chosen color. White in Behr Satin is the most popular choice. Use a roller for the flat ceiling areas and a brush for the edges of each batten.
Ideas by Room: Where to Install
- Bedroom: Floor-to-ceiling board and batten on the accent wall behind the bed, with the pattern continuing onto the ceiling above the bed. White-on-white keeps the room calm and clean. This is the single most popular board and batten ceiling application for 2026.
- Living room: A full-ceiling grid pattern in white with exposed wood beams creates a coffered-style effect without the cost of a true coffered ceiling. Pendant lights or a chandelier hang between the battens.
- Kitchen: White board and batten on the ceiling with matching white cabinetry creates a cohesive cottage-style kitchen. Keep the battens above 8 feet to avoid interfering with cabinet tops.
- Bathroom: PVC or moisture-treated MDF board and batten handles bathroom humidity. Standard MDF swells when wet — avoid it in wet rooms without a waterproof primer.
- Porch: Board and batten on a porch ceiling in white creates a finished, architectural outdoor space. Use PVC or fiber cement boards for moisture resistance.
- Basement: Board and batten covers an unfinished basement ceiling at a fraction of the cost of drywall. Paint the battens white and the flat ceiling a contrasting color for depth.
Vaulted, Sloped, and Tray Ceiling Applications
- Vaulted ceiling: Run the battens vertically from the peak to the wall plate on each slope. The vertical lines draw the eye upward and emphasize the height. This treatment on a vaulted surface creates a cathedral effect with more texture than flat drywall.
- Sloped ceiling: Run battens parallel to the sloped surface. Use a sliding miter saw to cut the angled ends where the battens meet the wall. Champagne Chaos documented a full DIY install on a slanted ceiling with detailed angle-cutting instructions.
- Tray ceiling: Install board and batten inside the recessed center section of the tray. The battens fill the tray with texture while the flat perimeter stays clean. This combination is popular in dining rooms and master bedrooms.
- 8-foot ceiling: The technique works on standard 8-foot ceilings. Use thinner battens (1.5–2 inches) to keep the pattern proportional. Thick battens on a low ceiling look heavy and make the room feel shorter.
- 9-foot ceiling: The ideal height for board and batten — enough room for the pattern to breathe without overwhelming the space. 2–3 inch battens with 12–16 inch spacing is the sweet spot.

Board and Batten Ceiling Costs in 2026
| Item | Cost Range |
| MDF strips (12×12 room) | $50–$120 |
| Solid wood strips (12×12 room) | $100–$250 |
| Brad nails, adhesive, caulk, nail filler | $20–$40 |
| Primer + paint | $30–$60 |
| Total DIY (12×12 room, MDF) | $80–$200 |
| Professional installation | $3–$8 per sq ft |
This is one of the cheapest architectural upgrades you can make. This completed a 20-foot wall floor-to-ceiling for $80 in materials using a single MDF sheet from Home Depot. Ceiling installations cost roughly the same in materials but take longer because of overhead work.
Common Mistakes to Avoid
- Filling nail holes with caulk: Caulk does not sand flat. Use nail filler putty instead.
- Not taping before caulking: Caulk smears onto the ceiling and wall surfaces and leaves messy edges. Tape first, caulk, then remove tape while wet.
- Skipping the level: One crooked batten throws off the entire grid pattern. Check every strip with a level before nailing.
- Not pre-painting: MDF absorbs paint heavily on cut edges. Consider priming and painting strips before installation using an assembly line method with a roller. Touch up nail holes and caulk lines after installation.
- Inconsistent spacing: Measure from edge to edge, not center to center, for visual consistency. Mark every position before nailing a single strip.
- Using standard MDF in a wet room: MDF swells and warps in bathrooms and porches. Use PVC, fiber cement, or moisture-treated MDF for wet environments.
Frequently Asked Questions
Can I install board and batten on a ceiling by myself?
Yes. The strips are lightweight. A brad nailer makes the job fast. The hardest parts are overhead fatigue and painting. Budget a full weekend for a single room.
What spacing looks best on a ceiling?
12 to 16 inches on center for farmhouse style. 8 to 10 inches for a more detailed, traditional look. 20 to 24 inches for a modern, minimal grid.
Do I need to nail into ceiling joists?
Yes for long-term hold. A stud finder locates joists through the drywall. Adhesive alone can hold light MDF battens short-term, but nailing into joists prevents sagging over months.
What paint finish works best?
Satin. It reflects a small amount of light, wipes clean easily, and shows the raised batten detail without the glare of semi-gloss or the flatness of matte.
Is board and batten cheaper than coffered ceiling?
Yes. Board and batten costs $80–$200 DIY for a standard room. Coffered ceiling installation costs $10–$20 per square foot professionally. Board and batten creates a similar geometric effect at 1/10th the price.
Can I do board and batten on a popcorn ceiling?
Yes. Nail the battens through the popcorn texture into the ceiling joists. The battens sit on top of the texture. The popcorn stays hidden in the recessed panels between battens. Test for asbestos in pre-1986 homes before nailing.