How to do Popcorn Ceiling Texture: DIY Guide for Spray and Repair
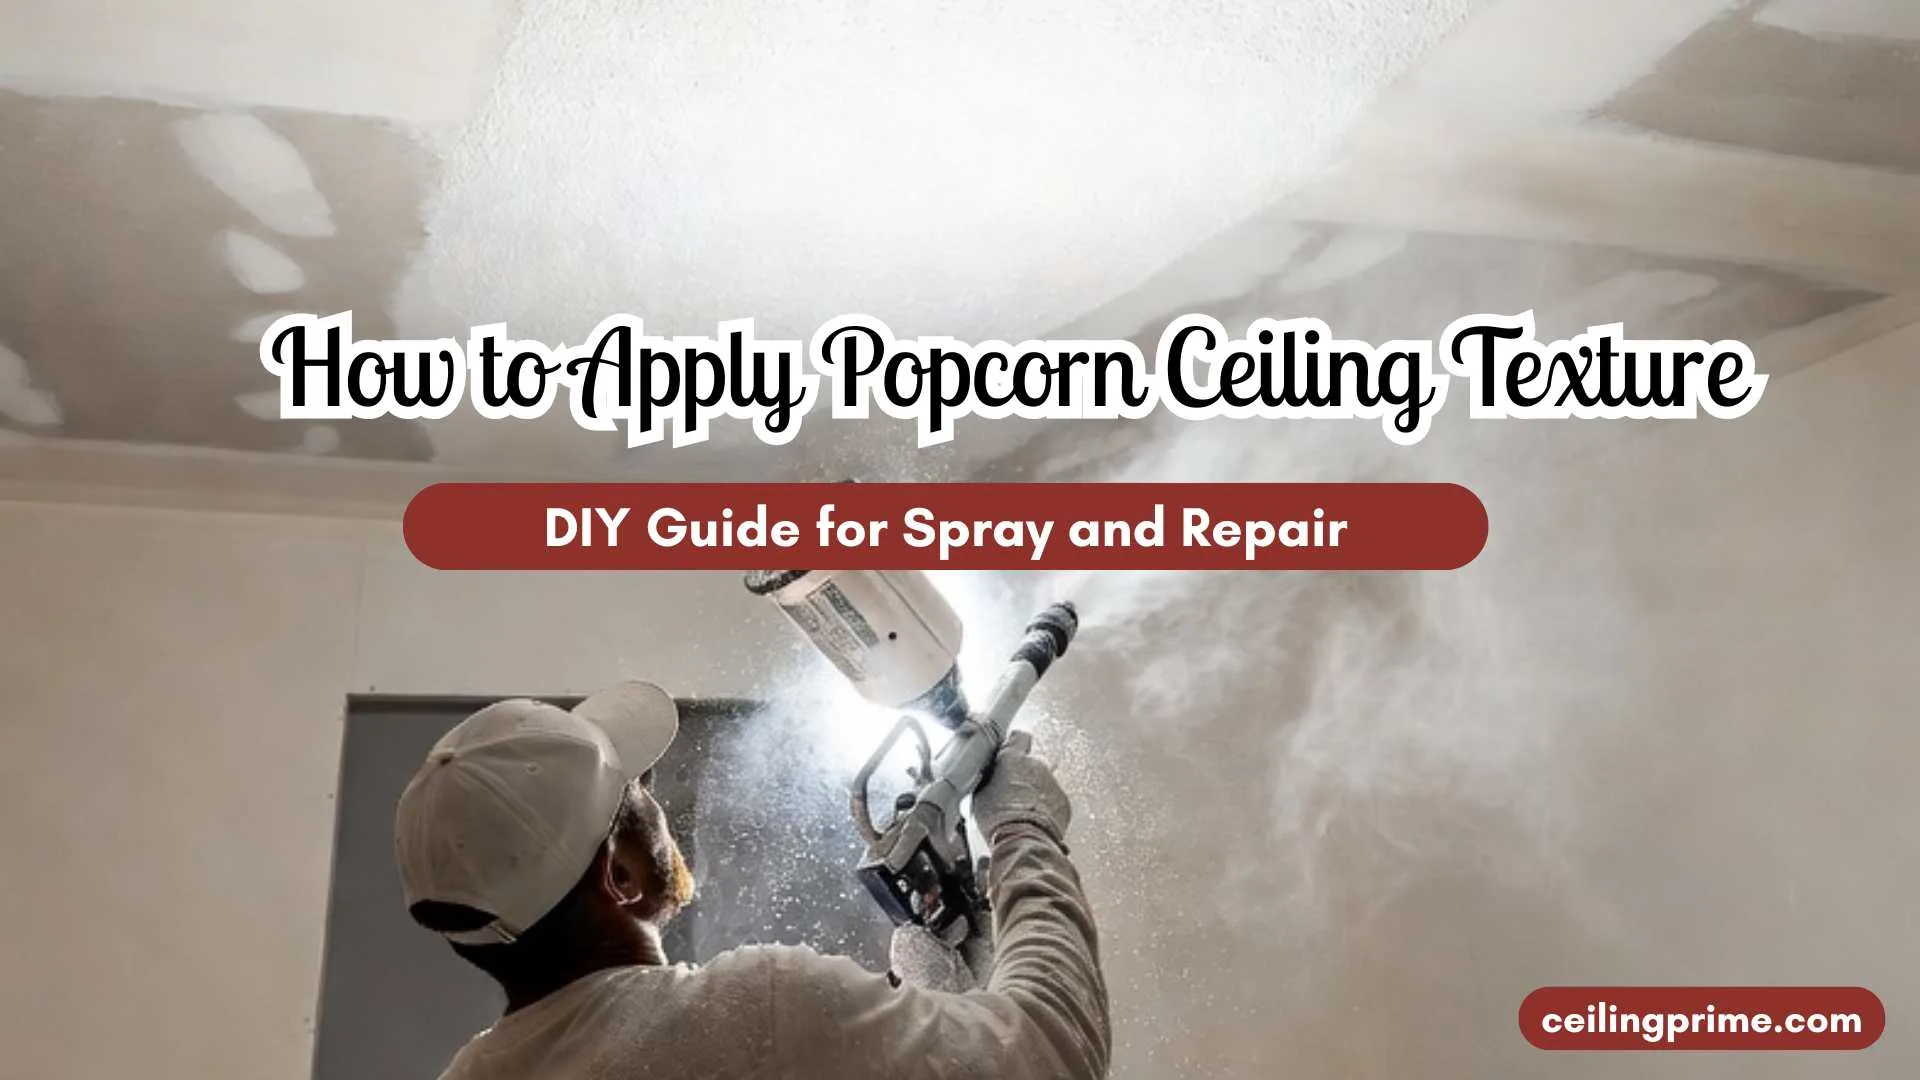
Applying popcorn ceiling texture involves mixing an acoustic texture compound — a blend of styrofoam or cellulose beads, adhesive, and water — and spraying it onto a primed ceiling using a hopper gun and air compressor, or aerosol spray cans for smaller areas.
The process is messy, requires heavy room protection, and takes practice to get consistent density and coverage. This guide covers both full-ceiling application and spot repair, with honest notes on what is achievable for a DIYer and when professional application makes more sense.
Important: Asbestos Check Before Applying Texture to Any Pre-1980 Ceiling
If you are applying new texture over an existing ceiling — including patch repair after partial removal — check the ceiling’s age first. For pre-1980 ceilings in Austin, any existing texture may contain asbestos. Spraying water-based texture compound onto an asbestos-containing surface disturbs the existing material. Sanding, scraping, or mechanically preparing the area around the patch also disturbs it.
Have a licensed inspector test the existing ceiling before any patch work on pre-1980 Austin homes. If the test is positive at the Environmental Protection Agency (EPA) threshold of 1% or more, asbestos abatement is required before any repair or texture application.
Materials and Tools
| Popcorn ceiling texture mix | Dry powder or pre-mixed; medium texture for general use | Available at Home Depot, Lowe’s. Dry powder gives more control over consistency; pre-mixed is faster. |
| Hopper gun | Drywall hopper gun (gravity-fed); 1.5–2.5mm orifice | Works with air compressor at 25–45 PSI. Adjust orifice size for coarse vs. fine texture density. |
| Air compressor | Minimum 1.5 CFM at 90 PSI; tank preferred | A small pancake compressor is adequate for light residential work. Consistent pressure = consistent texture. |
| Aerosol spray texture cans | Homax Knockdown or Popcorn Ceiling Spray; shake >1 minute | Best for repairs under 2–3 sq ft. Shake vigorously before use and between passes. |
| Drywall primer | PVA primer; let dry overnight before texturing | Unpainted drywall absorbs texture too aggressively. Primer creates consistent absorption across the surface. |
| Plastic sheeting | 4-mil poly, enough to cover full floor and walls | Texture falls and splashes. Cover everything — walls, windows, fixtures, floor — completely. |
| Painter’s tape | Standard blue tape | Tape plastic sheeting to wall surfaces at the ceiling line. Also masks crown molding and light fixture trims. |
| Safety glasses and N95 mask | Full-seal safety glasses; N95 minimum respirator | Texture particles fall on your face and into eyes during overhead spraying. Both are required, not optional. |
| Ladder | Step ladder or extension ladder for ceiling height | Do not attempt to spray overhead while balancing on a step stool. |
| Scrap drywall or cardboard | Test piece before applying to ceiling | Calibrate spray density and pressure on a test piece before touching the ceiling. |
Step-by-Step: How to do Popcorn Ceiling Texture
Prepare the room completely before mixing anything
Remove all furniture, or move to the center and cover entirely with plastic. Run plastic sheeting up the walls and tape it at the ceiling line. Cover light fixtures and remove ceiling fan blades. Remove all switch plates and outlet covers on walls that could catch overspray. Tape off crown molding or trim.
Prime the ceiling and let it dry overnight
Apply PVA drywall primer to the full ceiling using a 3/4″ nap roller. Let it dry completely — minimum overnight, 12–24 hours. Applying texture to unprimed drywall creates uneven absorption and texture inconsistency across the ceiling. The primer creates a uniform surface for the texture to bond to.
Mix the texture to the right consistency
For dry powder mix: add powder to water (not water to powder) following manufacturer ratios. The target consistency is similar to thin pancake batter or loose cottage cheese — it should flow off the mixing paddle but not be watery. A common mistake is mixing too thin; if the mix drips freely from the paddle without any resistance, it is too wet and will sag off the ceiling before tacking.
Test your spray on a scrap piece first
Hold the hopper gun or aerosol can at 12–18 inches from the scrap piece and make a sweeping pass. Check the density and aggregate size against the existing ceiling if you are doing a patch repair. For a hopper gun: adjust air pressure (higher pressure = finer, flatter texture; lower pressure = coarser, more pronounced aggregate). For aerosol: test different distances — closer gives denser coverage, farther gives lighter.
Apply the first pass across the ceiling
Hold the hopper gun at 12–18 inches from the ceiling surface and move in a steady, consistent back-and-forth motion, overlapping each pass by about 30%. Work in one direction across the full ceiling, then reverse direction for a second pass if needed for coverage. Keep your wrist speed consistent — slowing down creates heavy spots; speeding up creates thin spots. Do not try to get full coverage in one pass.
Let the first coat tack before evaluating
Wet texture looks more uniformly covered than dry texture. Wait 15–20 minutes for the first pass to tack before deciding whether additional coverage is needed. What looks sparse when wet often fills in visually as it dries.
Apply a second pass if coverage is uneven
Most ceiling applications need two passes to achieve consistent aggregate density across the full surface. The second pass should go in a different direction from the first for more even coverage.
Do not touch or manipulate the wet texture
Popcorn texture must be left completely undisturbed while drying. Do not roll it, brush it, or try to even it out once applied. The aggregate is soft when wet and will flatten or distort with any contact. Leave the room and let it dry.
Dry overnight — minimum 24 hours
Texture applied in the morning should not be touched until the following day. In Austin’s high-humidity summer months, drying can take 30–36 hours. Do not use a heat gun or fan to force-dry — rapid drying causes the texture to crack.
Prime and paint after full drying
After the texture is fully dry, apply a coat of ceiling paint using a slit foam acoustical roller or a 3/4″ thick nap roller. This seals the texture and provides the final color. Fresh texture is porous and absorbs paint heavily — plan for more paint than expected on the first coat.
How to spray popcorn ceiling Texture? Aerosol Spray Can Method (Small Repairs)
For repairs under 2–3 square feet, aerosol popcorn ceiling spray cans (such as Homax Popcorn Ceiling Spray) are the most practical option. A hopper gun setup is overkill for a small patch, and mixing a full batch of texture compound produces far more material than needed.
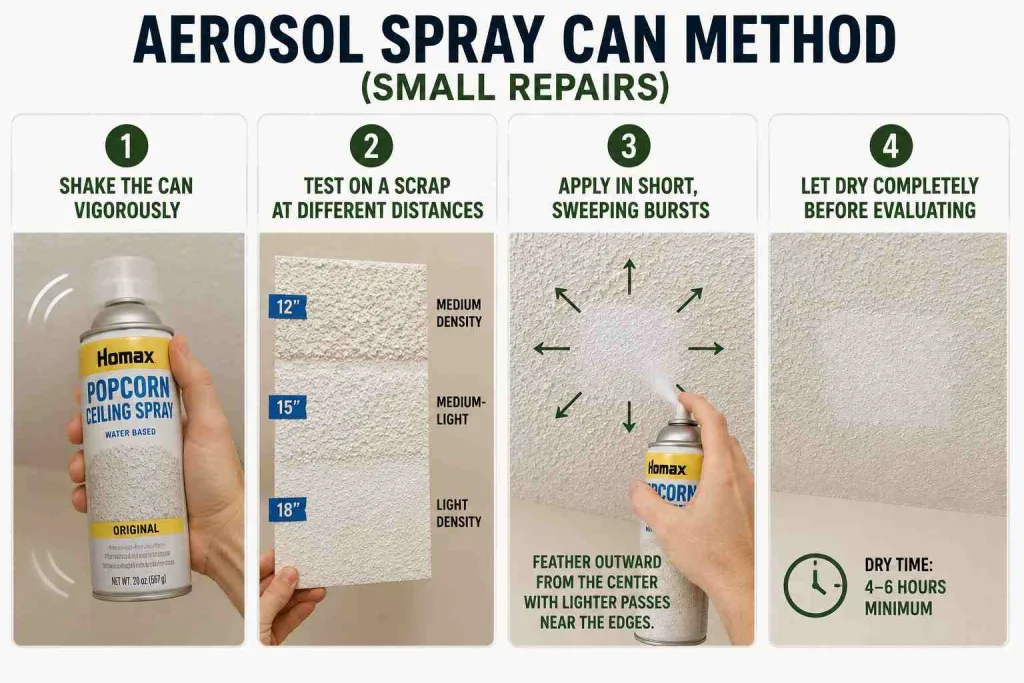
- Shake the can vigorously for at least one minute — The aggregate settles to the bottom. Under-shaking produces light, watery texture without the beads. Shake again between passes.
- Test on a scrap piece at different distances — Typically 12 inches gives medium density; 18 inches gives lighter, finer texture. Match to the existing ceiling’s aggregate density.
- Apply in short, sweeping bursts at the edges of the patch area — Blend the new texture into the surrounding existing texture by feathering the spray outward from the patch center, using progressively lighter passes near the edges.
- Let dry completely before evaluating the match — Aerosol texture always looks lighter and sparser when wet than when dry. Do not apply a second coat until fully dry (4–6 hours minimum).
Sponge Method (Very Small Repairs)
For repairs smaller than a dinner plate — nail pops, small cracks, or spot repairs — a coarse cellulose sponge dipped in texture compound and dabbed onto the ceiling surface gives more controlled, precise texture matching than a spray can. The sponge produces a cottageier, less-uniform texture that can more closely match aged ceiling texture than a mechanical spray.
Mix all-purpose joint compound to a slightly looser consistency than wall application. Dip the sponge, wring out excess so it does not drip, and dab onto the repair area in a stippling motion. Build up in multiple light applications rather than one heavy one. Let each application tack before the next.
Patch Repair: Blending Into an Existing Ceiling
Matching new popcorn texture to an existing ceiling is one of the hardest parts of this job. The existing texture has aged, been painted, and may have a specific aggregate size and density that no current product exactly replicates.
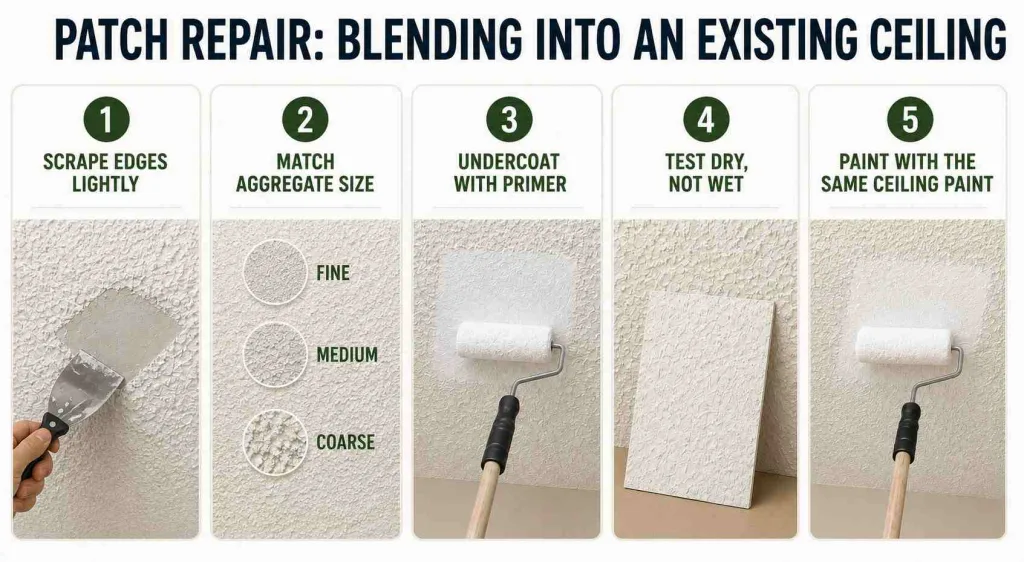
Here is how to get the closest match:
- Lightly scrape the edges of the repair area — Feather the surrounding texture slightly outward from the patch with a scraper. This creates a gradual transition rather than a hard edge between old and new texture.
- Match the aggregate size — Compare the existing ceiling texture under raking light to determine whether it is fine (small, uniform beads), medium, or coarse. Adjust hopper pressure and orifice accordingly, or choose the aerosol can labeled for your texture type.
- Undercoat the patch area with primer — The bare drywall in the repair area absorbs texture differently than the painted surrounding ceiling. A primer coat on the repair area creates a more consistent absorption baseline.
- Test dry, not wet — Spray your test piece, let it dry fully, and then compare it to the existing ceiling under the same lighting. Wet texture always looks different from dry — always test dry.
- Paint the patch area with the same ceiling paint — New texture is brighter and slightly different in color from aged, painted texture even after painting. In most cases, repainting the full ceiling surface produces a more seamless result than painting the patch only.
Troubleshooting Common Popcorn Ceiling Spray Application Problems
| Texture sagging off ceiling | Mix is too wet — add more dry texture powder. Also check that ceiling was primed; unprimed drywall allows texture to slide before tacking. |
| Uneven texture density | Inconsistent wrist speed or distance from ceiling. Practice sweeping motion on scrap until pace is consistent. Also check air pressure consistency (tank compressors help). |
| Texture drying too fast / cracking | Texture applied too thin, or ambient temperature too high. Apply in multiple thicker passes; avoid direct sunlight or AC draft on fresh texture. |
| Texture clumping or lumping | Mix not stirred thoroughly, or dry powder added too fast. Break up clumps before loading the hopper. Let mix sit 5 minutes after mixing and stir again. |
| Hard line between patch and existing ceiling | Edge of patch not feathered; primer not applied to patch area. Scrape the surrounding edge softer and blend out at a lower spray density. |
| Color mismatch after painting | New texture is brighter than aged ceiling. Solution: repaint the full ceiling, not just the patch. Color match is almost impossible on a spot-paint basis. |
Hopper Gun vs. Aerosol Can: Which Should You Use?
The right tool depends on the job size:
- Full ceiling application (new construction or full room re-texture) — Hopper gun with compressor. Faster coverage, more consistent density, better control of aggregate size. Cost to rent a hopper gun: $40–$80 per day at most Austin equipment rental shops.
- Medium repairs (1–10 sq ft) — Aerosol spray cans. Easier setup, no equipment to clean. Homax and similar brands are available at Home Depot. Buy extra cans — you will use more than you think and mid-job runs for more material are disruptive.
- Small spot repairs (<1 sq ft) — Sponge dabbing with joint compound. Most controlled method for tiny repairs; no spray waste, no equipment.
Frequently Asked Questions
Q. How to spray popcorn ceiling texture?
Mix the dry texture powder with water to a thin-batter consistency. Load the hopper gun, set air pressure to 25–40 PSI depending on desired density (higher pressure = finer texture), and spray in consistent, overlapping back-and-forth passes held 12–18 inches from the ceiling. Always test on a scrap piece first and let the test dry fully before applying to the ceiling.
Q. What is popcorn ceiling texture made of?
Modern popcorn ceiling texture is made from a mix of gypsum or calcium carbonate as the binder, with cellulose (shredded paper fibers), polystyrene (styrofoam) beads, or perlite as the aggregate. Pre-1978 formulas often also contained asbestos as an additional binder and fire-retardant — which is why pre-1980 ceilings require asbestos testing before any disturbance.
Q. Can I spray popcorn ceiling texture with an aerosol can?
Yes — aerosol spray cans work well for repairs up to 2–3 square feet. Shake vigorously for at least one minute before use, test at different distances on a scrap piece, and let dry completely before evaluating the match. For larger areas, a hopper gun is more practical and produces more consistent density.
Q. How long does popcorn ceiling texture take to dry?
At least 24 hours at normal room temperature. In Austin’s high-humidity summer months, full drying can take 30–36 hours. Do not paint, touch, or blow air across fresh texture — rapid drying causes cracking, especially in thick applications.
Q. Is applying popcorn ceiling texture a good DIY project?
For small repairs, yes — with practice on scrap pieces first. For full ceiling application on a new room, it is achievable for an experienced DIYer but requires proper equipment (hopper gun rental), heavy room protection, and patience with the consistency calibration.
The most common DIY failure point is skipping the test piece and applying directly to the ceiling at the wrong consistency — leading to sagging texture or uneven density that is very difficult to fix after drying.