How Do You Paint a Popcorn Ceiling Without Ruining the Texture?
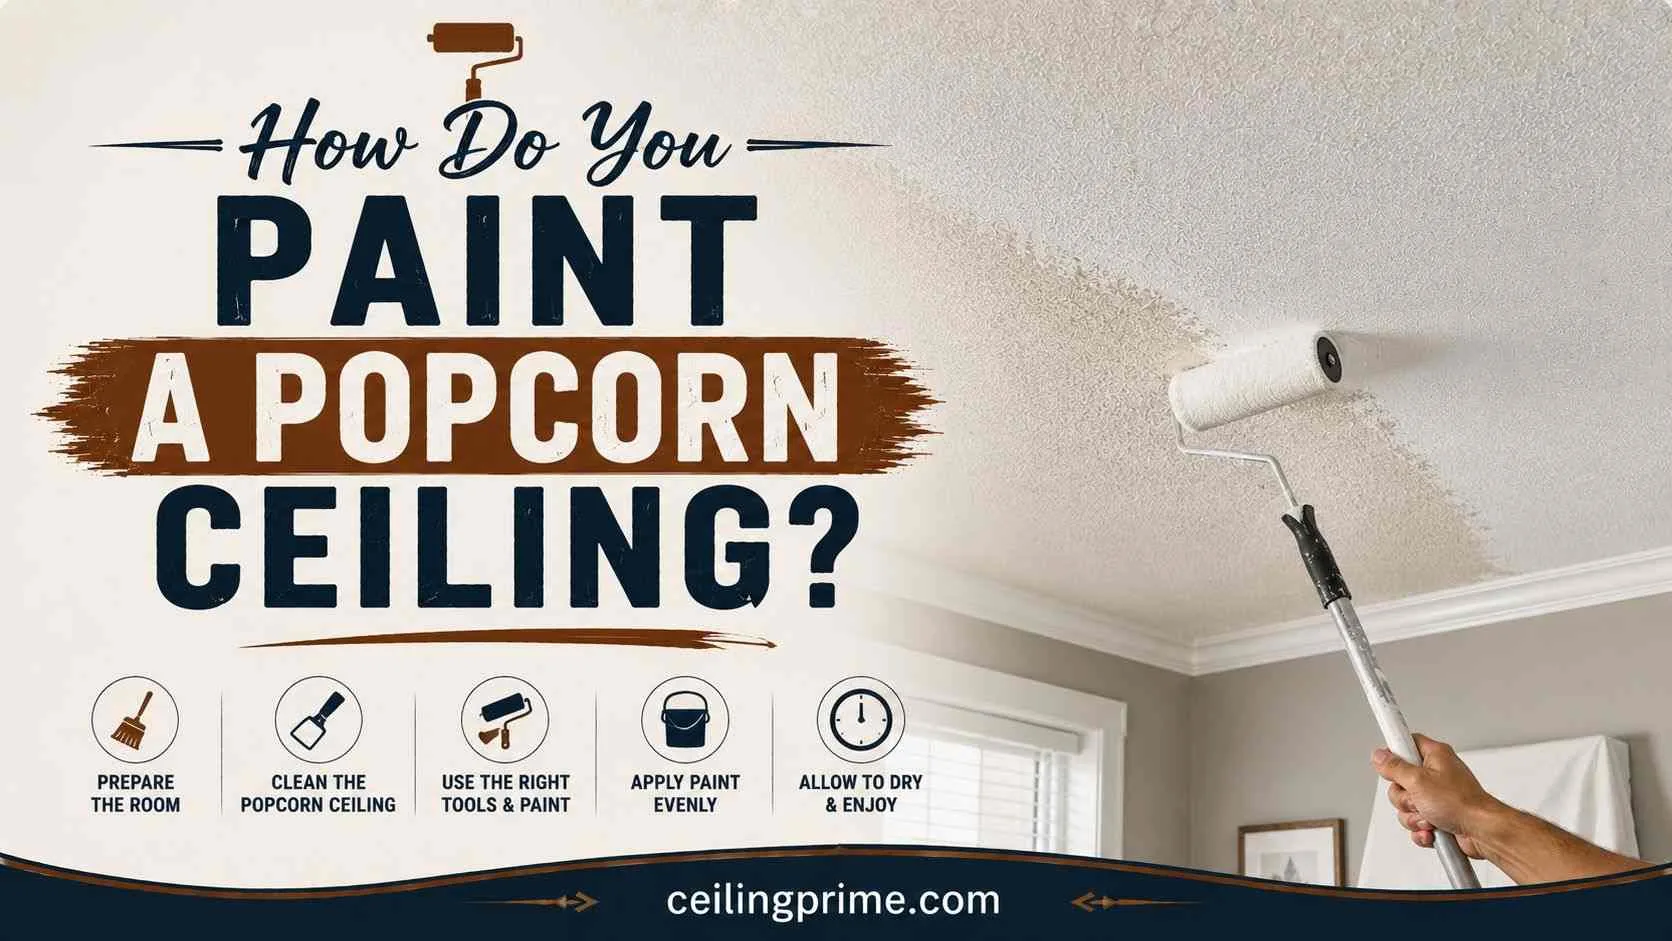
Popcorn ceilings are the hardest surface to paint in any home. The bumpy texture absorbs paint unevenly. Rollers tear the peaks off. Brushes flatten the bumps. Too much pressure pulls the entire texture off the drywall. Knowing how do you paint a popcorn ceiling without destroying it comes down to the right tool, the right paint, and the right technique.
This guide covers 3 application methods: airless sprayer (fastest and best), thick-nap roller (budget alternative), and brush (touch-ups only). It includes prep steps, the best paint for textured ceilings, first-time painting tips, mess prevention, and common mistakes that ruin the texture.
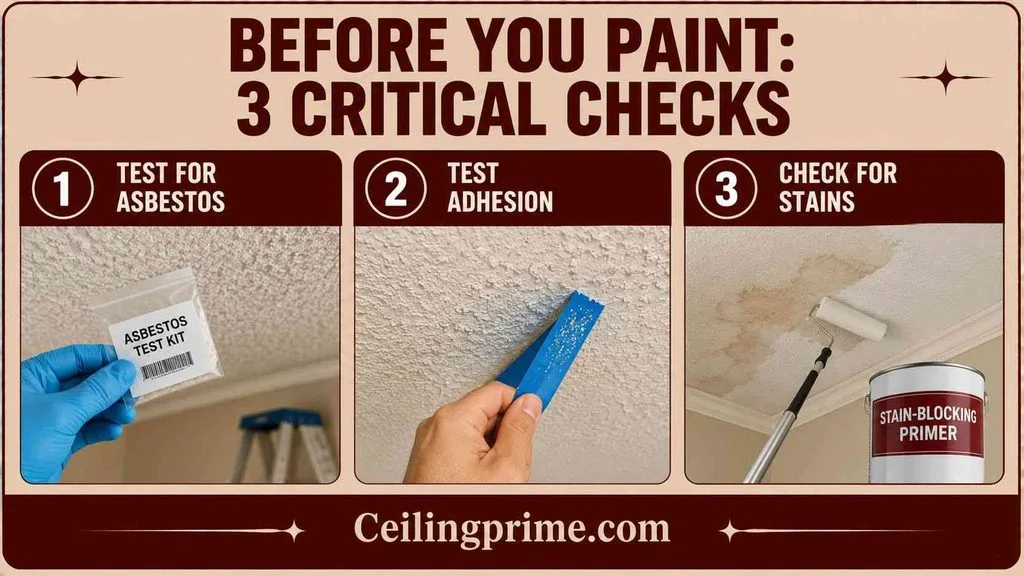
Before You Paint: 3 Critical Checks
1. Test for asbestos: Popcorn ceilings installed before 1986 may contain asbestos fibers. Painting over asbestos is legal and safe — it actually encapsulates the fibers. But sanding, scraping, or rolling aggressively can release fibers. Test before touching the surface. A mail-in test kit costs $25 to $50. Professional testing runs $200 to $400.
2. Test adhesion: Press a piece of painter’s tape onto the texture. Pull it off. If texture chunks come off with the tape, the adhesion is weak. Weak texture peels during painting. Apply a coat of primer to seal and bond the texture before painting. How do you paint a popcorn ceiling that is flaking? You prime it first.
3. Check for stains: Water stains, smoke damage, and nicotine bleed through regular paint. Apply stain-blocking primer over any discolored areas before painting. Oil-based or shellac-based primer blocks stains. Latex primer does not.
How to Prep a Popcorn Ceiling for Painting?
- Step 1: Clear the room. Move all furniture out. Cover the floor with drop cloths. Popcorn ceilings produce more drips and overspray than smooth surfaces.
- Step 2: Mask the walls. Run painter’s tape along the top of every wall at the ceiling line. Hang plastic sheeting from the tape to protect the upper walls.
- Step 3: Cover light fixtures, fans, and vents. Remove glass covers from light fixtures. Wrap ceiling fans with plastic bags. Tape over vent openings.
- Step 4: Dust the ceiling. Use a soft-bristle brush on an extension pole. Sweep gently across the surface to remove cobwebs, dust, and loose particles. Do not press hard. Aggressive dusting pulls texture off.
- Step 5: Spot-prime stains with stain-blocking primer using a small brush or mini roller. Let dry 1 to 2 hours.
- Step 6: Prime the full ceiling if the adhesion test showed weak texture. One coat of acrylic primer seals the texture and provides a bonding surface for the topcoat.
Prep takes longer than painting. A well-prepped ceiling paints in under an hour. A poorly prepped ceiling takes multiple coats and produces texture damage. This is the answer to how do you paint a popcorn ceiling without making a mess: thorough prep before a drop of paint touches the surface.
How Do You Paint a Popcorn Ceiling with a Sprayer (Best Method)
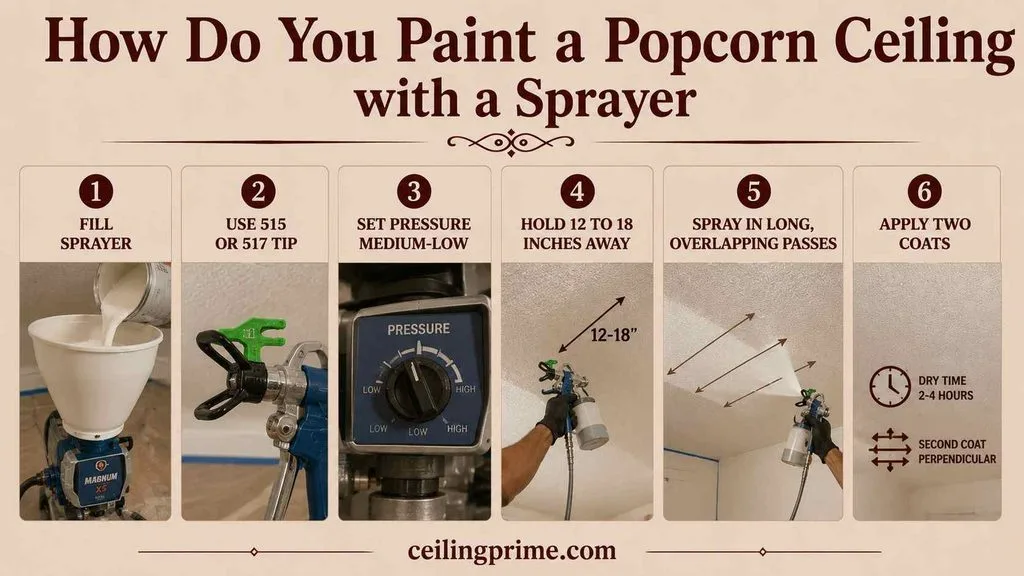
An airless sprayer is the best tool for popcorn ceilings. The spray deposits paint into every bump and valley without physical contact. No roller pressure. No brush strokes. No texture damage. This is the fastest way to paint popcorn ceilings with sprayer.
- Step 1: Fill the sprayer hopper with flat ceiling paint. Do not thin the paint unless the manufacturer instructions say to.
- Step 2: Use a 515 or 517 spray tip. These tips produce a 10-to-12-inch fan pattern at medium flow. Too narrow a tip concentrates paint and causes drips. Too wide a tip produces thin coverage.
- Step 3: Set the pressure to medium-low. High pressure atomizes the paint too finely and creates excessive overspray. Start low and increase until the spray pattern is even.
- Step 4: Hold the gun 12 to 18 inches from the ceiling surface. Keep the distance consistent.
- Step 5: Spray in long, overlapping passes. Overlap each pass by 50%. Move at a steady walking pace. Do not stop or slow down mid-pass — that creates thick spots.
- Step 6: Apply one light coat. Let dry 2 to 4 hours. Apply a second coat perpendicular to the first (if the first coat went east-west, spray the second coat north-south).
One room takes 15 to 30 minutes with a sprayer. Rental cost for an airless sprayer: $60 to $100 per day. This is faster than rolling by a factor of 3 to 5.
How Do You Paint a Popcorn Ceiling with a Roller (Budget Method)
A roller is the budget alternative when a sprayer is not available. It works. But it takes more time and more care. The wrong roller or too much pressure tears the texture off. Can you paint a popcorn ceiling with a roller? Yes. Here is how to do it without pulling the texture down.
- Step 1: Use a thick-nap roller. Choose a 3/4-inch or 1-inch nap lamb’s wool or woven polyester roller cover. Thick nap reaches into the texture valleys. Flat or short-nap rollers skip the valleys and tear the peaks.
- Step 2: Load the roller with plenty of paint. Dip fully into the paint tray. Roll off the excess on the tray ramp. The roller should be heavy with paint but not dripping.
- Step 3: Roll in one direction only. Do not roll back and forth. One slow, steady pass in one direction. Lift the roller at the end of each stroke. Return to the starting edge and make the next pass.
- Step 4: Do not press hard. Let the weight of the roller do the work. Pressing compresses and pulls the texture off. Light, even pressure deposits paint without damaging the surface.
- Step 5: Overlap each pass by half the roller width.
- Step 6: Apply one coat. Let dry 2 to 4 hours. Apply a second coat in the same direction.
Rolling a popcorn ceiling takes 2 to 3 times longer than spraying. A standard bedroom ceiling takes 45 minutes to 1.5 hours by roller. Painting popcorn ceiling without a sprayer is doable but slower and riskier for texture damage.
How to Paint a Popcorn Ceiling by Hand (Brush Only)
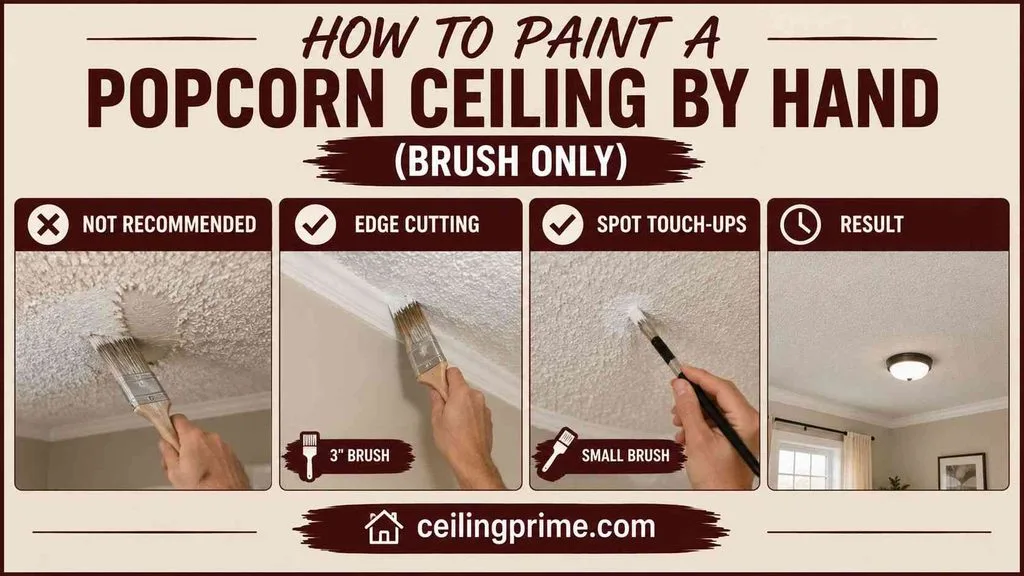
A brush is not recommended for full-ceiling painting. Bristles dig into the texture and pull it off. Brush strokes flatten the bumps. But a brush is the right tool for two situations.
- Edge cutting: Use a 3-inch brush to cut in the 2-inch perimeter where the ceiling meets the wall. The sprayer or roller cannot reach this edge cleanly. Dab the paint with the brush tip — do not drag. Dabbing deposits paint without pulling texture.
- Spot touch-ups: After the main coat dries, touch up any missed spots with a small brush. Dab, do not stroke. Match the surrounding coverage.
A full ceiling painted by brush takes 3 to 5 hours and produces an uneven finish. A brush is a support tool, not the primary application method.
How Do You Paint a Popcorn Ceiling: Sprayer vs Roller vs Brush
| Factor | Airless Sprayer | Thick-Nap Roller | Brush |
| Speed | 15–30 min/room | 45–90 min/room | 3–5 hours/room |
| Texture damage risk | None (no contact) | Low to medium | High |
| Coverage quality | Best — fills every bump | Good — may miss valleys | Poor — uneven |
| Overspray/mess | High — mask everything | Low | None |
| Cost | $60–$100/day rental | $10–$20 for roller + cover | $5–$10 for brush |
| Best for | Full ceilings (primary tool) | Full ceilings (budget) | Edges + touch-ups only |
The answer to how do you paint a popcorn ceiling for the best result is an airless sprayer. The answer for the lowest cost is a thick-nap roller. The answer for edges and spot work is a brush. Most homeowners use a sprayer or roller for the field and a brush for the perimeter.
Best Paint for Popcorn Ceiling
Here are the details of best paint for popcorn ceiling.
- Finish: Flat or matte. Flat paint hides texture imperfections and absorbs light evenly. Eggshell and satin reflect light and highlight every bump, seam, and roller mark. Never use semi-gloss or gloss on a popcorn ceiling.
- Type: Acrylic latex. It dries fast, cleans up with water, and flexes with temperature changes without cracking. Oil-based paint yellows over time on ceilings.
- Viscosity: Use the paint straight from the can. Do not thin it. Popcorn texture absorbs thin paint and requires 3 or more coats. Full-viscosity paint covers in 2 coats.
- Color: White or off-white is standard. Bright white reflects the most light. Warm whites (cream, linen) soften the look. Colored ceilings are possible but show roller marks and spray inconsistencies more than white.
How do you repaint a popcorn ceiling that was previously painted? Use the same flat latex paint. No stripping needed. Prime only if the old paint is peeling, stained, or oil-based. Two coats over old paint produce a fresh, even finish.
How to Paint a Ceiling for the First Time?
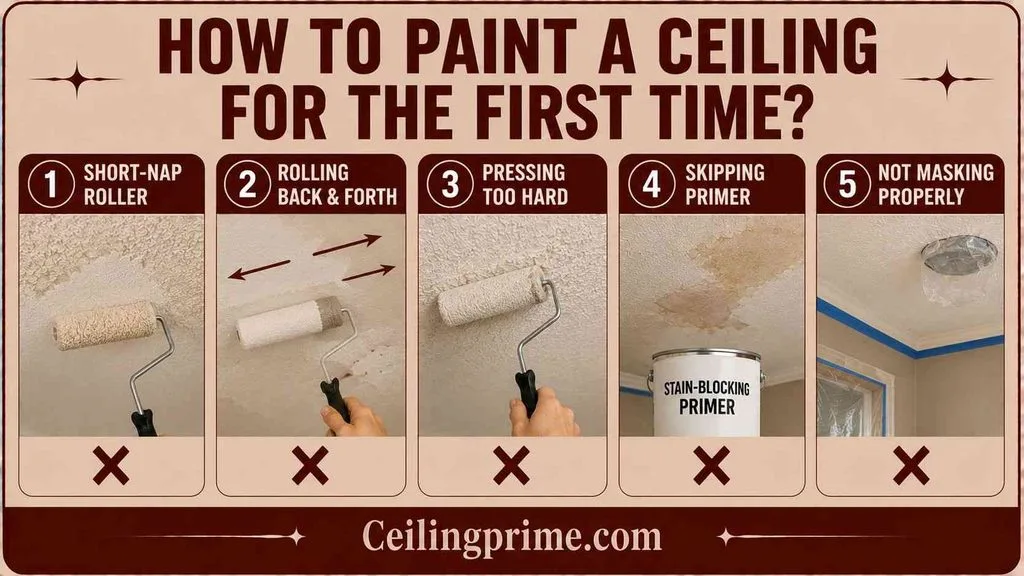
First-time ceiling painters make 5 predictable mistakes. Avoid them and the ceiling looks professional.
- Mistake 1: Using a short-nap roller. Short nap skips the texture valleys and tears the peaks. Use 3/4-inch or 1-inch nap.
- Mistake 2: Rolling back and forth. Multi-direction rolling tears texture. Roll one direction only. Lift at the end of each stroke.
- Mistake 3: Pressing too hard. Light pressure deposits paint. Heavy pressure removes texture. Let the tool weight do the work.
- Mistake 4: Skipping primer on stains. Stains bleed through flat paint within days. Prime stained areas with stain-blocking primer before painting.
- Mistake 5: Not masking walls and fixtures. Ceiling paint drips more than wall paint. Cover everything below the ceiling line.
How to Paint a Popcorn Ceiling Without Making a Mess?
- Cover the entire floor with canvas or plastic drop cloths.
- Tape and drape plastic sheeting along all walls.
- Wrap ceiling fans, light fixtures, and smoke detectors in plastic.
- Wear a hat, safety glasses, and old clothes. Overhead painting drips on you.
- Use a drip guard on the roller frame if rolling. The guard catches drips before they fall.
- If spraying, mask the room like a paint booth. Overspray coats everything within 6 to 8 feet of the spray pattern.
Popcorn Ceiling Painting Costs
| Item | Cost |
| Flat ceiling paint (1 gallon, covers 300–400 sq ft) | $25–$50 |
| Stain-blocking primer (1 quart) | $10–$20 |
| Thick-nap roller cover + frame | $10–$20 |
| Airless sprayer rental (per day) | $60–$100 |
| Drop cloths, tape, plastic sheeting | $15–$30 |
| Total DIY (one room, roller) | $50–$100 |
| Total DIY (one room, sprayer) | $100–$180 |
| Professional painting (per sq ft) | $1–$3 |
The Right Tool and the Right Pressure Make It Easy
Now you know how do you paint a popcorn ceiling without destroying the texture. Spray for the best and fastest result. Roll with a thick nap for the budget option. Dab with a brush for edges only. Prime stains first. Use flat latex paint. Two coats. One direction. Light pressure. And cover everything below the ceiling before you start.
Frequently Asked Questions
How do you paint over a popcorn ceiling without it falling off?
Prime first if the texture is loose. Use a thick-nap roller or airless sprayer. Apply light pressure. Roll in one direction only. Never scrub or roll back and forth. The texture falls off when you apply too much pressure or use a short-nap roller.
Can you paint a popcorn ceiling with a roller?
Yes. Use a 3/4-inch or 1-inch nap roller. Load it heavy with paint. Roll in one direction with light pressure. Two coats produce full coverage. It takes longer than spraying but costs less.
What is the fastest way to paint a popcorn ceiling?
An airless sprayer. One room takes 15 to 30 minutes. Two coats finish in under an hour including drying time between coats. Rental cost is $60 to $100 per day.
Do you need to prime a popcorn ceiling before painting?
Only if: the texture is flaking (primer reseals it), there are water or smoke stains (stain-blocking primer prevents bleed-through), or the surface has never been painted (bare texture absorbs the first coat unevenly). Previously painted popcorn in good condition does not need primer.
How many coats does a popcorn ceiling need?
Two coats for full coverage. The bumpy texture absorbs the first coat unevenly. The second coat evens the color and fills missed spots. Three coats may be needed when painting a dark ceiling white.
How do you repaint a textured ceiling that is not popcorn?
Orange peel, knockdown, and skip-trowel textures paint the same way as popcorn. Use a thick-nap roller or sprayer. Light pressure. One direction. Two coats. The technique applies to every textured ceiling surface.