Paint on Ceiling Bubbling: 7 Causes, How to Fix & How to Prevent
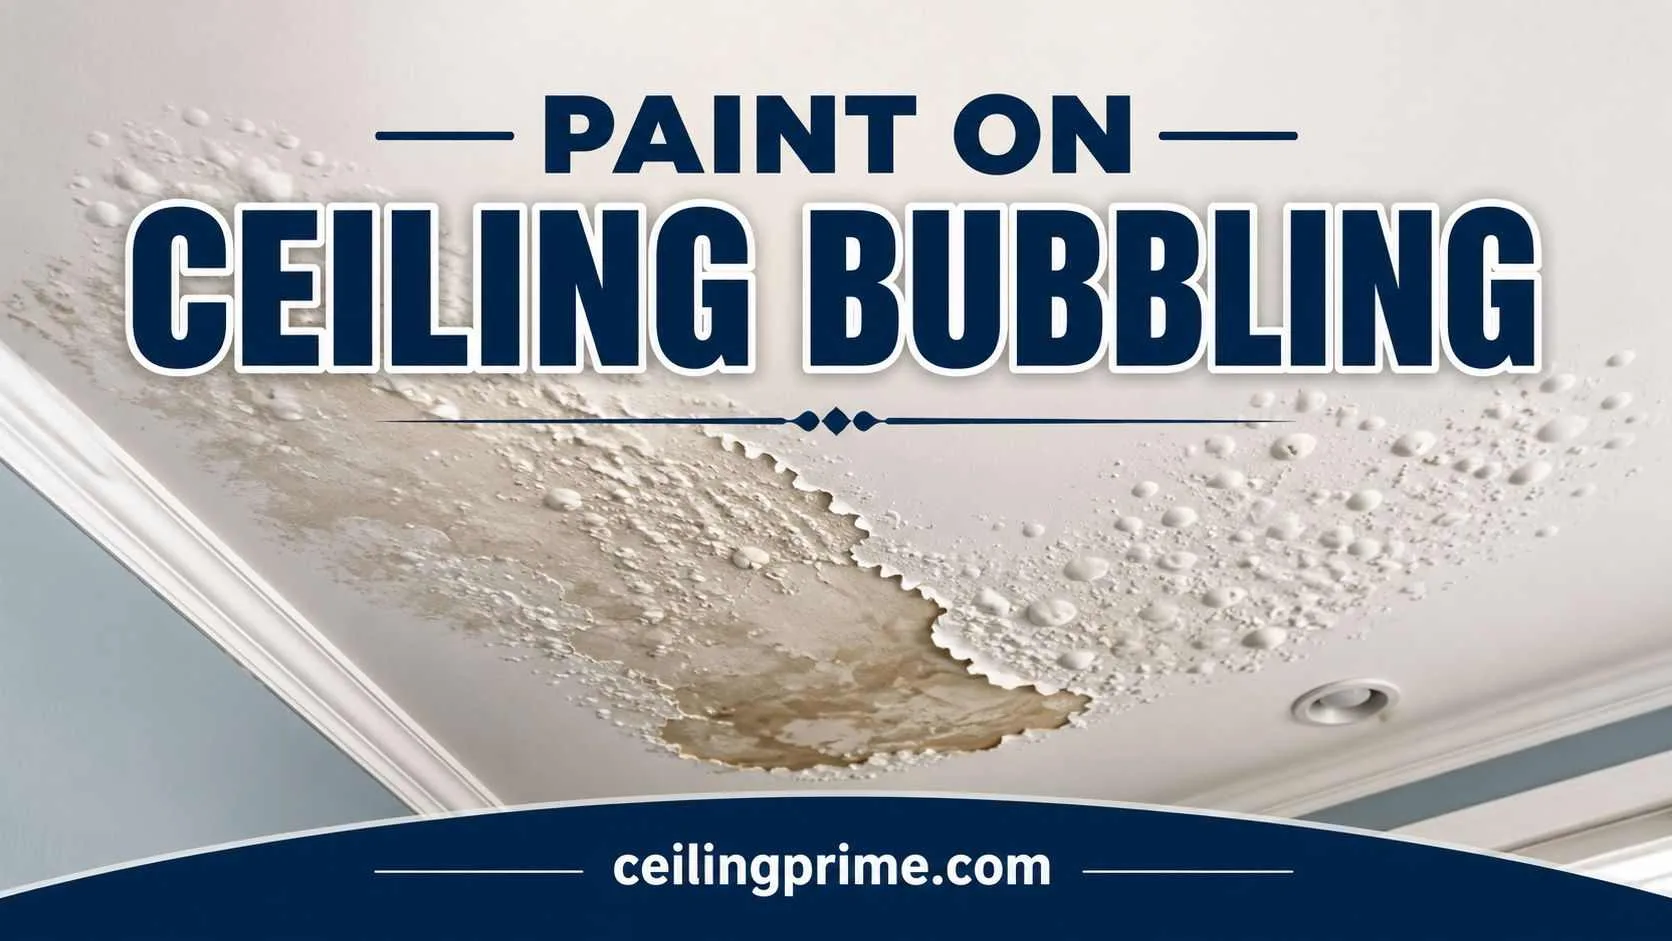
Paint on ceiling bubbling looks like blisters rising from the surface. Small domes of paint lift away from the drywall. Some are filled with air. Some are filled with moisture. Some crack and flake off. The problem can appear days after painting or years later.
This guide covers the 7 causes. It explains what each bubble type looks like. It walks through step-by-step repair. It covers bathroom ceilings, showers, water damage, and white paint bubbling. Every cause gets a specific fix. No details are repeated.
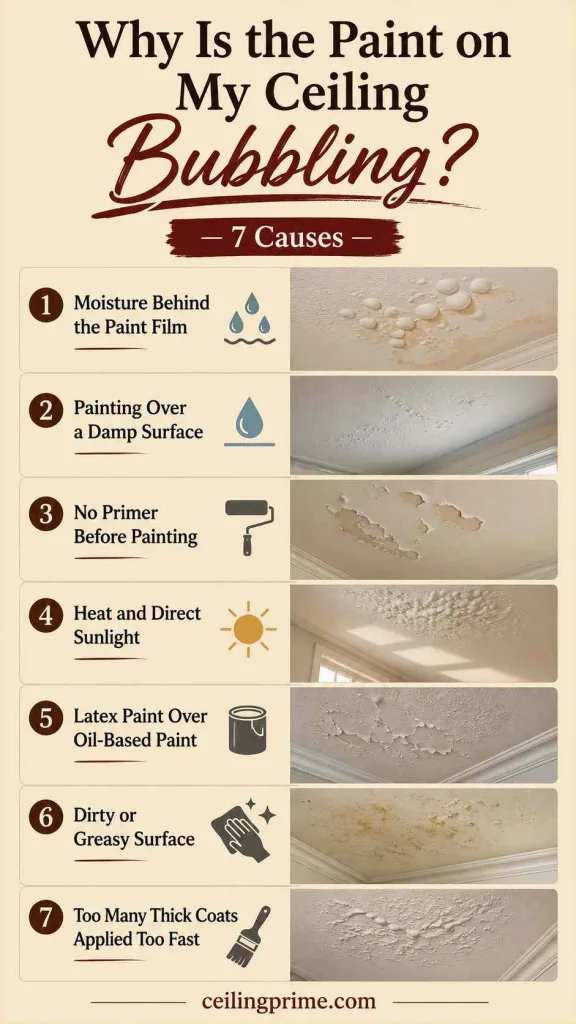
Why Is the Paint on My Ceiling Bubbling? 7 Causes
1. Moisture Behind the Paint Film
This is the number one cause. Moisture gets between the paint and the drywall. Steam, condensation, or a leak pushes water vapor under the paint film. The moisture lifts the paint away from the surface. The bubble fills with water or damp air. Pop a bubble with a pin. If liquid comes out, moisture is the cause. This explains most ceiling paint bubbling in bathrooms and kitchens.
2. Painting Over a Damp Surface
The drywall was not fully dry when painted. Water was trapped under the fresh coat. The moisture had nowhere to go. It pushed the paint film outward. This happens when painters rush after a water stain repair. It happens when humidity is high on painting day. The surface must be bone dry before any primer or paint.
3. No Primer Before Painting
Primer bonds paint to the surface. Without it, paint sits loosely on bare drywall. Joint compound absorbs differently than the paper face. The paint adhesion fails at those transitions. Bubbles form along drywall seams and patched areas.
4. Heat and Direct Sunlight
Extreme heat dries the outer layer of paint faster than the layer underneath. The top skin hardens. Moisture in the lower layer turns to vapor. The vapor pushes the hardened top layer upward. This happens in attic rooms and south-facing rooms with skylights. Painting on a hot day (above 90°F) or in direct sunlight causes bubbles within hours.
5. Latex Paint Over Oil-Based Paint
Oil-based and latex paints do not bond to each other. Latex applied directly over old oil-based paint lifts and bubbles. The two chemistries repel each other at the surface. A bonding primer between the two layers solves this. Test the existing paint with denatured alcohol. If the paint softens, it is latex. If it does not react, it is oil-based.
6. Dirty or Greasy Surface
Grease, dust, soap residue, and cooking film prevent paint from sticking. Kitchen ceilings collect grease vapor over years. Bathroom ceilings collect soap residue from shower mist. Paint does not bond to a dirty surface. The film lifts within weeks. Clean the ceiling with a degreaser before painting.
7. Too Many Thick Coats Applied Too Fast
Each coat needs time to dry before the next one goes on. Stacking thick coats traps solvents between layers. The trapped solvents create gas as they try to evaporate. The gas pushes the outer layer up. Apply thin coats. Wait 2 to 4 hours between each one.
Paint on Bathroom Ceiling Bubbling: The Most Common Room
Bathrooms produce more ceiling paint bubbles than any other room. The reason is steam. Hot showers fill the room with moisture. The steam rises. It hits the coldest surface — the ceiling. Moisture condenses on the paint film. It seeps behind the coating. The paint lifts.
Paint on Ceiling Bubbling Above Shower
The area directly above the shower gets the most steam. It is the hottest, wettest zone on the ceiling. Bubbling above the shower is almost always a ventilation problem. The exhaust fan is too weak. Or it is not running long enough. Or there is no exhaust fan at all.
Fix: Run the exhaust fan during every shower. Keep it running 20 minutes after. Upgrade to an 80+ CFM fan with a humidity sensor. Use a bathroom-rated paint with mildew resistance. Apply moisture-resistant primer before painting.
Paint on Ceiling Bubbling from Water Damage
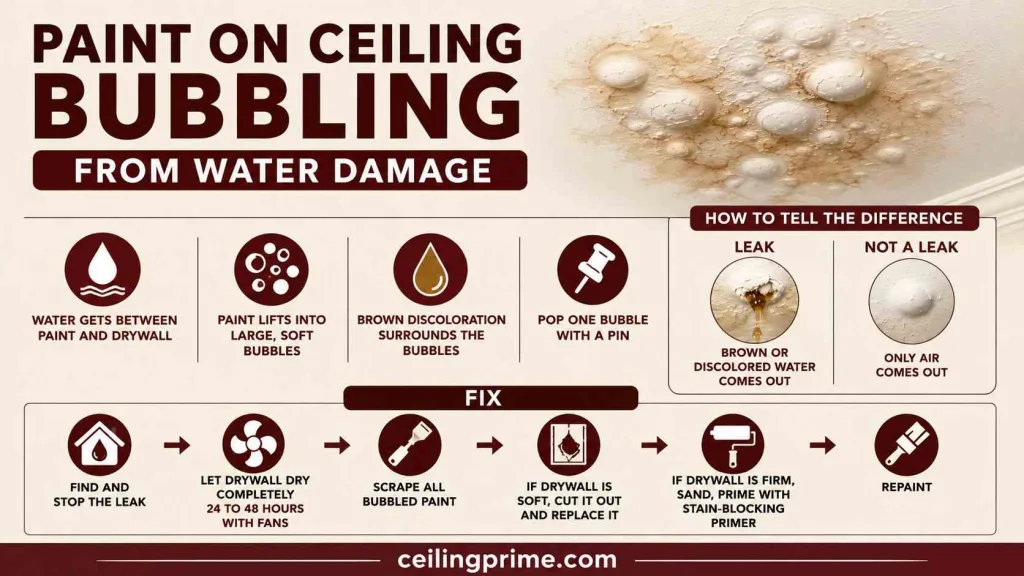
A roof leak or plumbing leak sends water through the drywall from above. The water collects between the paint film and the drywall surface. The paint lifts into large, soft bubbles. These bubbles may drip water when popped. Brown discoloration surrounds the bubbles.
Water damage bubbling looks different from other causes. The bubbles are larger. They are concentrated in one area. They may feel warm or heavy with liquid. The drywall behind the paint may be soft or sagging.
How to tell the difference: Pop one bubble with a pin. If brown or discolored water comes out, a leak is the cause. If only air comes out, the cause is heat, bad prep, or paint chemistry.
Fix: Find and stop the leak first. Let the drywall dry completely (24 to 48 hours with fans). Scrape all bubbled paint. If the drywall is soft, cut it out and replace it. If the drywall is firm, sand, prime with stain-blocking primer, and repaint.
How to Fix Paint on Ceiling Bubbling (Step by Step)
- Step 1: Identify and fix the cause. Moisture, heat, bad prep, or wrong paint — the cause must be resolved first. Painting over bubbles without fixing the cause produces new bubbles.
- Step 2: Scrape all bubbled and loose paint with a 6-inch putty knife. Scrape until you reach paint that is firmly bonded to the surface. Remove every blister.
- Step 3: Sand the edges. Use 120-grit sandpaper to feather the border where good paint meets bare drywall. This prevents a visible ridge after repainting.
- Step 4: Clean the scraped area. Wipe with a damp cloth to remove dust. For kitchen ceilings, wash with a degreaser. Let dry completely.
- Step 5: Apply stain-blocking primer. One coat. Let dry 1 to 2 hours. Use oil-based primer for water stains. Use bonding primer if the previous paint was oil-based.
- Step 6: Skim coat if needed. Apply a thin layer of joint compound to level any uneven areas where paint was removed. Let dry. Sand smooth with 150-grit.
- Step 7: Prime the skim coat. Another coat of primer over the compound. Let dry.
- Step 8: Paint two thin coats. Use flat ceiling paint. Wait 2 to 4 hours between coats. Do not apply thick coats. Do not paint in high humidity or extreme heat.
Total repair time: 1 to 2 days including drying. Cost: $30 to $80 in materials for a single room.
Paint on Ceiling Bubbling While Painting (White Paint)
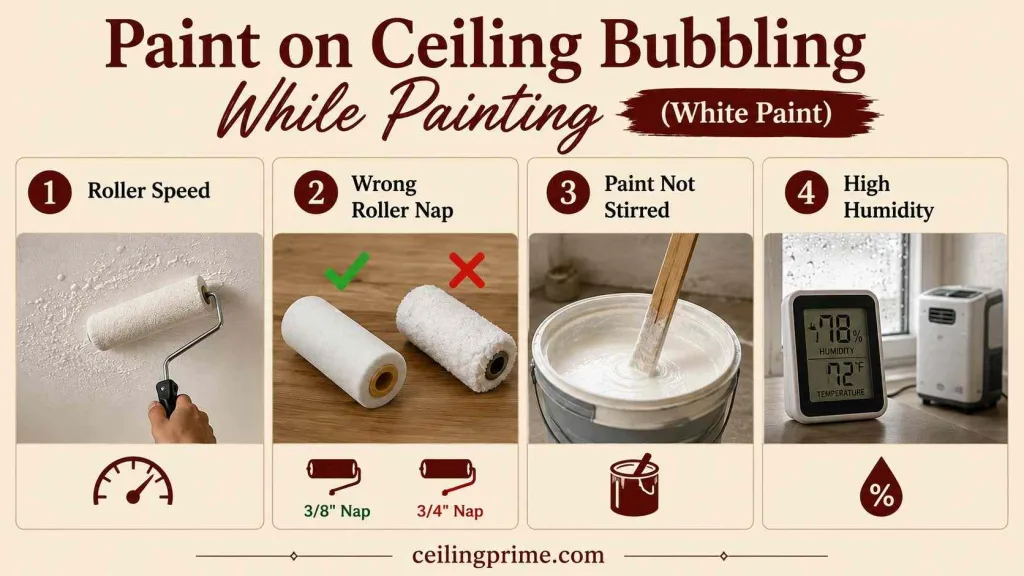
Sometimes bubbles appear during the painting process itself. You roll a fresh coat of white ceiling paint. Bubbles form behind the roller. This is different from moisture bubbling. It happens in real time.
Cause 1 — Roller speed: Rolling too fast whips air into the paint. Tiny air bubbles get trapped in the wet film. Slow down. Roll at a steady, even pace.
Cause 2 — Wrong roller nap: A thick nap roller (3/4 inch) on a smooth ceiling pushes too much paint. The heavy film traps air. Use a 3/8-inch nap roller for smooth ceilings. Use 3/4-inch only for textured surfaces.
Cause 3 — Paint not stirred: Settled paint has uneven consistency. Thick pockets create bubbles. Stir thoroughly before loading the roller.
Cause 4 — Painting in high humidity: Humidity above 70% slows drying. The paint film stays wet too long. Moisture from the air gets trapped. Close windows in humid weather. Run a dehumidifier while painting. Bubbling during application almost always stops when humidity drops below 50%.
How to Prevent Paint on Ceiling Bubbling?
- Always prime before painting. No exceptions. Use stain-blocking primer on stained surfaces. Use bonding primer over oil-based paint.
- Make sure the surface is 100% dry before painting. Wait 24 hours after any wet cleaning or repair.
- Clean the ceiling before painting. Remove grease, dust, and soap film. Use a degreaser on kitchen ceilings.
- Apply thin coats. Thick coats trap solvents and moisture. Two thin coats beat one heavy coat.
- Wait 2 to 4 hours between coats. Let each coat dry fully before adding the next.
- Do not paint in extreme heat (above 90°F) or high humidity (above 70%). Both cause bubbling.
- Run the exhaust fan in bathrooms before, during, and after painting. Steam from a shower hours later can bubble freshly dried paint.
- Use bathroom-rated paint in wet rooms. These paints resist moisture penetration better than standard ceiling paint.
- Test for oil-based paint before recoating. Apply bonding primer between oil-based and latex layers.
Repair Costs for Bubbling Ceiling Paint in 2026
| Repair | 2026 Cost |
| DIY scrape, prime, repaint (one room) | $30–$80 |
| Professional scrape and repaint | $200–$600 per room |
| Exhaust fan upgrade (80+ CFM) | $150–$400 installed |
| Drywall replacement (water damage) | $200–$800 |
| Roof or plumbing leak repair (source) | $300–$3,000 |
DIY repair saves $150 to $500 per room over professional work. The biggest time investment is scraping and drying — not the painting itself. Budget a full weekend per room for paint on ceiling bubbling repair.
Fix the Cause, Then Fix the Paint
Paint on ceiling bubbling is a symptom. Moisture, heat, dirty surfaces, wrong primer, or incompatible paint layers are the causes. Fix the cause first. Scrape all loose paint. Clean the surface. Prime with the right product. Apply two thin coats of ceiling paint. The bubbles stay gone when the surface underneath is dry, clean, and properly primed.
Frequently Asked Questions
Why does my ceiling paint bubble every time I repaint?
The root cause was not fixed. Moisture is still entering the ceiling. Or you are painting over old oil-based paint without bonding primer. Or the surface is not clean. Fix the cause before repainting. Prime with the correct primer.
Can I just pop the bubbles and paint over them?
No. The paint film is detached from the surface inside each bubble. Painting over bubbles traps dead space. The new paint peels within weeks. Scrape all bubbled paint down to a firm surface. Then prime and repaint.
Is bubbling ceiling paint a sign of water damage?
Sometimes. Pop one bubble. If brown or discolored water comes out, yes. If only air comes out, the cause is heat, bad prep, or paint chemistry. Check the attic above the bubbles for wet wood or plumbing leaks.
What primer stops ceiling paint from bubbling?
Oil-based stain-blocking primer for water stains. Bonding primer for latex-over-oil adhesion. Moisture-resistant primer for bathroom ceilings. Regular latex primer does not prevent bubbling on problem surfaces.
Does the type of ceiling paint matter?
Yes. Flat ceiling paint hides imperfections and breathes better than satin or semi-gloss. Bathroom-rated paint resists moisture penetration. Using the wrong paint in a wet room causes recurring bubbles.
How long should I wait between coats to avoid bubbles?
2 to 4 hours for standard latex ceiling paint. Check the paint can label. The surface should feel dry and not tacky to the touch before the next coat. Painting in humid or cold conditions extends drying time.




One Comment