How to Knock Down Popcorn Ceiling: Scrape, Texture & Finish
If you want to knock down popcorn ceiling texture and replace it with a modern knockdown finish, the process has two parts: scrape the old popcorn off, then spray and flatten a new knockdown texture onto the bare drywall. The result is a low-profile, slightly mottled surface that hides imperfections without the dust-trapping bumps of old popcorn.
Popcorn ceilings were standard in homes built from the ‘50s through the ‘80s. The bumpy acoustic texture hid drywall seams and dampened sound, but it traps dust, darkens rooms, and signals outdated construction to buyers and renters. Knockdown texture is the modern replacement — it provides the same imperfection-hiding benefit with a cleaner, flatter look.
This guide covers both phases: scraping popcorn off (including asbestos safety) and applying knockdown ceiling texture. Every tool, material, and technique is listed step by step. A single room takes one to two days for most DIY homeowners.
Knockdown Ceiling vs Popcorn Ceiling: What Is the Difference?
| Feature | Popcorn Ceiling | Knockdown Ceiling |
| Texture height | High, deep bumps (3–5mm) | Low, flattened peaks (1–2mm) |
| Appearance | Rough, cottage cheese look | Subtle, Mediterranean-style pattern |
| Dust collection | High — traps dust in deep bumps | Low — flatter surface sheds dust |
| Application method | Sprayed on and left rough | Sprayed on, then scraped flat with a knife |
| Modern appeal | Outdated — signals 1970s–1980s home | Current — standard in new construction |
More homeowners are switching from popcorn to knockdown because the newer finish looks cleaner, cleans easier, and adds value at resale. Knockdown is the most common ceiling texture in new homes built after 2000.
Safety First: Asbestos Testing Before You Scrape
Before you knock down popcorn ceiling texture, test for asbestos. Popcorn ceilings installed before the 1980s often contain asbestos fibers. Scraping releases those fibers into the air — a serious health hazard that causes mesothelioma and lung disease.
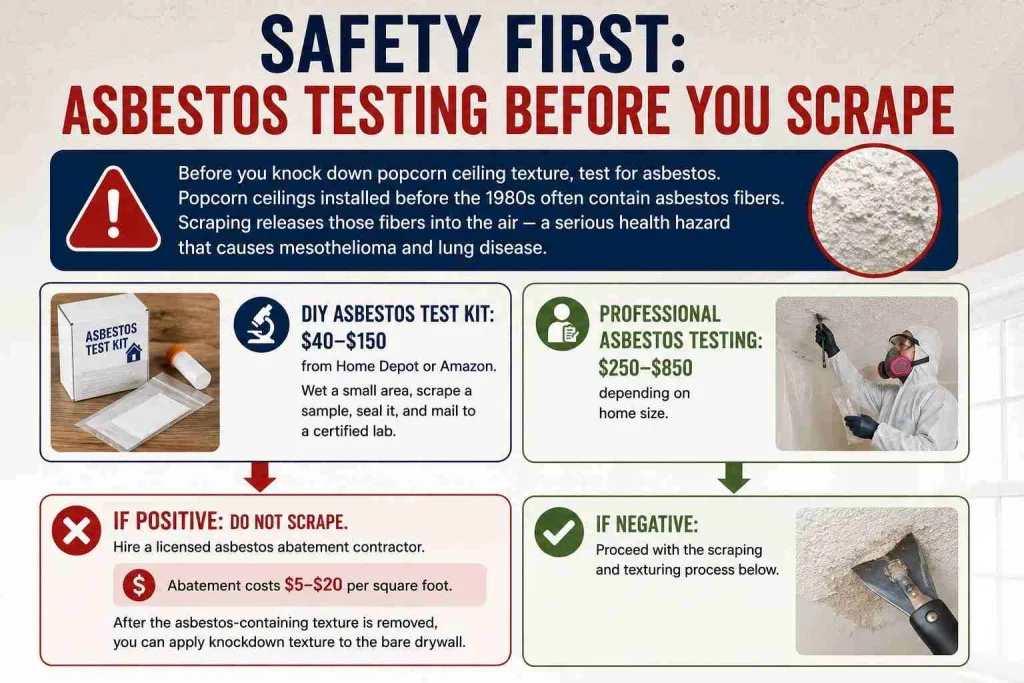
- DIY asbestos test kit: $40–$150 from Home Depot or Amazon. Wet a small area, scrape a sample, seal it, and mail to a certified lab.
- Professional asbestos testing: $250–$850 depending on home size.
- If positive: Do not scrape. Hire a licensed asbestos abatement contractor. Abatement costs $5–$20 per square foot. After the asbestos-containing texture is removed, you can apply knockdown texture to the bare drywall.
- If negative: Proceed with the scraping and texturing process below.
Tools and Materials for a Knock Down Popcorn Ceiling Project
For scraping popcorn:
- Sheetrock mudding knives (6-inch and 12-inch) — for scraping wet popcorn off the drywall.
- Spray bottle filled with water — for wetting the popcorn before scraping.
- Plastic sheeting and masking tape — for covering floors, walls, furniture, and light fixtures.
- Safety glasses, dust mask or respirator, and gloves.
For applying knockdown texture:
- Pre-mixed joint compound (All-Purpose Drywall compound): ProForm Lite Blue or similar. Buy a 5-gallon bucket per 300–400 square feet of ceiling.
- Drywall hopper gun (also called a spray gun or texture gun): Connects to an air compressor and sprays the joint compound onto the ceiling.
- Air compressor: 4–6 CFM minimum at 40–60 PSI. Rent one from a hardware store or rental company for $30–$50/day if you do not own one.
- Knock-down knife (18-inch or wider drywall knife): For scraping over the wet texture to flatten the peaks.
- Paddle mixer attachment for a power drill: For mixing the joint compound to the right consistency.
- Paint roller, paint brush, primer, and ceiling paint for the final coat.
Phase 1: How to Scrape Popcorn Ceilings
Step 1 — Prep Your Space
Cover all the furniture with plastic sheeting or move it out of the room. Lay plastic tarps on the floor and tape them to the baseboards. Cover walls with plastic if they are freshly painted. Remove light fixtures and ceiling fan blades. Tape over electrical boxes. This part of the process to knock down popcorn ceiling texture is messy — wet popcorn falls in clumps.
Step 2 — Wet the Popcorn
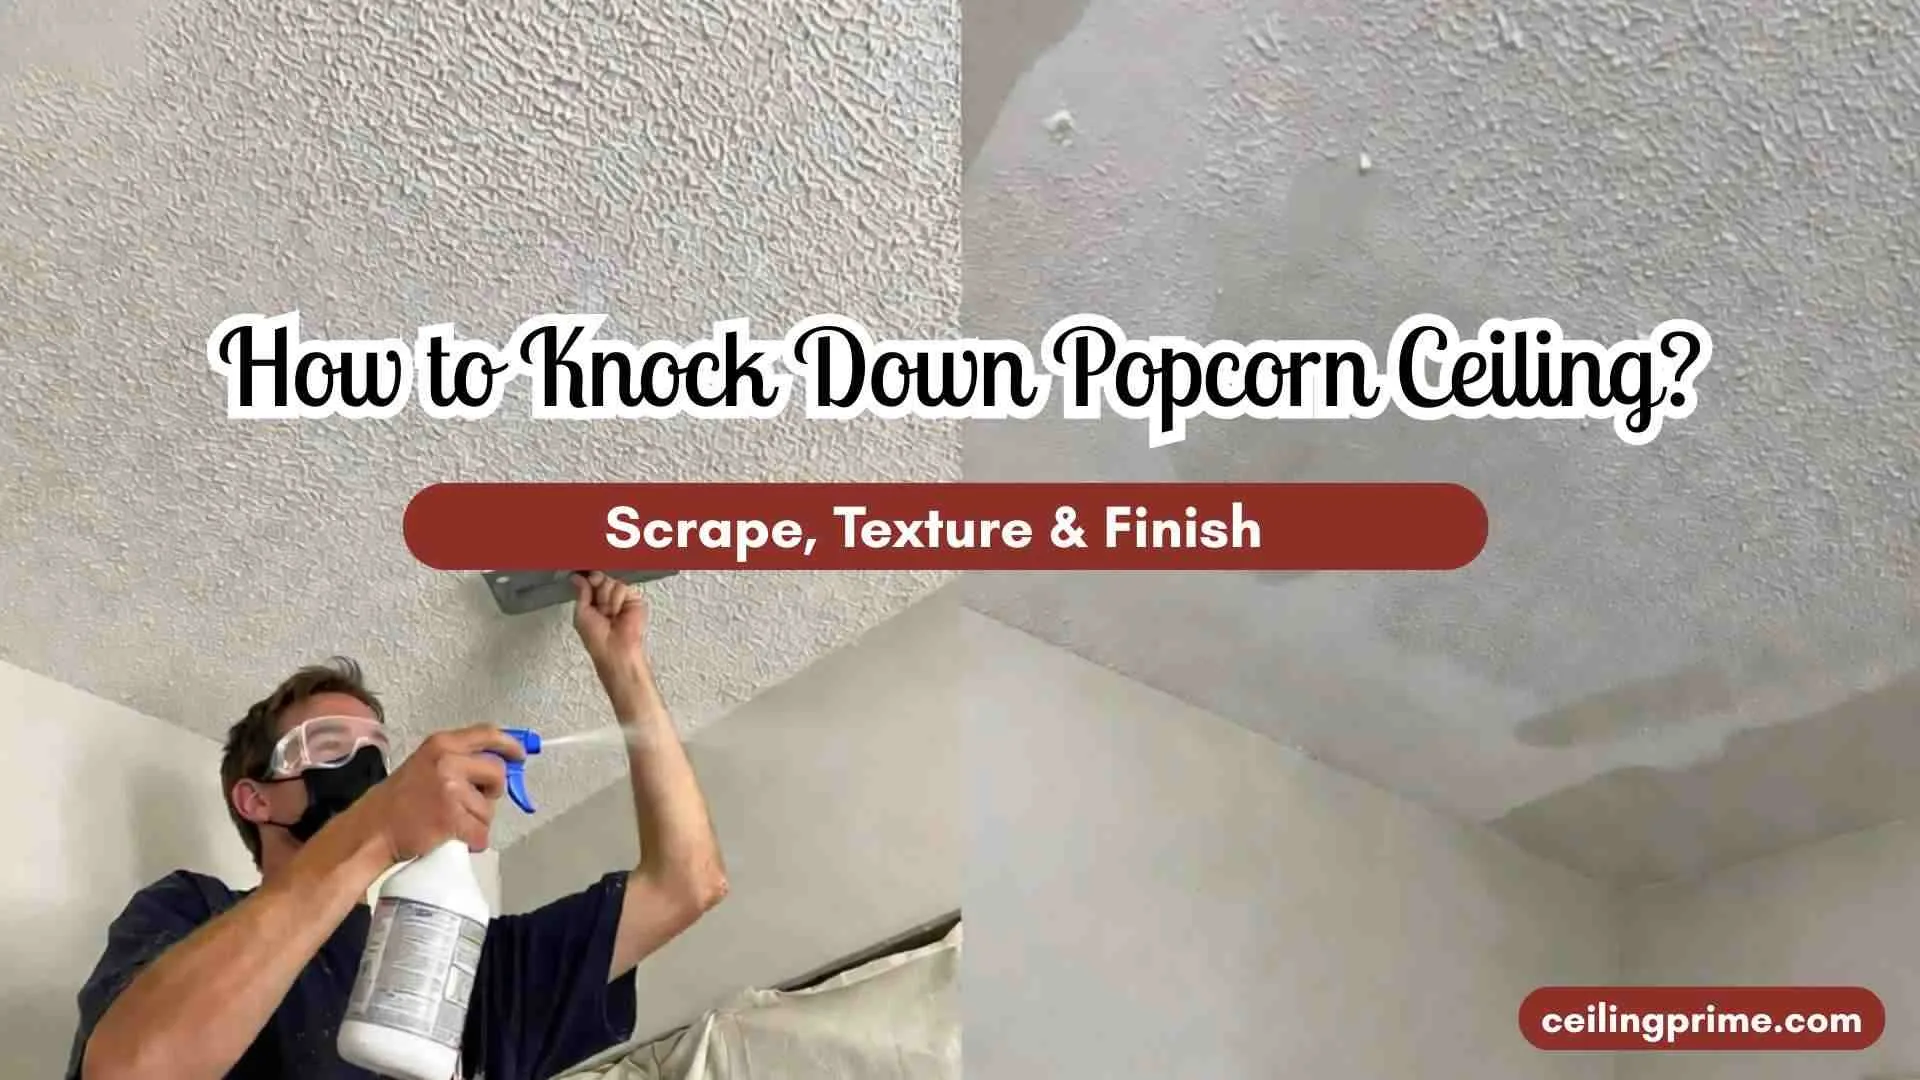
Fill a spray bottle with warm water. Mist a 4-by-4 foot section of the ceiling. Let the water soak in for 3 to 5 minutes. The moisture softens the texture so it scrapes off in large sheets instead of crumbling into dry dust. Do not soak the drywall — too much water weakens the paper facing.
Step 3 — Scrape the Texture Off
Hold a 6-inch or 12-inch sheetrock mudding knife at a low angle against the ceiling. Push in long, smooth strokes. The wet popcorn peels away in satisfying strips. Work section by section, wetting and scraping 4-foot areas at a time. If the texture does not come off easily, spray more water and wait another 2 minutes.
Step 4 — Sand and Inspect
After scraping the entire ceiling, let the drywall dry completely. Sand lightly with 120-grit sandpaper or a pole sander to remove rough spots. Inspect for gouges, nail pops, or damaged tape joints. Fill any damage with premixed joint compound and let it dry before sanding smooth.
Phase 2: How to Apply Knockdown Ceiling Texture?
Step 1 — Mix the Joint Compound
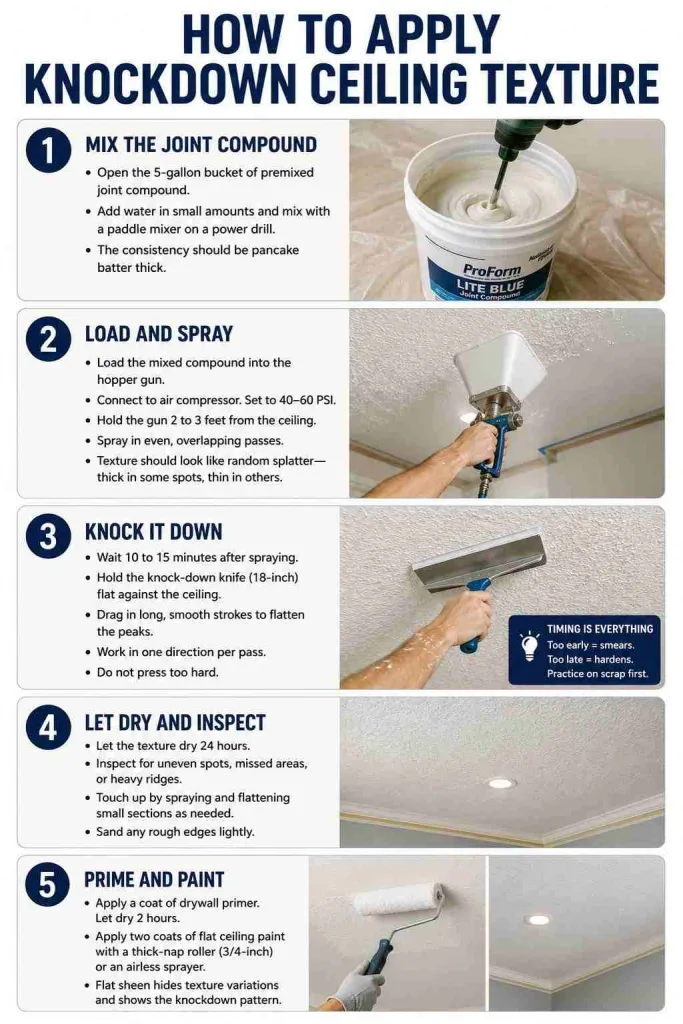
Open the 5-gallon bucket of premixed joint compound (ProForm Lite Blue or All-Purpose Drywall compound). Add water in small amounts and mix with a paddle mixer attachment on a power drill. The desired consistency is pancake batter thick — thin enough to spray through the hopper gun but thick enough to stick to the ceiling without dripping.
Step 2 — Load and Spray
Load the mixed compound into the drywall hopper gun. Connect the hopper to the air compressor. Set the compressor to 40–60 PSI. Hold the gun 2 to 3 feet from the ceiling. Spray in even, overlapping passes. Cover the entire surface with a thin, even layer of compound. The texture should look like random splatter — thick in some spots, thin in others. That is the knockdown pattern before flattening.
Step 3 — Knock It Down
Wait 10 to 15 minutes after spraying. The compound should start to lose its wet sheen but still feel damp. Hold the knock-down knife (18-inch drywall knife) flat against the ceiling. Drag it in long, smooth strokes across the surface.
The blade flattens the peaks of the splatter into a low-profile, mottled pattern. This is the “knockdown” step — it creates the final texture. Work in one direction per pass. Do not press too hard or you will scrape the compound off entirely.
Timing is everything. Scrape too early and the compound smears. Wait too long and it hardens — you cannot flatten dried compound. Practice on a scrap piece of drywall first to learn the right timing.
Step 4 — Let Dry and Inspect
Let the knockdown texture dry 24 hours. Inspect for uneven spots, missed areas, or heavy ridges. Touch up by spraying and flattening small sections as needed. Sand any rough edges lightly with fine-grit sandpaper.
Step 5 — Prime and Paint
Apply a coat of drywall primer to the entire ceiling. Let it dry 2 hours. Apply two coats of flat ceiling paint with a thick-nap roller (3/4-inch) or an airless sprayer. Flat sheen hides texture variations. The knockdown pattern shows through the paint as a subtle, modern finish.
Can You Apply Knockdown Texture Over Popcorn Without Scraping?
Some homeowners ask if they can knock down popcorn ceiling texture by simply spraying knockdown compound over the existing popcorn and flattening it. This can work on light, low-profile popcorn — but not on thick, heavily textured ceilings.
- Thin popcorn (barely raised): Spray a light coat of compound over the texture and knock it down. The compound fills the low spots and the knife flattens the peaks. Results are uneven but passable for a basement or rental.
- Thick popcorn (deep bumps, cottage cheese texture): Scrape first. The thick bumps show through any overlay and create an uneven, lumpy finish. The compound layer needed to cover heavy popcorn adds excessive weight.
- Orange-peel texture alternative: If you want to skip the hopper gun entirely, apply a thin skim coat of joint compound with a wide drywall knife, sand smooth, and prime. This creates a flat or light orange-peel finish rather than knockdown.
2026 Cost Breakdown: Knockdown Ceiling Texture
| Item | Cost Range |
| DIY scraping + knockdown (150 sq ft room) | $75–$200 (materials only) |
| Hopper gun + air compressor rental | $50–$100/day |
| Joint compound (5-gallon bucket) | $15–$25 |
| Primer + ceiling paint | $40–$80 |
| Professional scraping only | $1–$2 per sq ft |
| Professional scraping + knockdown + paint | $3–$6 per sq ft |
| Asbestos abatement (if needed) | $5–$20 per sq ft additional |
DIY saves $200–$600 per room compared to hiring a contractor. The hopper gun and air compressor are the biggest costs — rent them instead of buying if this is a one-time project. Paint stores and hardware stores carry all the other supplies.
Common Mistakes When You Knock Down Popcorn Ceiling Texture
- Scraping dry popcorn: Dry scraping creates a dust cloud and damages the drywall paper. Always wet the popcorn first and wait for it to soften.
- Wrong compound consistency: Too thick and the hopper gun clogs. Too thin and the compound drips off the ceiling. Mix to pancake batter consistency.
- Scraping the knockdown too early: Flattening before the compound starts to set creates a smeared, muddy look. Wait until the wet sheen dulls — about 10 to 15 minutes.
- Scraping too late: Once the compound hardens, the knife cannot flatten it. You have to sand and re-spray. Practice timing on a test board first.
- Skipping the asbestos test: Scraping asbestos-containing popcorn without containment releases carcinogenic fibers. Test every pre-1980 ceiling before any work.
- Heavy compound application: Thick layers crack as they dry. Spray a thin, even layer and let the knockdown knife do the shaping.
Frequently Asked Questions
Q. How long does it take to knock down a popcorn ceiling?
One to two days for a single room (150 sq ft). Day one: scrape and repair the drywall. Day two: spray knockdown texture, let dry, prime, and paint. Large spaces like a living room, entry way, or stairwell take longer.
Q. Can you put knockdown texture over popcorn ceiling?
Only on thin, low-profile popcorn. Thick popcorn must be scraped first. Spraying over heavy texture produces a lumpy, uneven finish that looks worse than the original.
Q. What is the cost to knock down popcorn ceiling professionally?
$3 to $6 per square foot for scraping, knockdown texture, and painting. A 150 sq ft room runs $450 to $900 professionally. DIY costs $75 to $200 in materials plus equipment rental.
Q. Is knockdown texture easier to maintain than popcorn?
Yes. The flatter surface does not trap dust or cobwebs like deep popcorn bumps. You can wipe it with a damp cloth. Popcorn cannot be wiped without crumbling.
Q. What is the best joint compound for knockdown texture?
ProForm Lite Blue or any premixed All-Purpose Drywall compound works well. Mix with water to pancake batter consistency using a paddle mixer on a power drill. Avoid setting-type (hot mud) compounds for large areas — they dry too fast to knock down.
Q. Can I DIY knockdown texture or should I hire a pro?
DIY works for homeowners comfortable with a hopper gun and air compressor. The technique takes practice — timing the knockdown scrape is the hardest part. Rent equipment from a paint store or rental company to keep costs low. Hire a pro if the ceiling is larger than 500 square feet or if asbestos is present.
A Modern Ceiling in Two Days
When you knock down popcorn ceiling texture and replace it with knockdown, the room looks ten years newer. The flat, mottled finish is clean, easy to maintain, and standard in modern construction. The process is straightforward: scrape the old, spray the new, flatten it with a knife, and paint.