
Water Stain on Ceiling: Causes, How to Fix & What to Do
A water stain on ceiling drywall is a brown, yellow, or rust-colored ring or patch left behind after water soaks through from above. The stain is not the problem. It is the evidence of a problem. Somewhere above that stain, water entered the ceiling structure and dried.
This guide covers the 6 causes, how to tell if the leak is active or old, step-by-step repair, how to paint over the stain correctly, what to do if there is no visible leak, location-specific guides (under bathroom, under shower, after rain), apartment-specific advice, who to call, and 2026 costs. Every search question about ceiling water stains is answered in order.
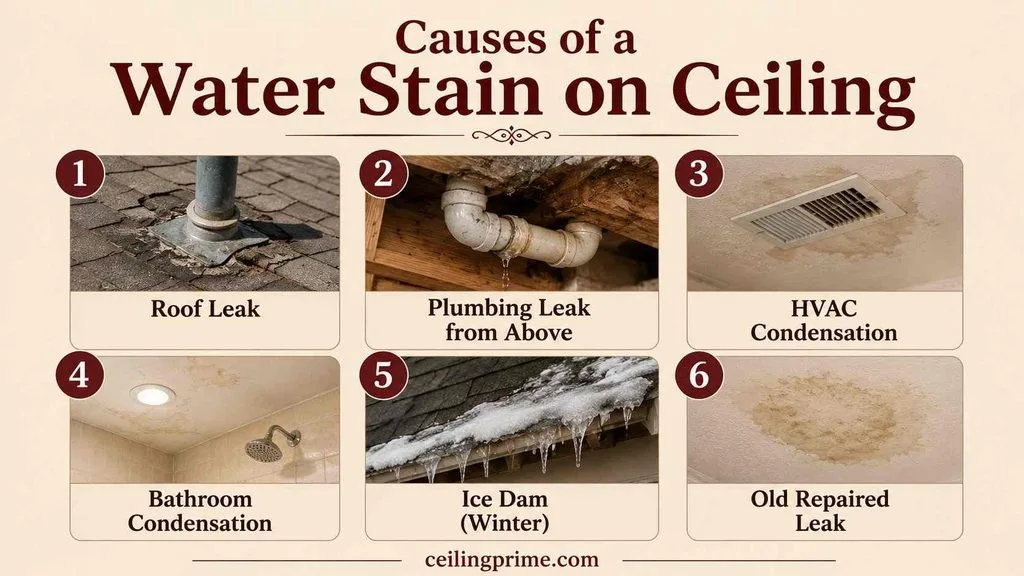
6 Causes of a Water Stain on Ceiling
1. Roof leak: Damaged shingles, cracked flashing, deteriorated vent boots, or clogged gutters let rainwater into the attic. The water travels along rafters and joists before dripping onto the drywall. Stains that appear after heavy rain point to the roof.
2. Plumbing leak from above: A dripping supply line, failing toilet wax ring, leaking shower pan, or cracked drain pipe sends water through the subfloor to the ceiling below. A stain under a bathroom or kitchen ceiling points to plumbing.
3. HVAC condensation: A clogged condensate drain line or overflowing AC drain pan creates moisture inside the ceiling cavity. Stains near ceiling vents or registers indicate an HVAC issue.
4. Bathroom condensation: Steam from hot showers condenses on the cold ceiling surface. The moisture soaks into the drywall and leaves a yellow stain over time. No exhaust fan or a weak fan makes this worse.
5. Ice dam (winter): Ice builds up along the roof edge and traps melting snow. The water backs up under the shingles and enters the ceiling. Stains that appear in late winter and early spring point to ice dams.
6. Old repaired leak: The leak was fixed. The drywall dried. But the stain was never primed or painted. The tannins from the water remain visible indefinitely until sealed with stain-blocking primer.
Ceiling Stain but No Leak
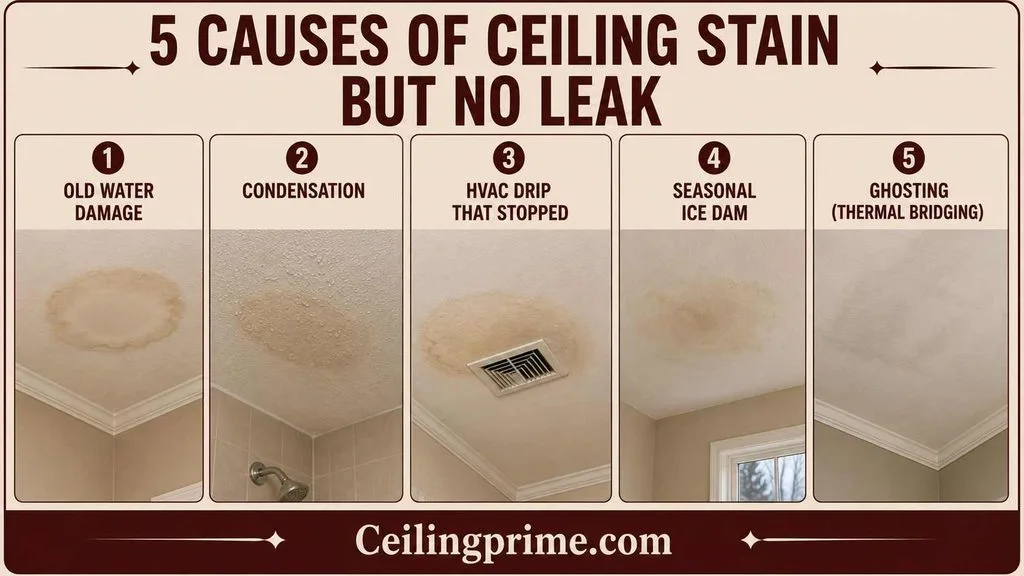
This is the most common search question about ceiling water stains. The stain is there. The ceiling is dry. No dripping. No wet spots above. Here are 5 causes that produce a stain without an active leak.
- Old water damage: A leak that was repaired weeks, months, or years ago. The stain dried. The source is gone. But the tannin discoloration stays until sealed.
- Condensation: Steam from showers or cooking condensed on the ceiling repeatedly. Each event left mineral deposits. Over time, a visible stain formed. No pipe or roof involved.
- HVAC drip that stopped: The condensate pan overflowed once. The technician cleaned it. The ceiling dried. The stain remains.
- Seasonal ice dam: Water entered during one winter event. The ice melted. The shingles re-sealed. The stain persists from that single event.
- Ghosting (thermal bridging): Faint lines or spots that look like water stains but are dust accumulation on cold ceiling surfaces. Not water at all. Touch the stain. If it is dry and dusty, it is ghosting.
Press the stained area with your palm. Dry and firm means the moisture event is over. Damp and soft means an active leak still exists.
Is the Stain Old or Active?
| Dry Stain (Old Damage) | Active Leak (Needs Immediate Action) |
| Ceiling feels firm and dry | Ceiling feels damp, soft, or spongy |
| Stain has not changed in weeks | Stain is growing larger or darker |
| No dripping or water beads | Water drips or pools on the surface |
| No musty smell | Musty odor near the stain |
| Fix: prime and paint | Fix: stop the leak first, dry the area, then repair |
A dry, unchanging stain is cosmetic. Prime and paint it. A stain that is growing, wet, or smells musty needs the leak found and stopped before any cosmetic work.
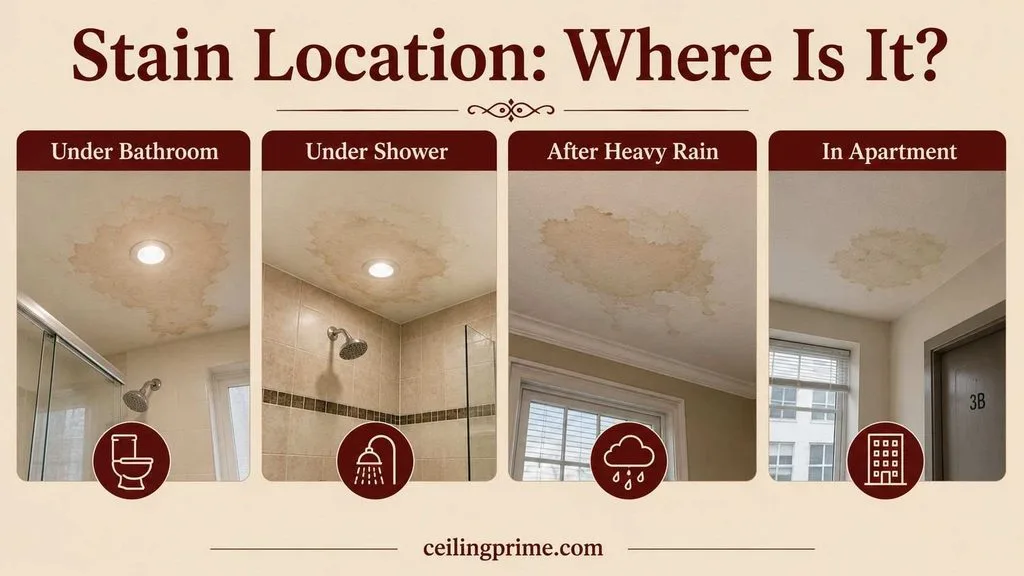
Stain Location: Where Is It?
Water Stain on Ceiling Under Bathroom
A stain directly below an upstairs bathroom points to plumbing. Check the toilet wax ring, shower pan, supply line connections, and tile grout. The stain may appear directly below the toilet, the shower, or the sink. Run water in each fixture one at a time and check the ceiling below after 30 minutes. The active fixture reveals the source.
Water Stain on Ceiling Under Shower
The shower pan or tile grout is the most likely source. Shower pans develop cracks over 10 to 20 years. Grout between tiles cracks and lets water behind the tile. The water enters the subfloor and drips to the ceiling below. A stain that appears only after showers confirms the shower as the source.
Water Stain on Ceiling After Heavy Rain
Rain stains point to the roof. Check the attic during or after the next rainfall. Look for wet wood, drip trails on rafters, and daylight through the roof deck. Common entry points: missing shingles, cracked flashing around chimneys, damaged vent boots, and clogged gutters backing water under the roofline.
Water Stain on Ceiling in Apartment
Renters face a different process. Document the stain with dated photos. Notify the landlord or property manager in writing. The landlord is responsible for plumbing, roof, and structural repairs. Do not paint over the stain yourself — the landlord needs to see the damage for repair and insurance purposes. If the landlord does not respond, most jurisdictions allow tenants to file a housing code complaint.
How to Fix a Ceiling Water Stain (Step by Step)
Step 1: Stop the Water Source
Find and fix the leak before touching the stain. A plumber handles pipes. A roofer handles shingles and flashing. An HVAC technician handles condensate lines. Fixing the stain without fixing the source means the stain comes back.
Step 2: Let the Ceiling Dry
Run fans and a dehumidifier aimed at the stained area. Open windows. Wait 24 to 48 hours. Use a moisture meter if you have one. The drywall must be fully dry before priming. Priming a damp surface traps moisture and causes mold.
Step 3: Check for Mold
Look at the stain closely. Black, green, or gray spots mean mold has started. Smell the area. A musty odor means moisture is still present. If mold covers more than 10 square feet, call a professional for remediation.
Step 4: Clean the Surface
Wipe the stained area with a solution of 1 part bleach to 10 parts water. Let it dry. This kills any surface mold spores and removes loose debris before priming. For a cosmetic-only stain (dry, firm, no mold), skip bleach and go straight to priming.
Step 5: Apply Stain-Blocking Primer
Use an oil-based or shellac-based stain-blocking primer. Apply one coat directly over the stain. Extend the primer 2 to 3 inches beyond the stain edges. Regular latex primer does not block tannin stains — the brown ring bleeds through within days.
Step 6: Paint
Apply two coats of flat ceiling paint. For a perfect color match, paint the entire ceiling. Spot painting on a white ceiling shows a visible patch under certain lighting angles.

How to Paint Over a Ceiling Water Stain Without Bleed-Through?
The biggest mistake homeowners make is painting over a ceiling water stain with regular paint. The tannins in the stain bleed through standard latex paint within 48 to 72 hours. The stain reappears as a yellow shadow under the new coat.
- Never skip the stain-blocking primer. Oil-based or shellac-based are the only types that seal tannin stains. Water-based primers do not block tannins.
- Let the primer dry fully (1 to 2 hours for shellac, 4 to 8 hours for oil-based) before painting.
- Apply paint in two thin coats with a roller. Let each coat dry for 2 to 4 hours.
- Use flat finish ceiling paint. Flat absorbs light and hides the texture difference between the primed patch and the surrounding surface.
- Spray paint products designed for ceiling stains work for small spots. Shake well. Apply from 12 inches away. Let dry. Repaint over the spray primer with roller-applied ceiling paint.

Who to Call for Ceiling Water Damage?
- Plumber: If the stain is under a bathroom, kitchen, or laundry room. The source is likely a pipe, fixture, or drain connection.
- Roofer: If the stain appeared after rain, is on the top floor, or is near a chimney or vent stack. The source is the roof.
- HVAC technician: If the stain is near a ceiling vent, register, or directly below the air handler in the attic. The condensate drain or drain pan is the source.
- Drywall contractor or painter: After the leak is fixed and the area is dry. For cosmetic repair only.
- Water damage restoration company: If the stain covers multiple rooms, the ceiling is sagging, or mold is visible. These companies handle drying, mold testing, and full restoration.
- Insurance adjuster: If the damage is from a sudden event (burst pipe, storm). Contact your insurer within 24 hours. Document everything with photos before any cleanup.
What to Do Right Now?
- Step 1: Touch the stain. Dry and firm = old damage. Damp and soft = active leak.
- Step 2: If active, place a bucket under the drip. Turn off the water supply if plumbing is the source.
- Step 3: If the ceiling is bulging, poke a small hole in the center to drain trapped water into a bucket.
- Step 4: Take photos from multiple angles. Note the date.
- Step 5: Call the right professional based on the stain location (see who to call above).
- Step 6: After the source is fixed and the ceiling is dry, clean, prime with stain blocker, and paint.
Water Stain Repair Costs in 2026
| Repair | 2026 Cost |
| DIY stain cover (prime + paint, one spot) | $15–$40 |
| DIY full ceiling prime + repaint | $50–$150 |
| Professional stain treatment + paint | $100–$400 |
| Drywall section replacement | $200–$600 |
| Plumbing leak repair (source fix) | $150–$3,000 |
| Roof leak repair (source fix) | $300–$1,500 |
| HVAC condensate repair | $100–$400 |
| Mold remediation (if needed) | $500–$3,000 |
Fix the Source, Seal the Stain, and Move On
A water stain on ceiling drywall tells you where the water went. Find the source: roof, plumbing, HVAC, or condensation. Fix it. Let the ceiling dry. Clean the surface. Prime with stain-blocking primer. Paint with flat ceiling paint. The stain disappears when the source is gone and the tannins are sealed.
Frequently Asked Questions
Can I just paint over a water stain?
Only with stain-blocking primer first. Regular latex paint does not block the tannin stain. The brown ring bleeds through within days. Apply oil-based or shellac primer first. Then paint.
Is a water stain on ceiling dangerous?
The stain itself is not dangerous. But an active leak behind it can cause mold growth within 48 to 72 hours. Mold causes respiratory issues. A wet, sagging ceiling can collapse. Check for dampness and mold before treating the stain as cosmetic.
Why does my ceiling stain keep bleeding through paint?
You used regular latex primer or no primer at all. Tannins in the water stain dissolve into wet latex paint and migrate to the surface. The fix: apply oil-based or shellac-based stain-blocking primer. These seal the tannins permanently.
Can I remove a water stain without painting?
Partially. A solution of 1 part bleach to 10 parts water lightens the stain. Mist it on. Let dry. Repeat. This works for light stains on white ceilings. Deep or dark stains need primer and paint for full coverage.
Does homeowner insurance cover ceiling water stains?
Insurance covers damage from sudden events: burst pipes, storm damage, appliance failures. It does not cover damage from gradual leaks, deferred maintenance, or condensation. File the claim within 24 hours. Document with photos before cleanup.
How do I tell if a ceiling stain is water or mold?
Water stains are brown, yellow, or rust-colored with smooth edges. Mold is black, green, gray, or white with fuzzy or spotted texture. A musty smell near the stain points to mold. Both can exist together — water creates the conditions for mold growth.






One Comment