How to Paint Popcorn Ceiling Without Making a Mess
Learning how to paint popcorn ceiling surfaces takes a different approach than painting flat drywall. The bumpy texture absorbs more paint. It tears if you press too hard with a roller. It creates a mess of falling particles if you use the wrong technique. But done right, a fresh coat of paint brightens the room, hides stains, and makes the texture look cleaner without the cost of removal.
This guide covers 3 application methods (sprayer, roller, and brush), step-by-step prep, asbestos safety, water stain coverage, how to avoid mess, and beginner tips. Each LSI question is answered in its own section.
How to Paint Popcorn Ceiling with Asbestos: Safety First
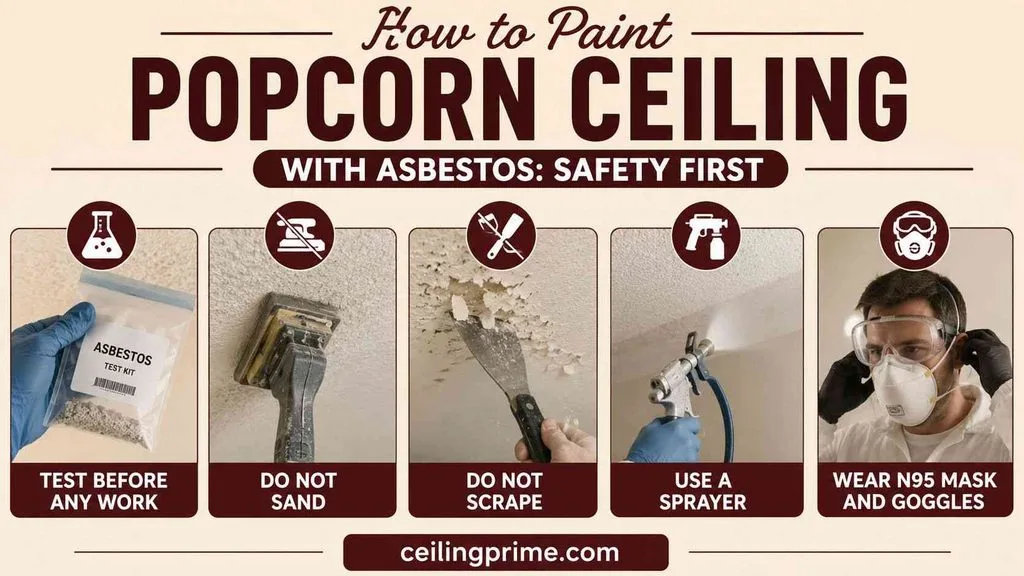
Popcorn ceilings installed before 1986 may contain asbestos. Painting over asbestos popcorn is legal and safe — as long as you do not sand, scrape, or disturb the texture. The paint encapsulates the fibers and seals the surface.
- Test before any work: Buy a DIY asbestos test kit ($40 to $150) or hire a certified inspector ($250 to $850). Do not guess.
- Do not sand: Sanding asbestos popcorn releases fibers into the air. Skip the sanding step entirely on pre-1986 ceilings.
- Do not scrape: Even scraping loose flakes sends fibers airborne. If the texture is flaking, call a licensed abatement contractor before painting.
- Use a sprayer, not a roller: A roller pressed into asbestos popcorn can pull fibers loose. An airless sprayer applies paint without physical contact. This is the safest application method for asbestos-containing popcorn ceilings that contain asbestos.
- Wear an N95 respirator and safety goggles during all work, even when spraying.
How to Prep a Popcorn Ceiling for Painting?
Prep determines 80% of the final result. Skip it and the paint peels, drips, or flakes within months.
- Step 1: Clear the room. Remove furniture or cover everything with plastic sheeting. Popcorn ceiling painting creates more drips and splatter than flat ceiling painting.
- Step 2: Cover the floor. Lay heavy canvas drop cloths or plastic sheeting across the entire floor. Tape the edges to the baseboards.
- Step 3: Mask the walls. Apply painter’s tape along the wall-ceiling joint. Press the tape firmly with a putty knife for a clean edge. Cover the top 6 inches of each wall with plastic sheeting if spraying.
- Step 4: Mask fixtures. Cover ceiling fans, light fixtures, smoke detectors, and HVAC vents with plastic bags and tape. Remove anything you can. The fewer obstacles, the cleaner the result.
- Step 5: Clean the ceiling. Use a vacuum with a soft brush attachment on low suction. Remove cobwebs, dust, and loose texture particles. Do not use water — wet popcorn softens and falls off.
- Step 6: Repair damage. Fill cracks and holes with spackling compound or popcorn ceiling patch spray. Let it dry. Do not stand on pre-1986 ceilings. This prep step matters for textured ceilings with visible damage.
- Step 7: Prime stains. Apply stain-blocking primer over water stains, smoke stains, and discoloration. Use an aerosol spray primer for spot treatment. Let dry for 1 to 2 hours.
How to Paint Popcorn Ceiling with Sprayer (Best Method)
An airless paint sprayer is the best tool for popcorn ceilings. It applies an even coat without touching the texture. No roller marks. No torn texture. No visible brush strokes. Here is the sprayer method step by step.
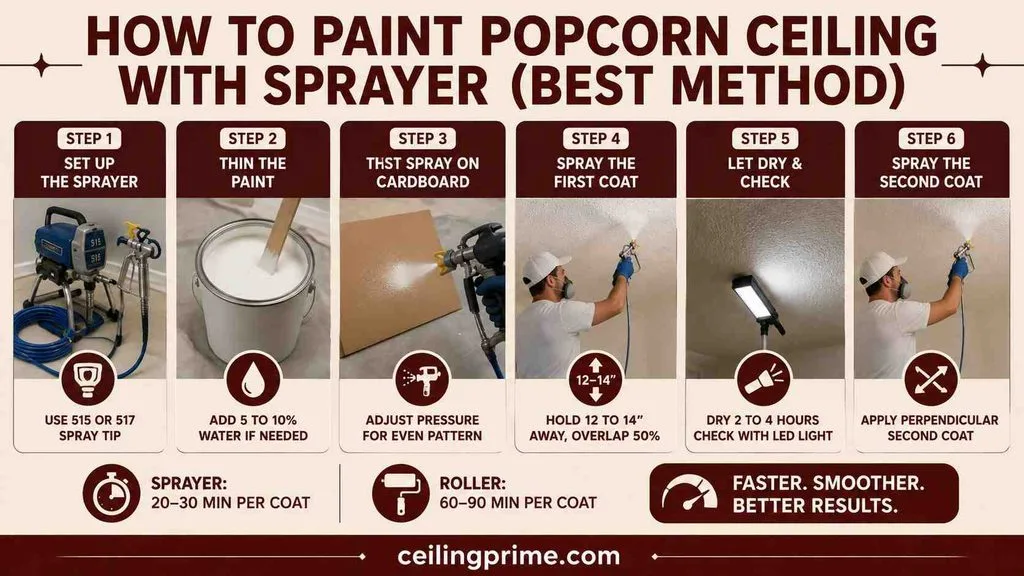
- Step 1: Set up the sprayer. Use an airless sprayer with a 515 or 517 spray tip. The 515 sprays a 10 to 12-inch fan pattern. The 517 sprays 12 to 14 inches. Wider fans cover faster but use more paint.
- Step 2: Thin the paint if needed. Most flat ceiling paints spray at full thickness. If the sprayer struggles, add 5 to 10% water to latex paint. Stir thoroughly.
- Step 3: Test spray on cardboard. Adjust the pressure until the spray pattern is even with no heavy spots or dry edges.
- Step 4: Spray the first coat. Hold the tip 12 to 14 inches from the ceiling. Move at a steady pace. Overlap each pass by 50%. Start at one wall and work in parallel lines to the opposite wall.
- Step 5: Let dry for 2 to 4 hours. Check for missed spots using an LED work light held at a low angle. Light reveals thin areas that are invisible under normal room lighting.
- Step 6: Spray the second coat. Same technique. Perpendicular to the first coat if possible. Two thin coats cover better than one heavy coat.
An airless sprayer covers a 12×12 room in 20 to 30 minutes per coat. A roller takes 60 to 90 minutes for the same room.
How to Paint Popcorn Ceiling with Roller (No Sprayer Method)
No sprayer? A roller works. The technique is different from rolling flat drywall. The goal is to load the texture with paint without pressing hard enough to crush or tear the bumps.
- Use a thick-nap roller: 3/4-inch nap minimum. A 1-inch nap is better for a heavy popcorn texture. The long fibers reach into the valleys between bumps.
- Use an extension pole: A 4 to 8-foot extension pole keeps you on the floor instead of on a ladder. Less fatigue. Better control. Fewer neck cramps.
- Load the roller heavily: Dip the roller in a paint tray filled to the ramp line. Roll it once or twice on the ramp to distribute paint. The roller should be saturated but not dripping.
- Roll in ONE direction only: Pick a direction and roll straight lines from one wall to the other. Do not roll back and forth. Back-rolling tears popcorn texture and leaves bald patches.
- Apply light pressure: Let the weight of the roller and the extension pole do the work. Pressing hard crushes the texture bumps. The result is a patchy, flattened surface. This is the most common roller mistake on textured ceilings.
- Apply two coats: The first coat feeds paint into the texture valleys. The second coat evens the coverage. Wait 2 to 4 hours between coats.
How to Paint Popcorn Ceiling with Brush (Edges and Corners)
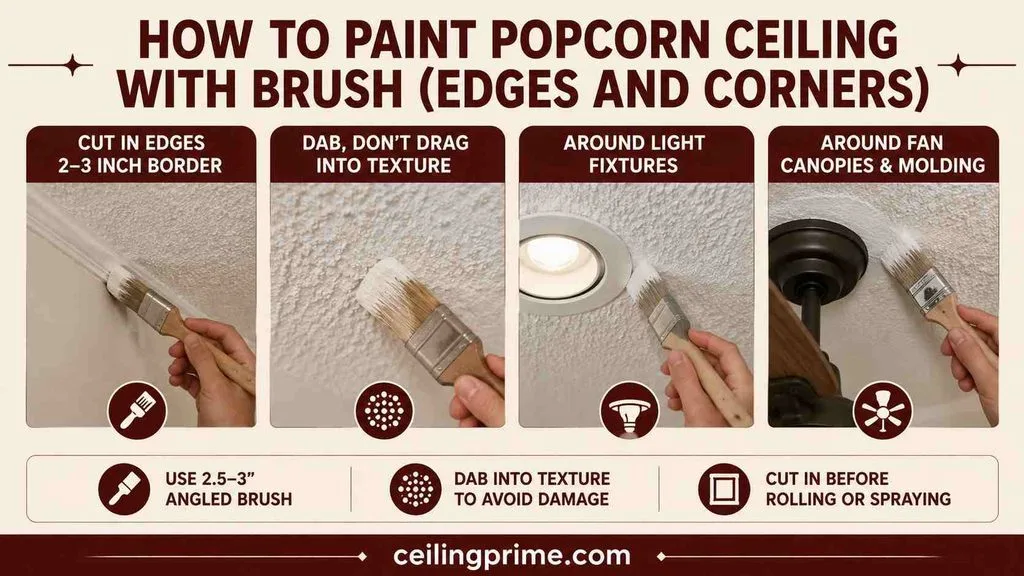
A brush is not for painting the full ceiling. It is for cutting in edges and corners where the roller or sprayer cannot reach. Use a 2.5 to 3-inch angled brush. Dab the bristles into the texture instead of dragging them across it. Dragging pulls texture off. Dabbing pushes paint into the bumps without damage.
Cut in a 2 to 3-inch border around the entire ceiling perimeter before rolling or spraying the main area. Cut in around light fixtures, fan canopies, and crown molding with the same dabbing technique.
How to Paint Popcorn Ceiling Without Making a Mess?
Popcorn ceiling painting is messier than flat ceiling painting. Texture particles fall. Paint drips from the bumps. Splatter covers everything below. Here are 7 ways to minimize the mess when painting textured ceilings.
- 1. Use a sprayer instead of a roller. Sprayers apply paint without physical contact. No torn texture. Less fallout.
- 2. Cover the entire floor with drop cloths or plastic sheeting. Tape the edges to the baseboards.
- 3. Cover walls with plastic sheeting if spraying. Overspray mist reaches 3 to 4 feet beyond the ceiling edge.
- 4. Mask every fixture, fan, vent, and smoke detector. Remove what you can.
- 5. Do not overload the roller. A dripping roller sends paint drops onto the floor, walls, and your face.
- 6. Wear a hat, safety goggles, and old clothes. Paint drips fall directly downward. You are standing directly below.
- 7. Keep a damp rag nearby. Wipe splatter off walls, trim, and skin immediately. Dried latex paint is harder to remove.
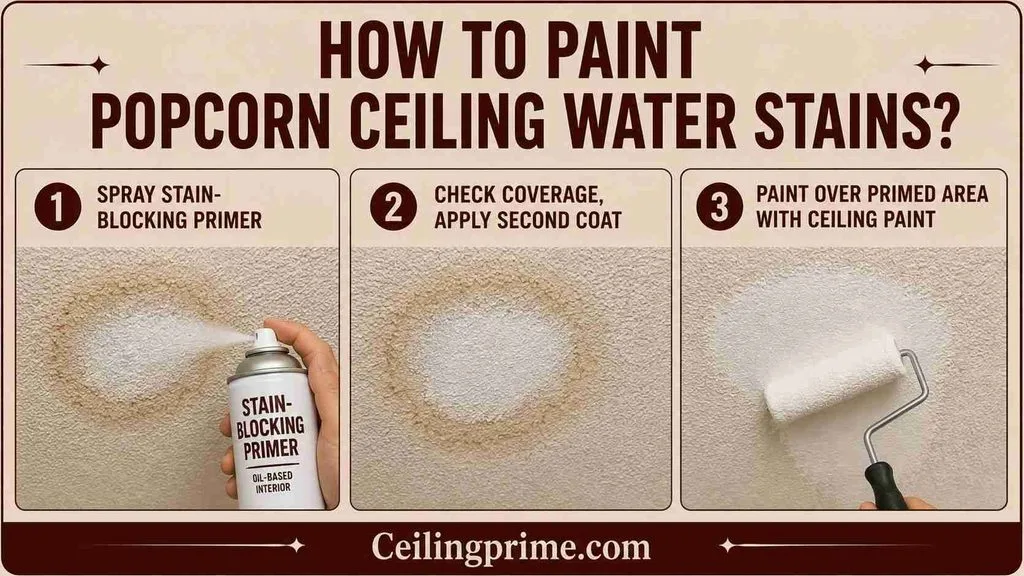
How to Paint Popcorn Ceiling Water Stains?
Water stains bleed through regular paint. The brown tannin ring reappears within days. Fix the leak source first. Let the ceiling dry 24 to 48 hours. Then seal the stain before painting.
- Step 1: Spray aerosol stain-blocking primer directly on the water stain. Extend 2 to 3 inches beyond the stain edges. Let dry for 1 to 2 hours.
- Step 2: Check coverage. If the stain still shows through the primer, apply a second coat.
- Step 3: Paint over the primed area with ceiling paint (sprayer or roller). The primer seals the tannins. The topcoat matches the surrounding ceiling.
Do not use regular latex primers on water stains. It does not block tannins. Use oil-based or shellac-based stain-blocking primer only.
Beginner Tips for Painting Popcorn Ceilings: 6 Tips
- 1. Test a small area first. Paint a 2×2 foot section in a closet or hidden corner. Confirm the texture holds and the paint looks good before doing the full ceiling.
- 2. Buy 20% more paint than the square footage calculation suggests. Popcorn texture absorbs more paint than flat surfaces. A gallon covers 250 to 300 sq ft on popcorn vs 350 to 400 on flat drywall.
- 3. Use flat or matte finish paint. Flat hides texture imperfections. Satin and semi-gloss highlight every bump and shadow. Flat is the standard for textured ceiling painting.
- 4. Do not touch the wet ceiling. Do not press, test, or poke the surface while the paint is drying. Wet popcorn is fragile. One finger press pulls a chunk off.
- 5. Plan for 2 coats. The first coat absorbs into the texture. Coverage looks uneven after one coat. The second coat provides full, uniform coverage.
- 6. Paint on a warm, dry day. Room temperature between 50 and 85°F. Humidity below 50%. Cold or humid conditions extend drying time and increase the risk of drips and runs.
Sprayer vs Roller: Which Method Is Better?
| Factor | Airless Sprayer | Roller |
| Speed | 20–30 min per coat | 60–90 min per coat |
| Texture preservation | Best — no contact | Good if light pressure used |
| Coverage | Even, thin coats | Heavier in valleys, lighter on peaks |
| Mess level | Overspray mist on walls | Drips and splatter below |
| Masking time | More — must cover walls | Less — walls stay clean |
| Cost | $75–$200/day rental | $15–$30 for roller + tray |
| Best for | Full rooms, vaulted ceilings | Small rooms, tight budgets |
A sprayer gives a better result on popcorn ceilings. A roller is cheaper and works for homeowners who do not want to rent equipment.
Cost to Paint a Popcorn Ceiling in 2026
| Item | 2026 Cost |
| DIY with roller (one room, ~150 sq ft) | $30–$60 |
| DIY with rented sprayer | $100–$250 (paint + rental) |
| Professional painting (per sq ft) | $1.50–$3.00 |
| Professional painting (one room) | $200–$500 |
| Stain-blocking primer (aerosol can) | $8–$15 per can |
| Asbestos test kit | $40–$150 |
Paint It Right the First Time
Now you know how to paint popcorn ceiling surfaces with a sprayer, a roller, or a brush. Test for asbestos first on pre-1986 ceilings. Prep the room with drop cloths and masking. Clean the ceiling with a vacuum brush. Prime water stains with stain-blocking primer. Apply two thin coats of flat ceiling paint. Use light pressure with a roller. Use steady passes with a sprayer. And wear old clothes — popcorn ceiling painting is messy no matter which method you choose.
Frequently Asked Questions
Can I paint the popcorn ceiling without removing the texture?
Yes. Painting over the texture is the standard approach. Removal is a separate, more expensive project. Paint freshens the surface, covers stains, and brightens the room without the cost and dust of scraping.
What is the best paint for popcorn ceilings?
Flat or matte finish, water-based latex ceiling paint. Flat hides texture imperfections. Satin or semi-gloss highlights every bump and shadow. White or off-white is the standard color. Flat white reflects the most light and makes the texture least visible.
How many coats do I need on the popcorn ceiling?
Two coats minimum. The first coat absorbs into the porous texture and looks blotchy. The second coat provides full, even coverage. Some heavily textured ceilings need three coats.
How long does it take to paint a popcorn ceiling?
A 12×12 room takes 1 to 2 hours per coat with a sprayer (including setup). It takes 2 to 3 hours per coat with a roller. Add 1 to 2 hours for prep and masking. Total time for one room: half a day with a sprayer, a full day with a roller.
Can I change the color of my popcorn ceiling?
Yes. Apply stain-blocking primer first if changing from a light to dark color or vice versa. Two coats of the new color over primer covers completely. Color changes on popcorn texture work the same as on flat surfaces.
Should I paint or remove my popcorn ceiling?
Paint if: the texture is in good condition, you want a quick refresh, or asbestos is present and you want to avoid disturbance. Remove if: you want a modern flat finish, the texture is damaged beyond repair, or the texture has been painted 5+ times and is heavy. Painting costs $30–$250 DIY. Removal costs $1–$3 per square foot professionally.






One Comment